

Do you ever work with Power Apps and need to take advantage of the functionality that Power Automate provides to support your app? Well in this blog post, I’ll explain how we can use Power Apps flows, and how we can pass data between our app and flow to be able to leverage Power Automate capabilities.
Creating a Power Apps flow
So, first lets look at how to create one of these flows. In this example, I’m going to use a Canvas app. From a canvas app in the left hand bar, we have a Power Automate icon. Start by clicking this and if you haven’t already created any flows in your app you’ll see a button to create a new flow.
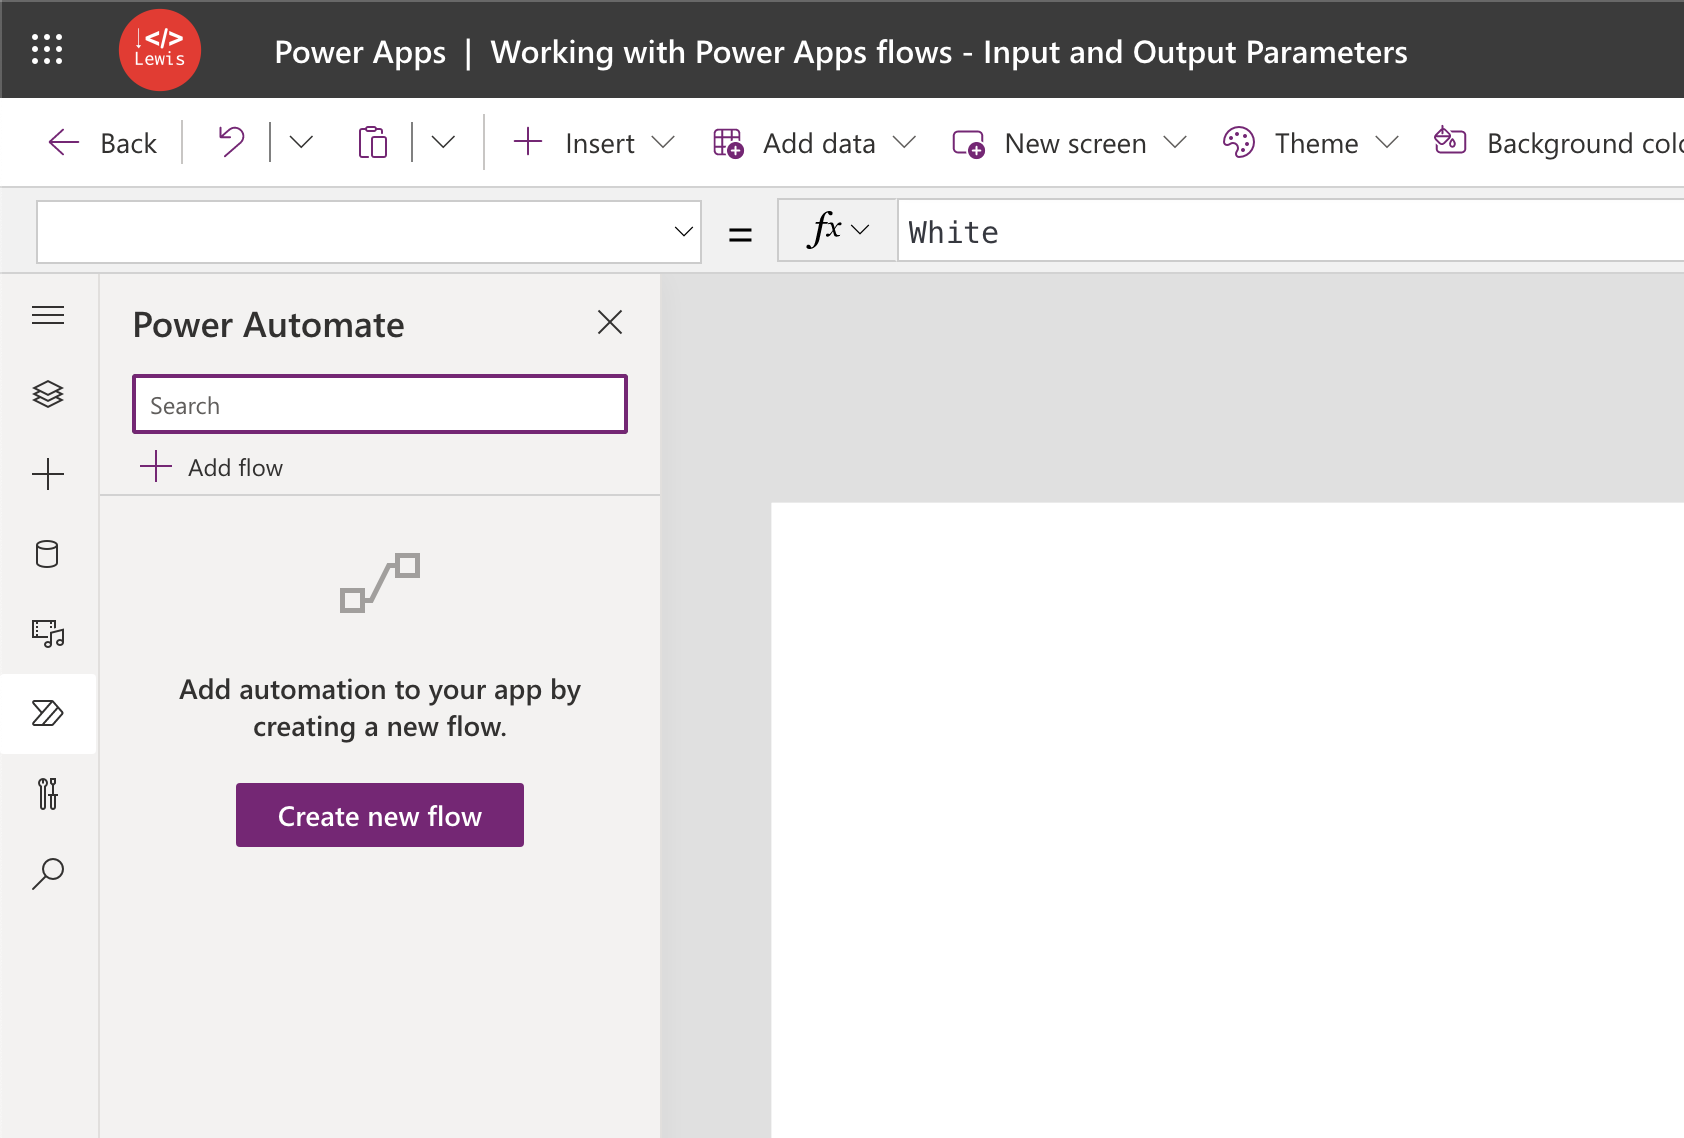
Let’s select create new flow to start building our automation. This will open a Power Automate dialogue.
Changing the trigger
So next we simply need to select Create from blank, but then we’ll need to make a change to our flow trigger to be able to use something called an input parameter. This is how we’ll pass data into our flow.

Now select the three dots on your Power Apps trigger and select delete. Then replace it with V2 of the same trigger.
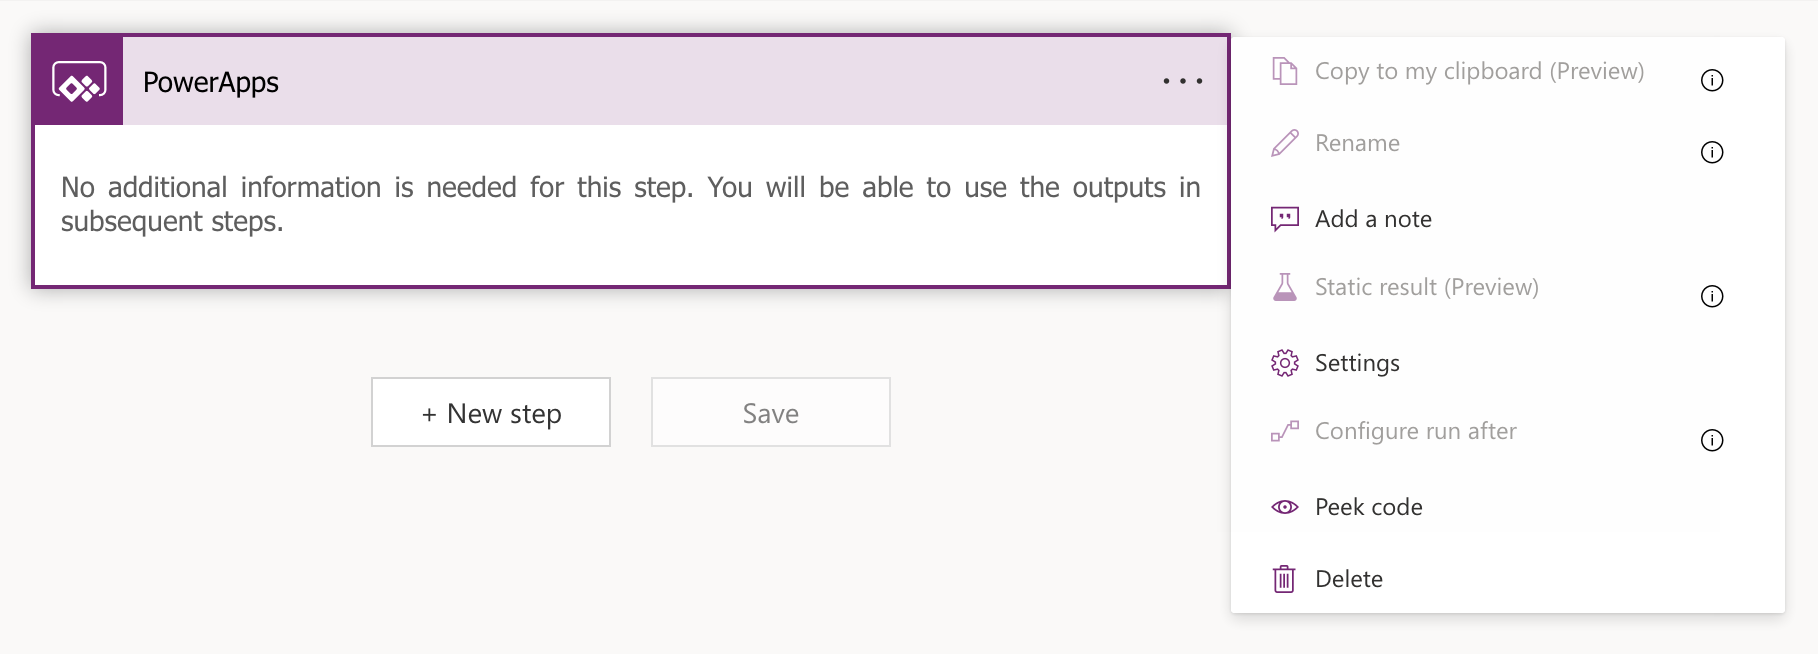
Fantastic! We’re now working with the newer version of the Power Apps flow trigger which will let us use an input parameter in our flow.
Tunnels of data
So the way I like to explain this and think about it is, input and output parameters are like tunnels into and out of our flow which we can push data through. They allow us to push data through the tunnel into our flow, so we can use it in our flow as dynamic content, and they also let us push data back through the tunnel from our flow to our app once we’ve done something with that data using actions in our flow.
Input parameters let us push data from our app into our flow.
Output parameters let us push data from our flow back into our app.
We can also use these tunnels and parameters with button flows and child flows where we can push data in and out of other flows which we can trigger from a currently running flow.
Adding an input parameter
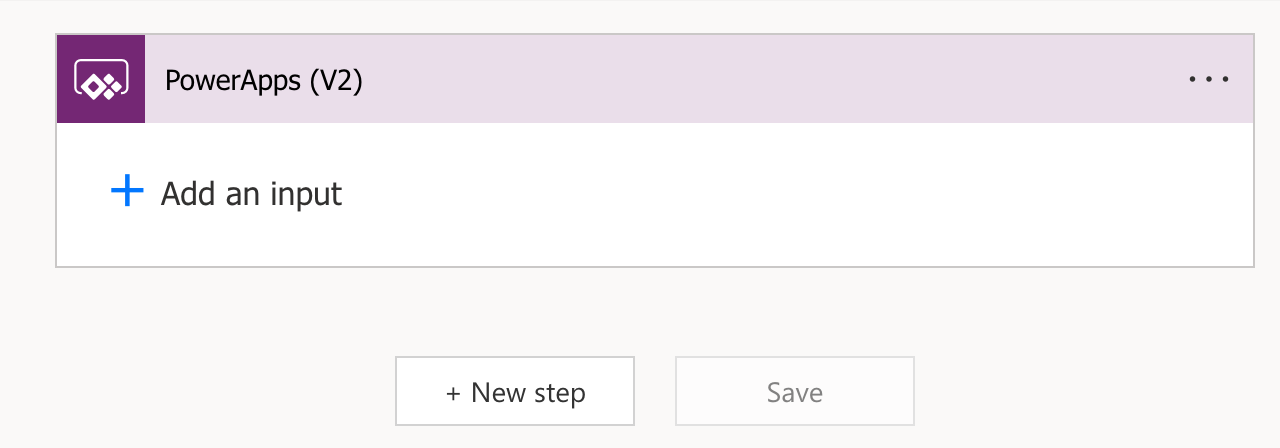
To add an input parameter or a tunnel of data to push data from our app into our flow, add an input to the trigger that we just replaced. Then you’ll need to select an appropriate data type for that parameter. Sometimes I find working with strings a lot easier than using the relevant data type, but do what works for your solution best.
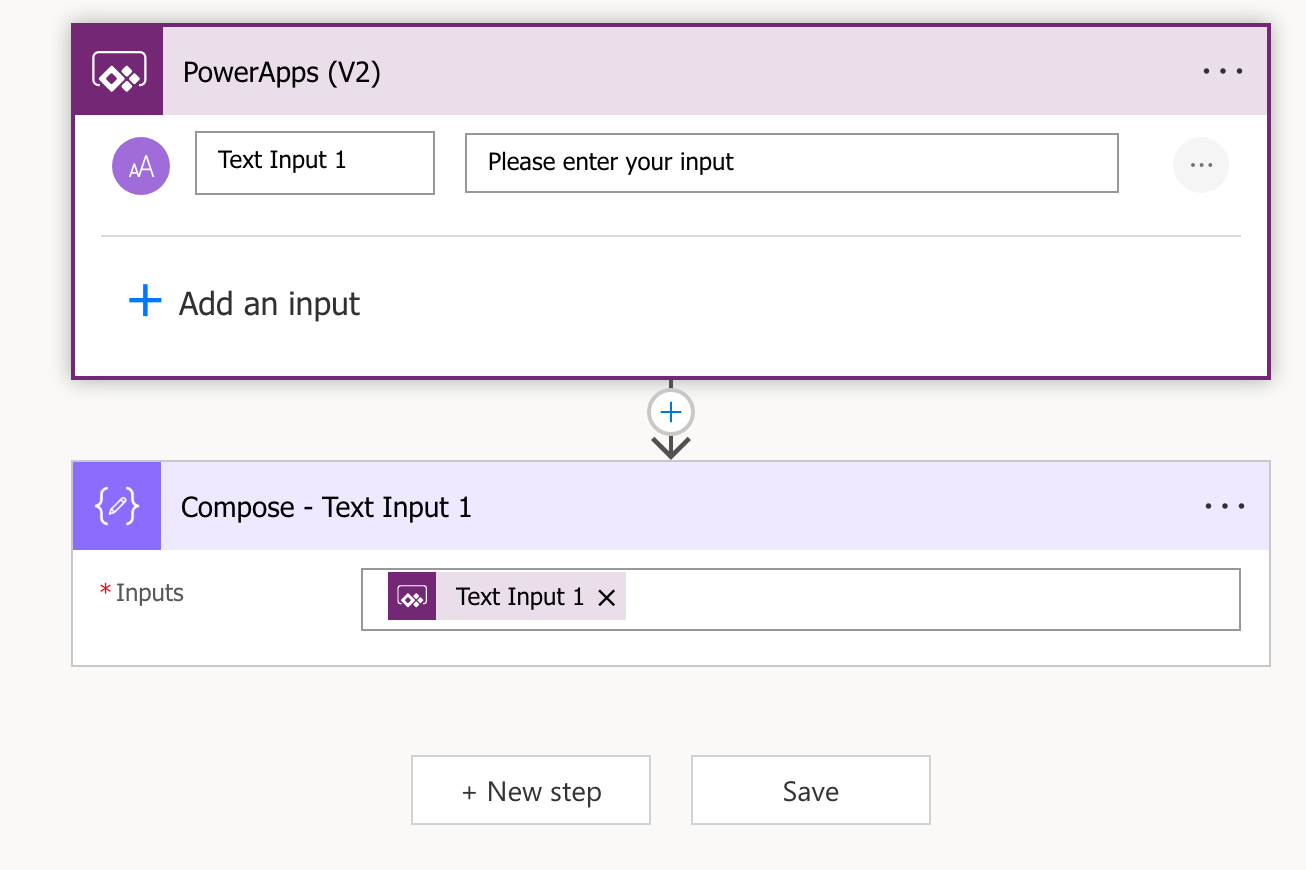
I’m going to add a text input here just so we can see how this works.
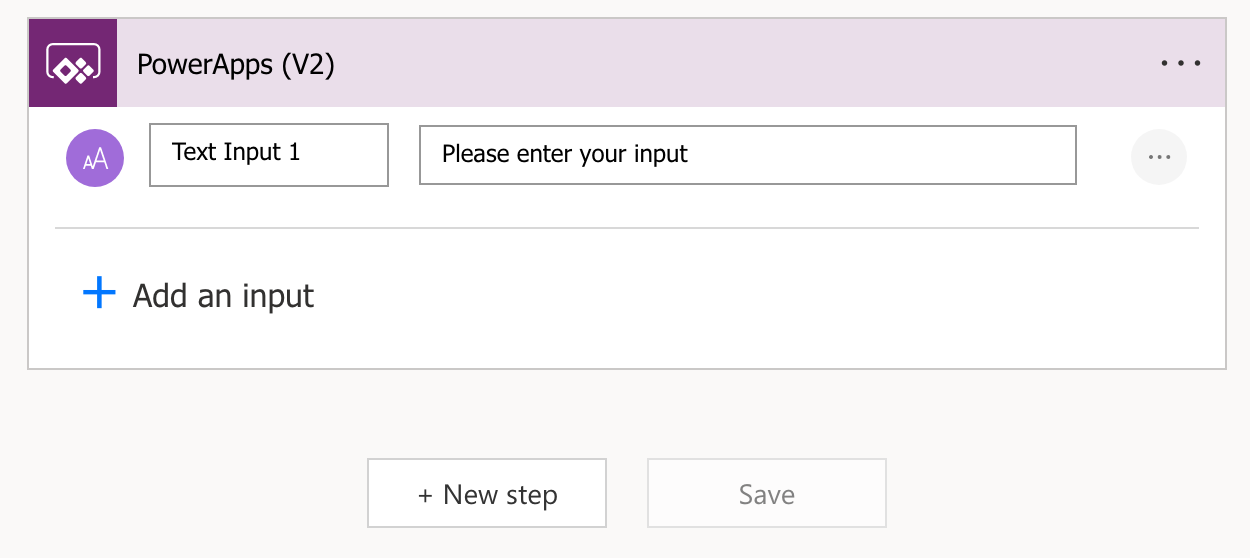
There we go. Now so that we can test this out, lets add a compose step to the flow to reference the dynamic content from our trigger that this parameter will now provide.
Now I’m just going to save the flow and we’ll take a look at how to pass in data using the input parameter we created from the app perspective.

Now to use the flow in our app lets select add flow and then select one of the flows we’ve got in our environment. There’s the one I just created which I’ll select.
Then we’ll need a way to trigger our flow. We can do this through various methods such as using the OnSelect property of a button, the OnStart property of our app or other methods.
I’m going to add a button to my screen and use the following formula to run my flow.
Testinginputandoutputparameters.Run("This is the data I want to pass into my flow")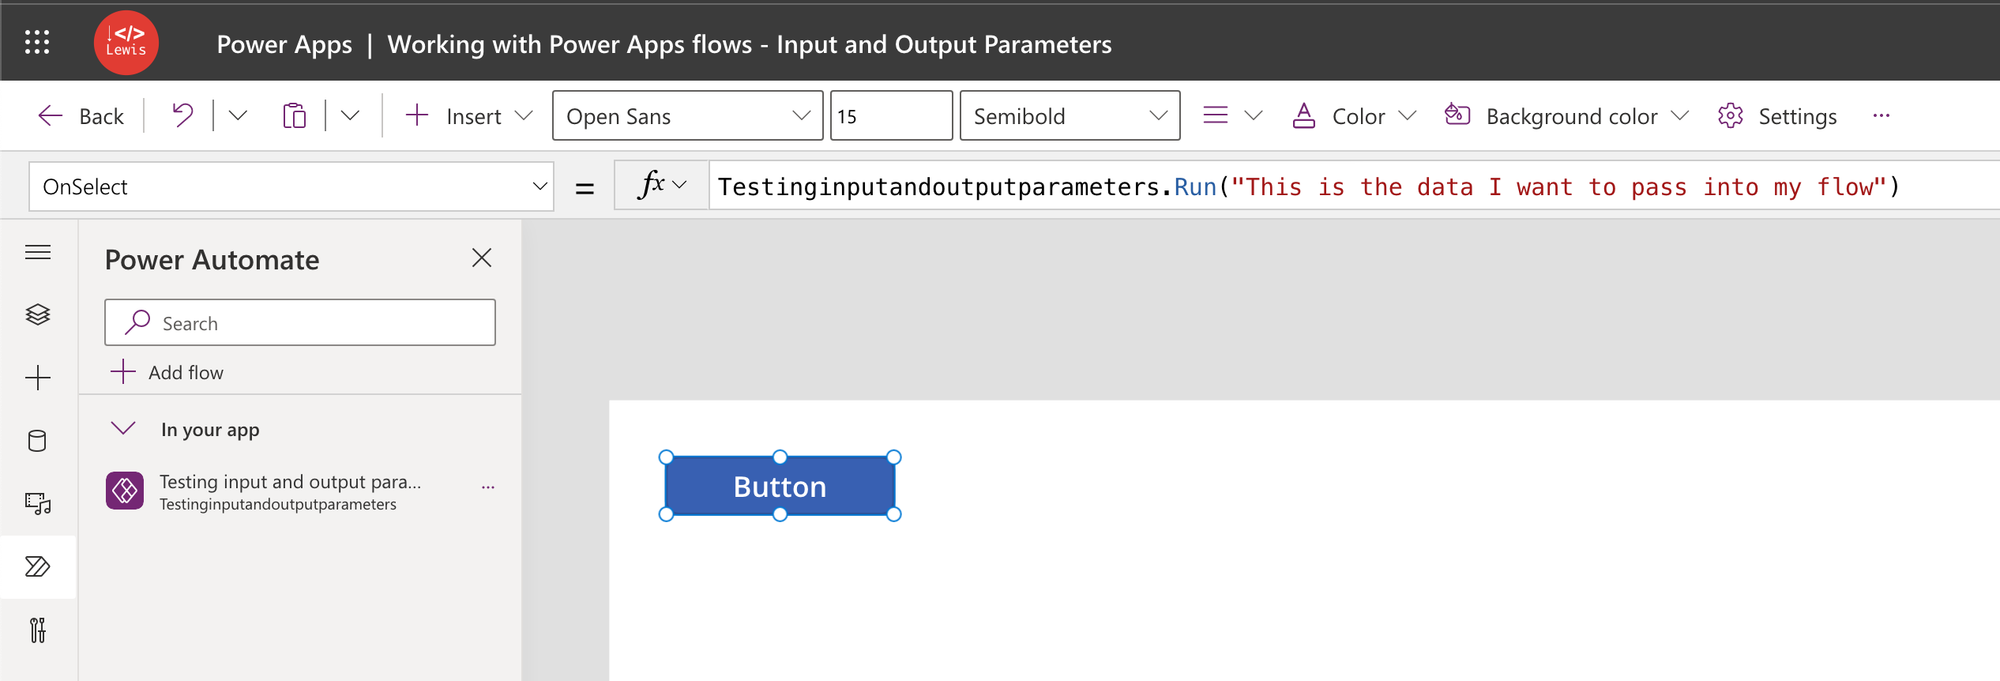
Here you can see I use the flows name followed by .Run then I open brackets which is where I provide inputs to the flow for the input parameters I’ve created in the flow. As you write these into your brackets, Intellisense will tell you which parameter is being populated. This is a good reason to name your parameters properly so that it makes populating them here easier.
I’ve just used a hard coded string to test this out, but you’d probably have a use case where you use a dynamic value from somewhere in your app here. That might mean using a variable value, or a value retrieved from a LookUp() or something else.
Let’s now run the flow and see what happens.
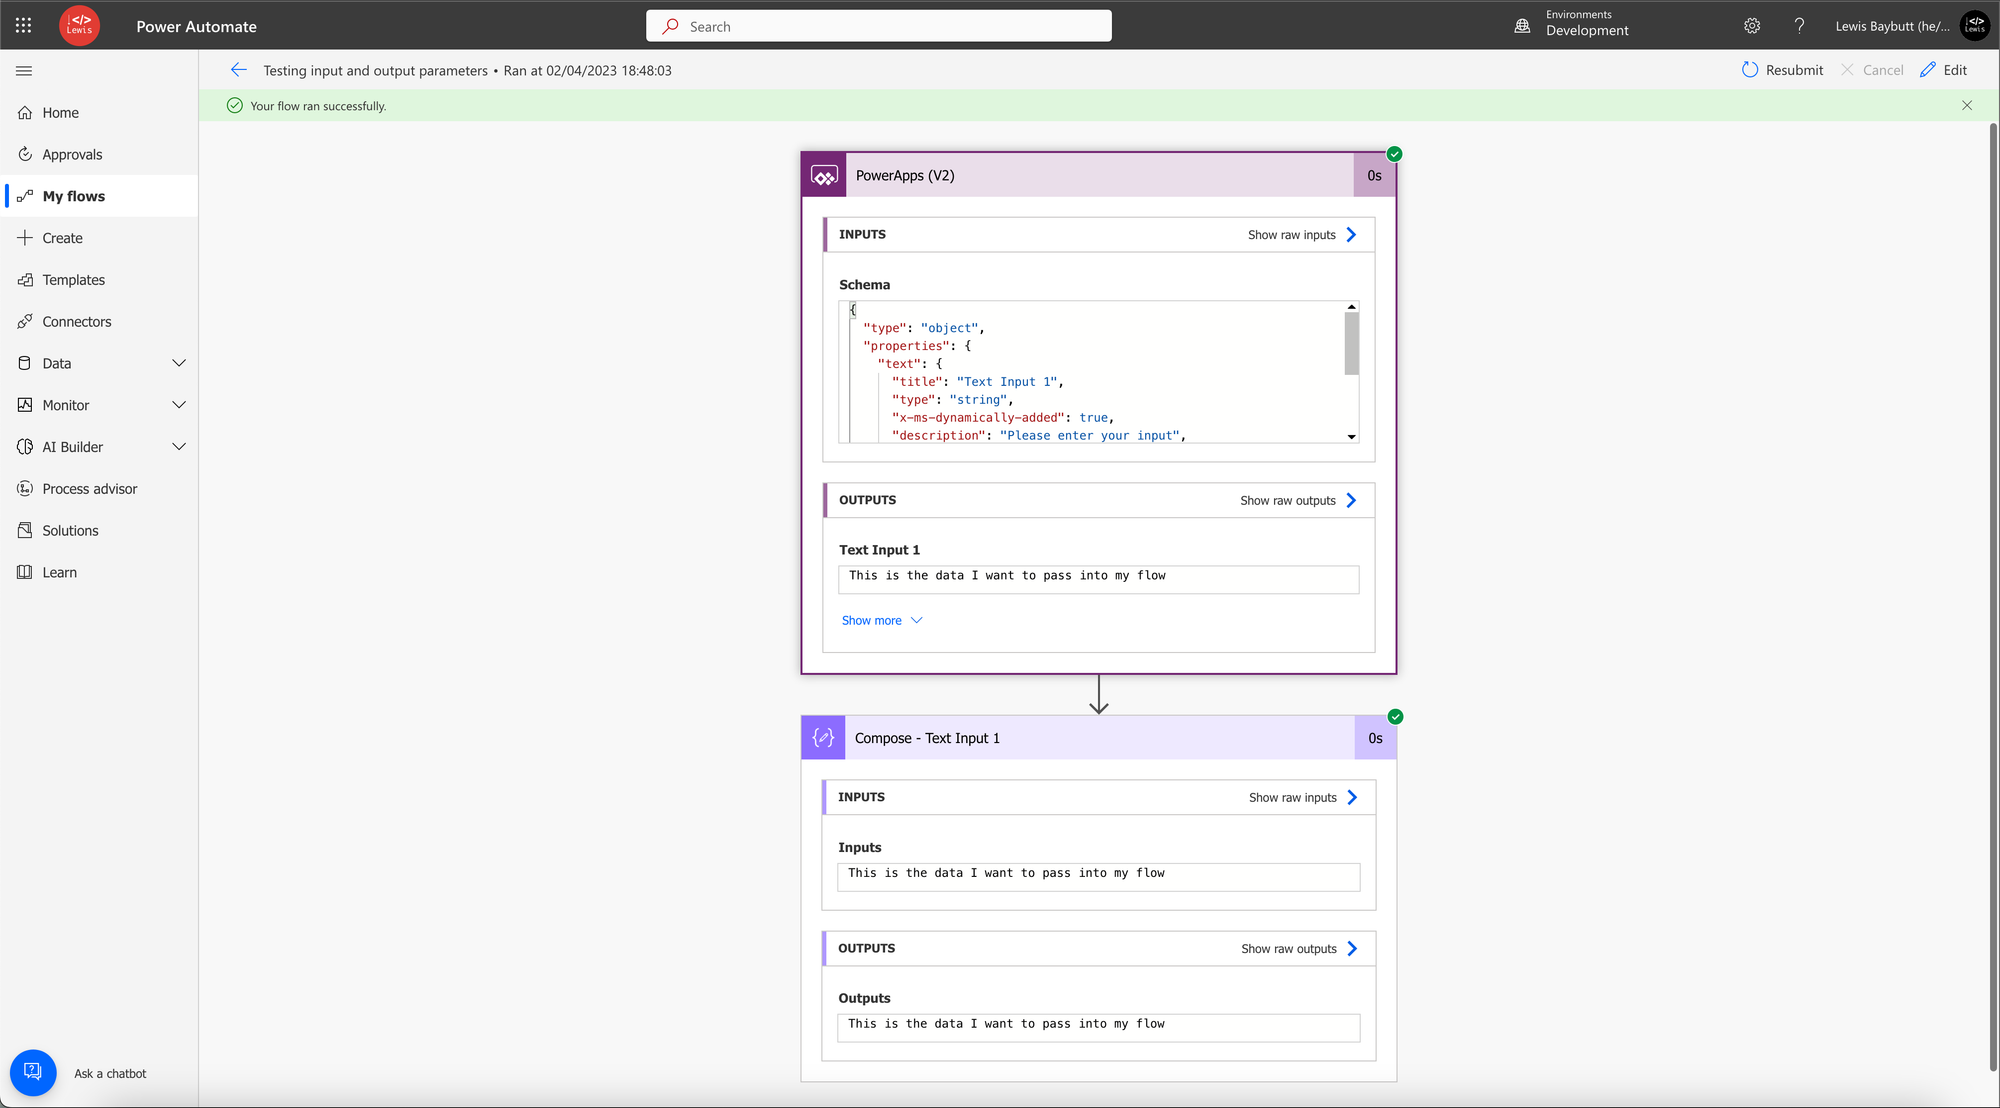
There we have it! Thats my data in my compose that I’ve passed into my flow.
Working with output parameters
Okay so now lets say we want to do something with that data we passed into our flow using flow actions. Perhaps somewhere in our flow we want to make API calls to get more data and pass the new data back into our app. We can do all of this!
In this example, I’m simply going to do a concatenation of the string I’ve passed into my flow with another string I’ll hard code in my flow using that compose action.
I’m going to edit my flow and add another compose action for ‘step 2’ of my process here just to break it down. We could do this in one action but I’m not going to here for ease of understanding.
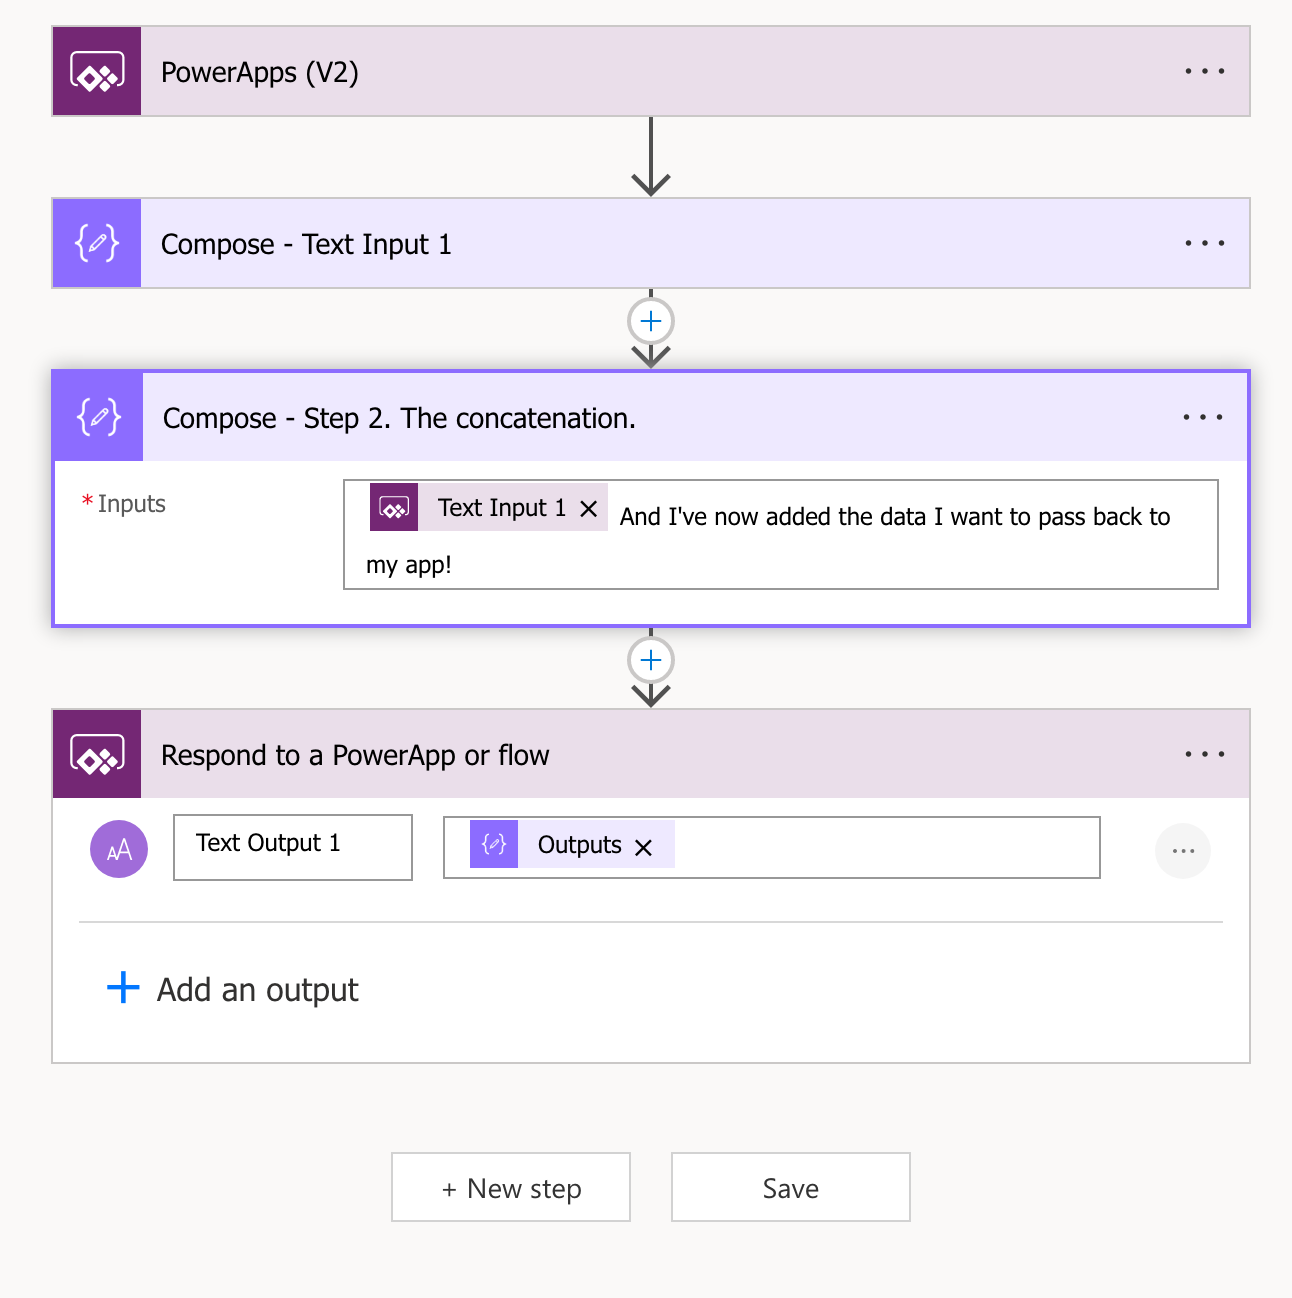
Okay so I’ve now made my data change in my flow in my second compose action and I want to push this data back through the tunnel into my app. I can do this using a Respond to a PowerApp or flow action. Here I want to do the same thing as when I work with input parameters. I’ll create an output parameter of type text and give it a name.
Now this is when something gets a bit different. This is where we need to now populate the value instead of doing it from our app side. This is because this time we’re passing data from our flow to our app. It is the opposite way around.
In the value I’m going to use dynamic content from my second compose action. Then I’ll save the flow.
Handling output parameters from our app
So now that we’re passing data from our flow to our app we need to handle this data being passed back. This becomes different dependant on the amount of parameters we want to pass back into our app. Lets start by understanding how to handle one parameter.
I need to put the data coming back somewhere, so we’ll set a variable for this which we’ll do around our .Run function to run our flow. Then before we close the Set() function, after closing the .Run() function we’ll use dot notation to collect output parameter values from our flow run.

Here you can see by using dot notation I’ll get all of my output parameters available to use as a value to pass into my app variable.
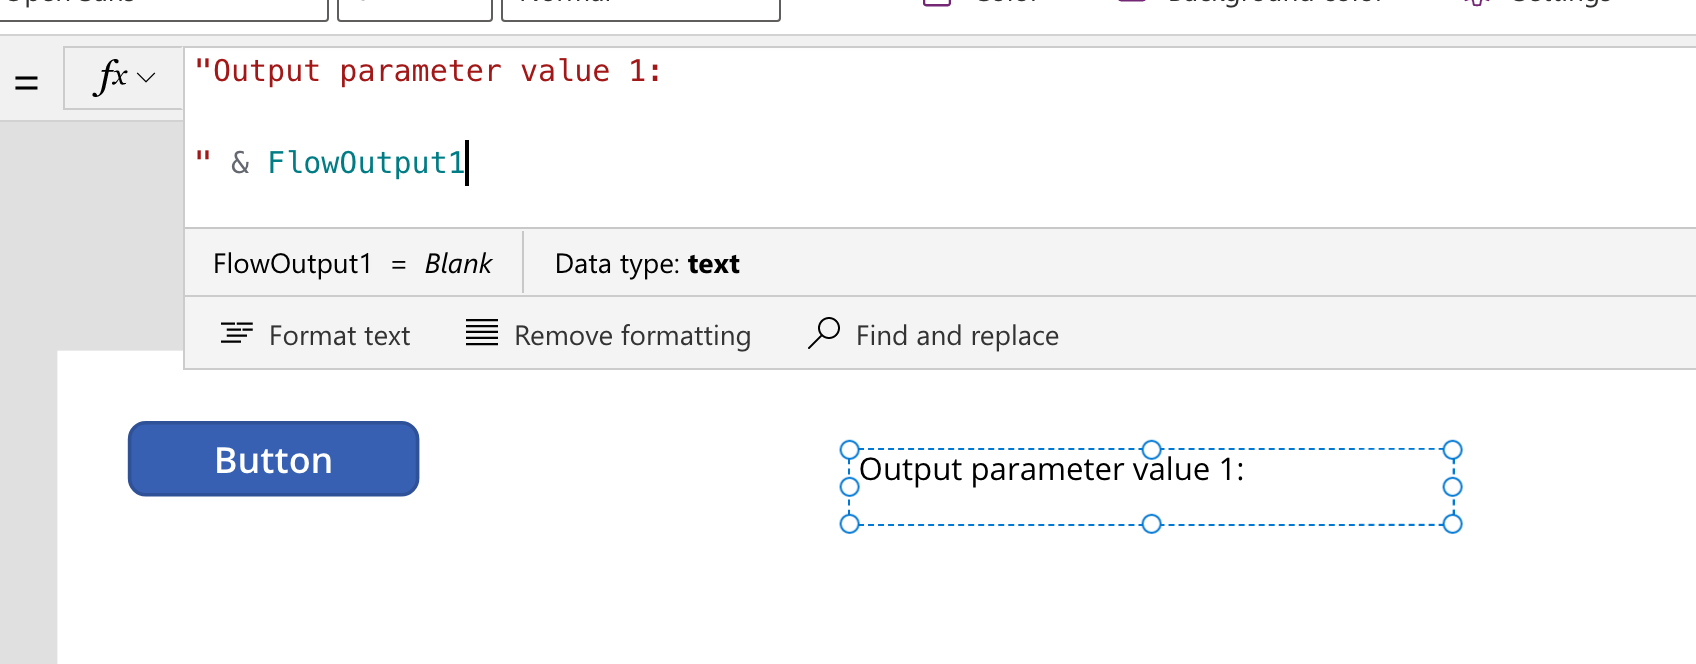
Now to test that this works and see the value that is pushed into our global variable lets add it to a text label on the screen and see what gets populated.
Now I’m going to run the flow by clicking my button and see what happens…
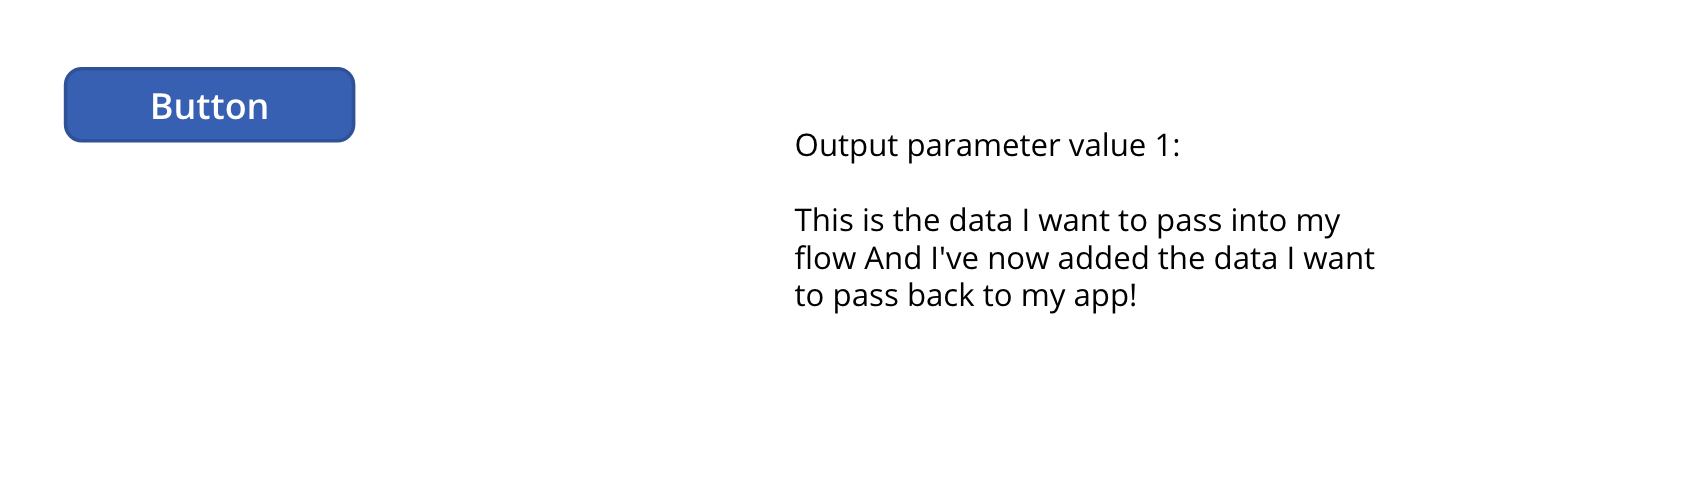
And there we go! As you can see I’ve now got the data I had in my flow back inside of my app.
Handling multiple output parameters
Okay but what if I want to access multiple output parameters. So to do this you’ll want to set a global variable and only have the .Run() function inside the set without using dot notation to get to the parameters yet. This will set the variable with an object holding all of the output parameters your flow has passed back to your app.
Now you can set further variables using that previous variable then using dot notation into that variable to get hold of all your parameters. Or just reference the first global variable and use dot notation in all of the places you want to use the values passed back from your flow.