

In this post, we’ll be taking a look at how you can use a very simple OnLoad event on a Dataverse form to determine whether form sections show or hide based on the form type for example whether the form is creating a new record, or editing a current record. We’ll go through writing the JavaScript for this form event, step by step, understanding each line and testing as we go.
Starting with some JavaScript
So let’s start by writing a little bit of JavaScript, not a lot, but just a bit to test the first little thing out. The first thing I want to test out is whether or not I can find out the type of form I have open using a JavaScript event. I’ll test this by writing the outputs of a command to a variable which i’ll then make visible by logging them in the browser console.
Using JavaScript in Dynamics 365 and model driven apps requires us to work with functions, which are like tasks formed up by a set of steps or lines of code. So effectively I could have one JS file with multiple functions in it to save me creating lots of web resources, then I just need to reference the function I want to use in my form event rather than using a completely separate JS file.
Anyway, I’m going to use Visual Studio Code to write my JS. Let’s start by creating a new file and setting the language to JavaScript.
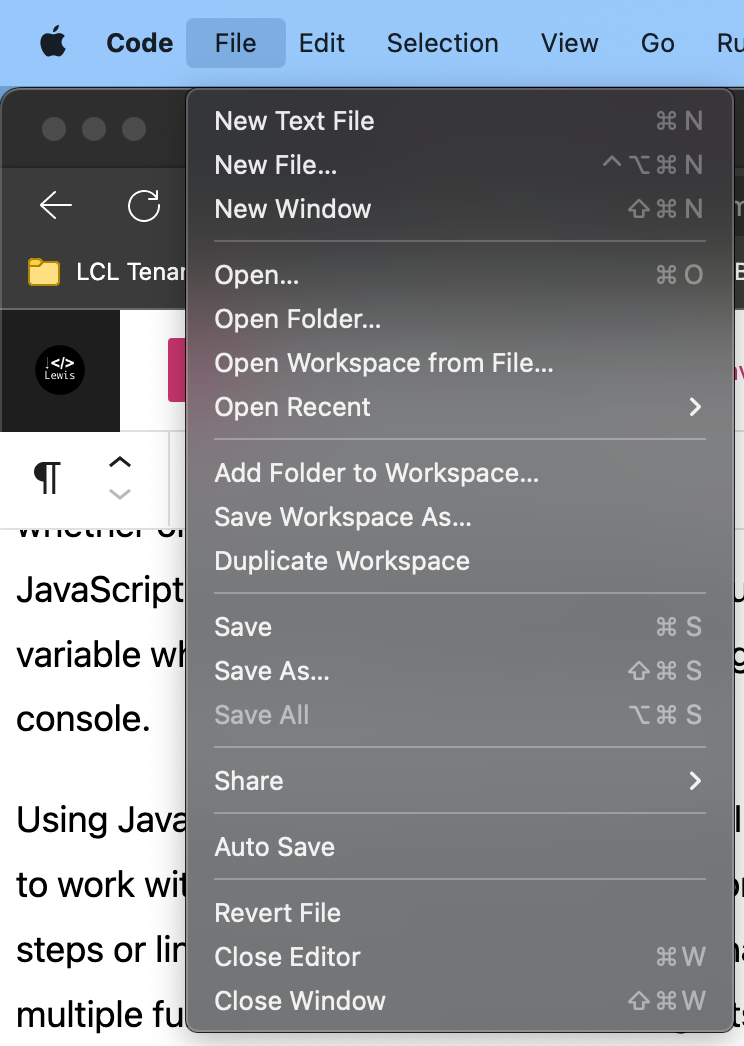
I’m selecting ‘New Text File’
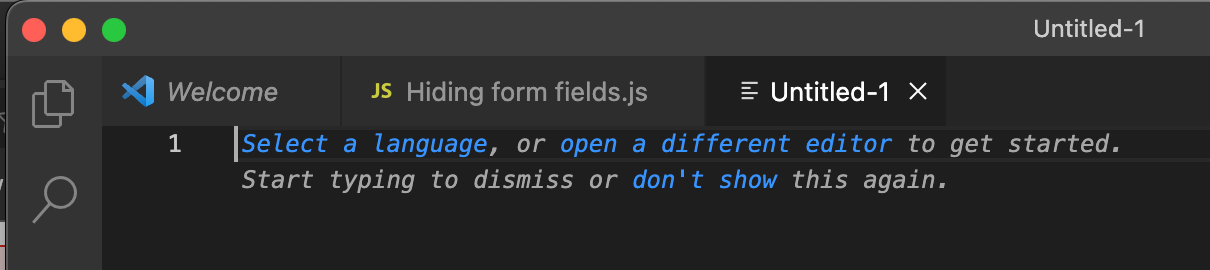
Now I’m going to select ‘Select a language’ and choose JavaScript. Now I’m ready to start writing some code.
Let’s start by defining a function using the ‘function’ keyword to create one, a name for our function and rounded brackets to store parameters we’ll need to pass into the function. Then at the end I’m going to add open and closed curly brackets. Inside of these curly brackets will be where we add our code for the function to run.
function RetrieveFormType() {};We’re not completely ready to start adding steps into our function yet. Prior to that we need to pass some data into our function using a parameter so that we have some information about our form to work with. We can do this using executionContext which gives us an object which lets us then use further methods to return a range of detail about things like our form and more.
See more details about executionContext here – Execution context (Client API reference) – Power Apps | Microsoft Learn
To pass in the executionContext parameter we just need to simply add this inside of our rounded brackets. So now we’re working with something more like this.
function RetrieveFormType(executionContext) {};Awesome! Okay… now we’ve written a first line of code, but this won’t really do anything yet or return anything that we can see to know if things are working. Let’s start adding some tasks to our function. Inside the curly brackets I’m going to use one of the methods provided by our executionContext parameter to retrieve some context about our form. I’m going to set a variable with the results of this command to. So let’s add the following…
let formContext = executionContext.getFormContext();Now here I’m setting a variable called formContext with the data returned by the getFormContext method provided by the executionContext parameter we passed in earlier. Now I’ve got hold of some information about my form.
Your code should look something like this by now…
function RetrieveFormType(executionContext) {
    let formContext = executionContext.getFormContext();
}
Cool! So now we’ve got a variable storing some information about our form, but I want further specific detail. We’re now going to use the following code… formContext.ui.getFormType() to get the type of form we have open using the reference returned by getFormContext currently held inside our formContext variable.
To do this, lets set another variable…
let formType = formContext.ui.getFormType();So now our code should something a little like this…
function RetrieveFormType(executionContext) {
    let formContext = executionContext.getFormContext();
    let formType = formContext.ui.getFormType();
}
Finally I want to be able to test out that my formType variable is holding the type of form I have open currently. To do this let’s write the value inside our variable to the browser console using console.log()
Our code should now look like this…
function RetrieveFormType(executionContext) {
    let formContext = executionContext.getFormContext();
    let formType = formContext.ui.getFormType();
    console.log(formType)
}
Now let’s start to bring things into Power Apps, to test things out. Give your file a save ensuring you set the file type to JavaScript and head over to Power Apps.
Applying the event to a form
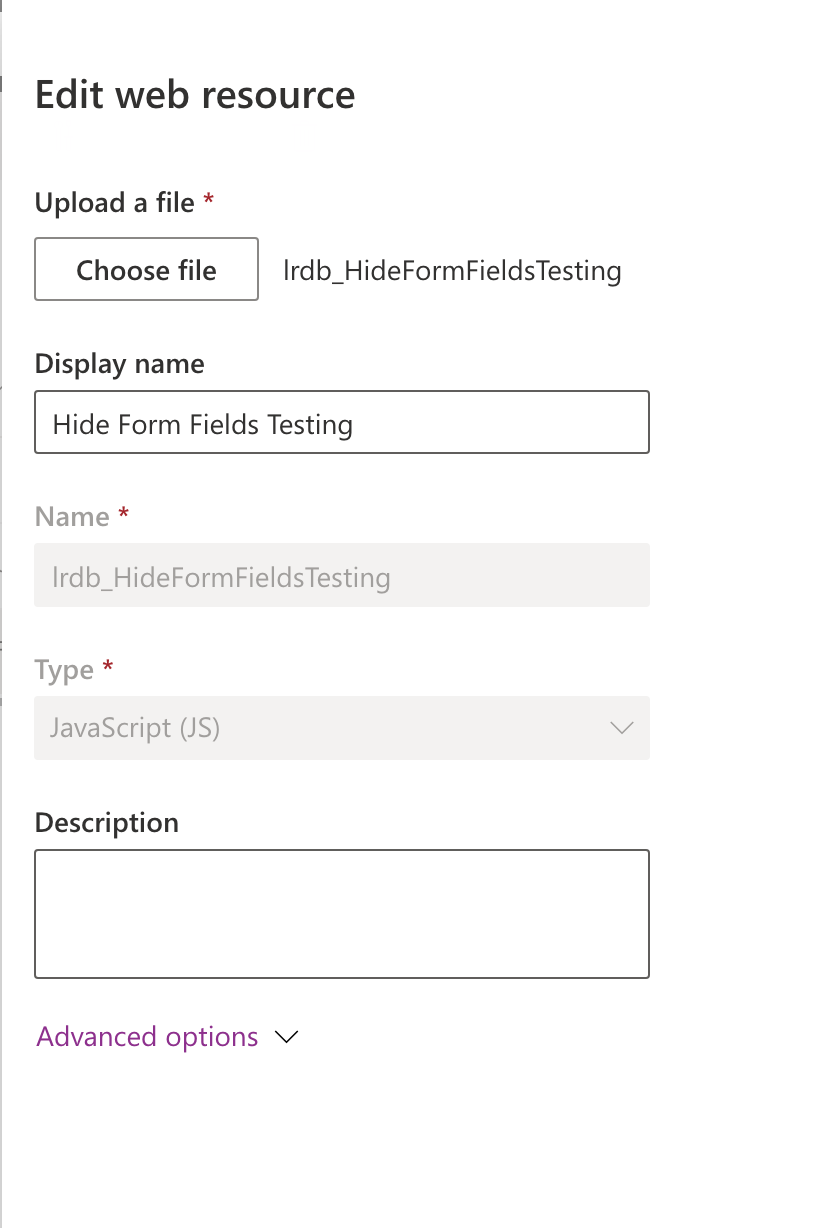
Okay so now let’s take a look at making this work on a form when the form has loaded. I’ve added my account table, and a model driven app to a solution to make some customisations. Now I need to bring my JavaScript file into Power Apps. Let’s select new, then web resource and upload the file.
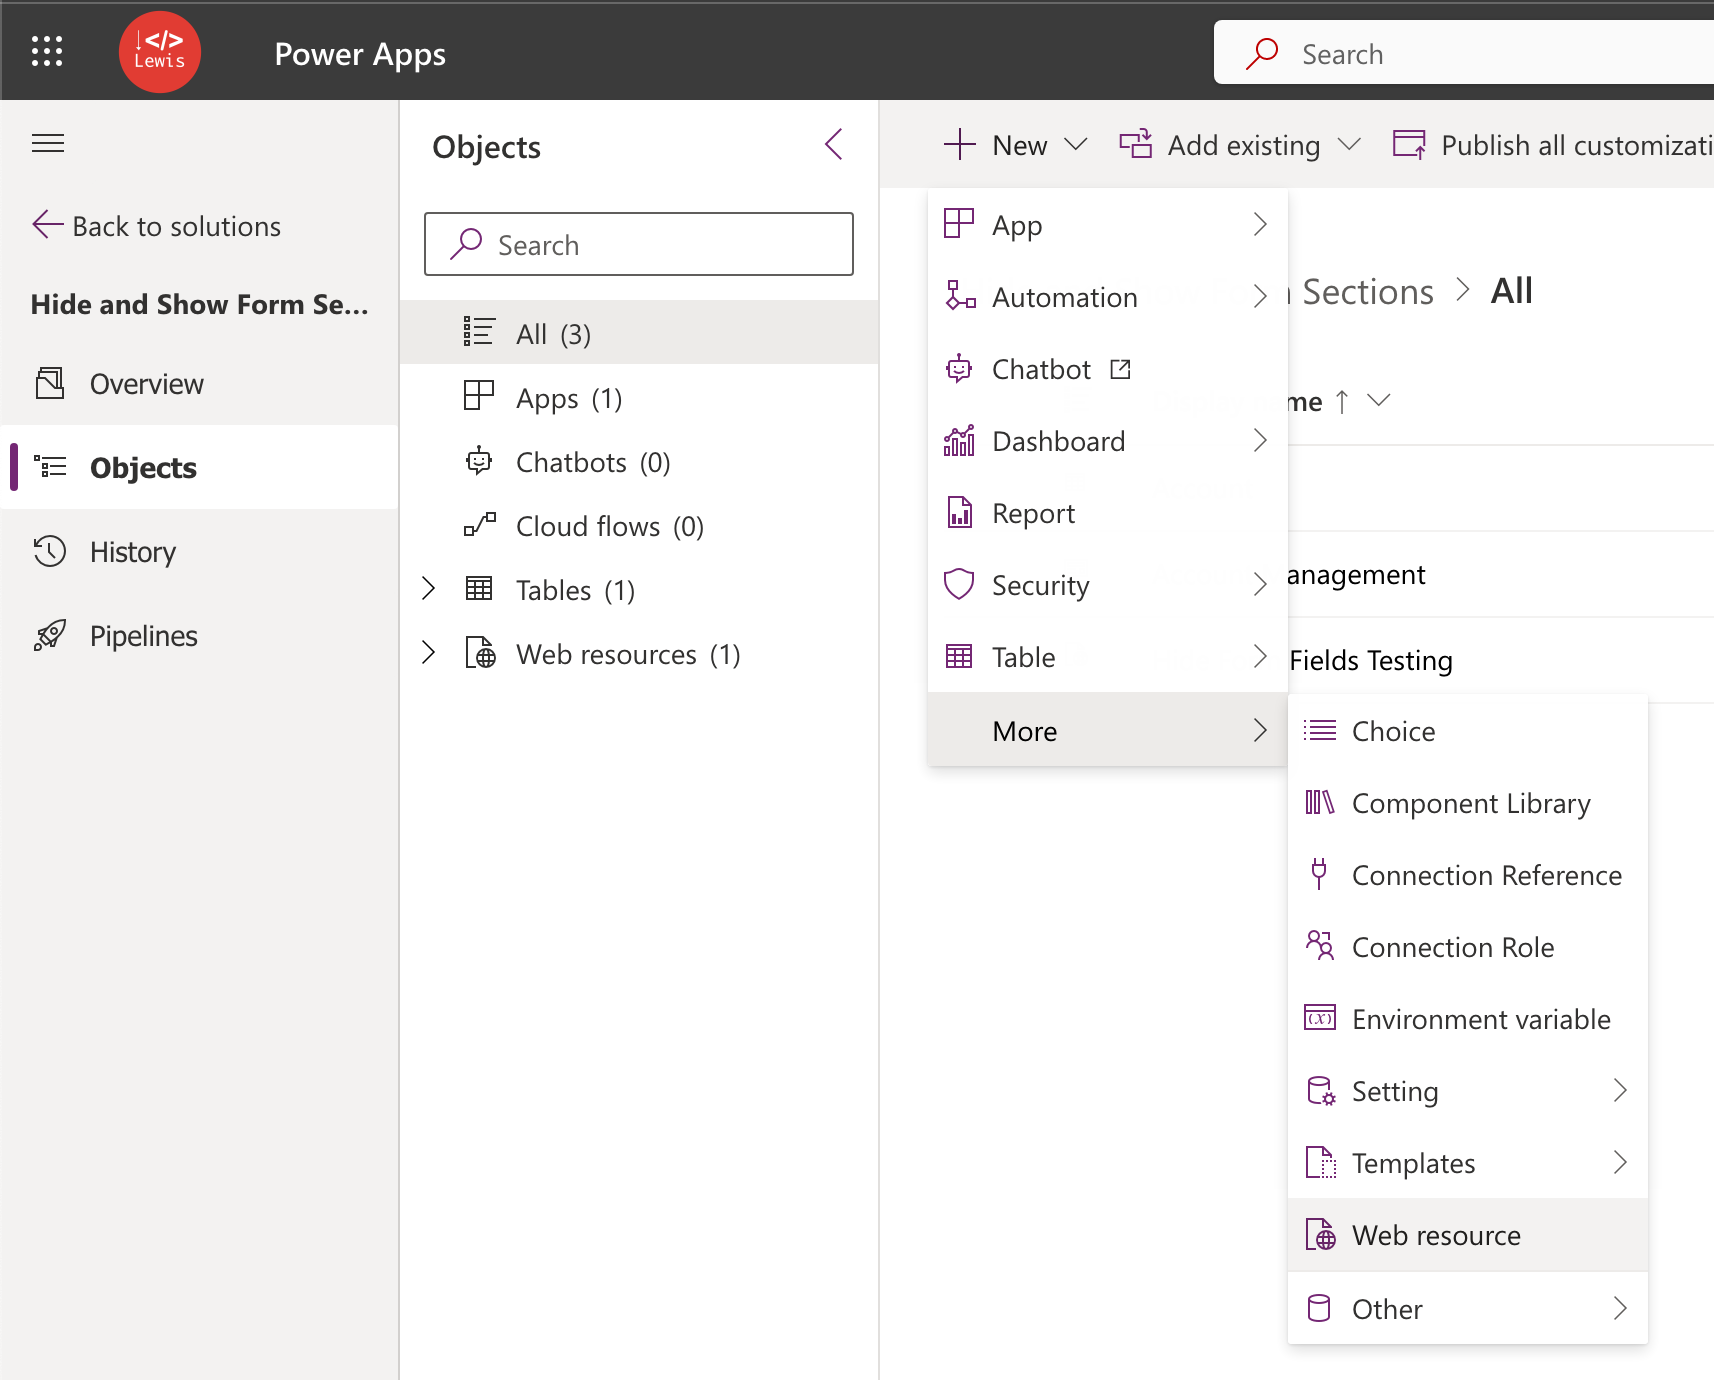
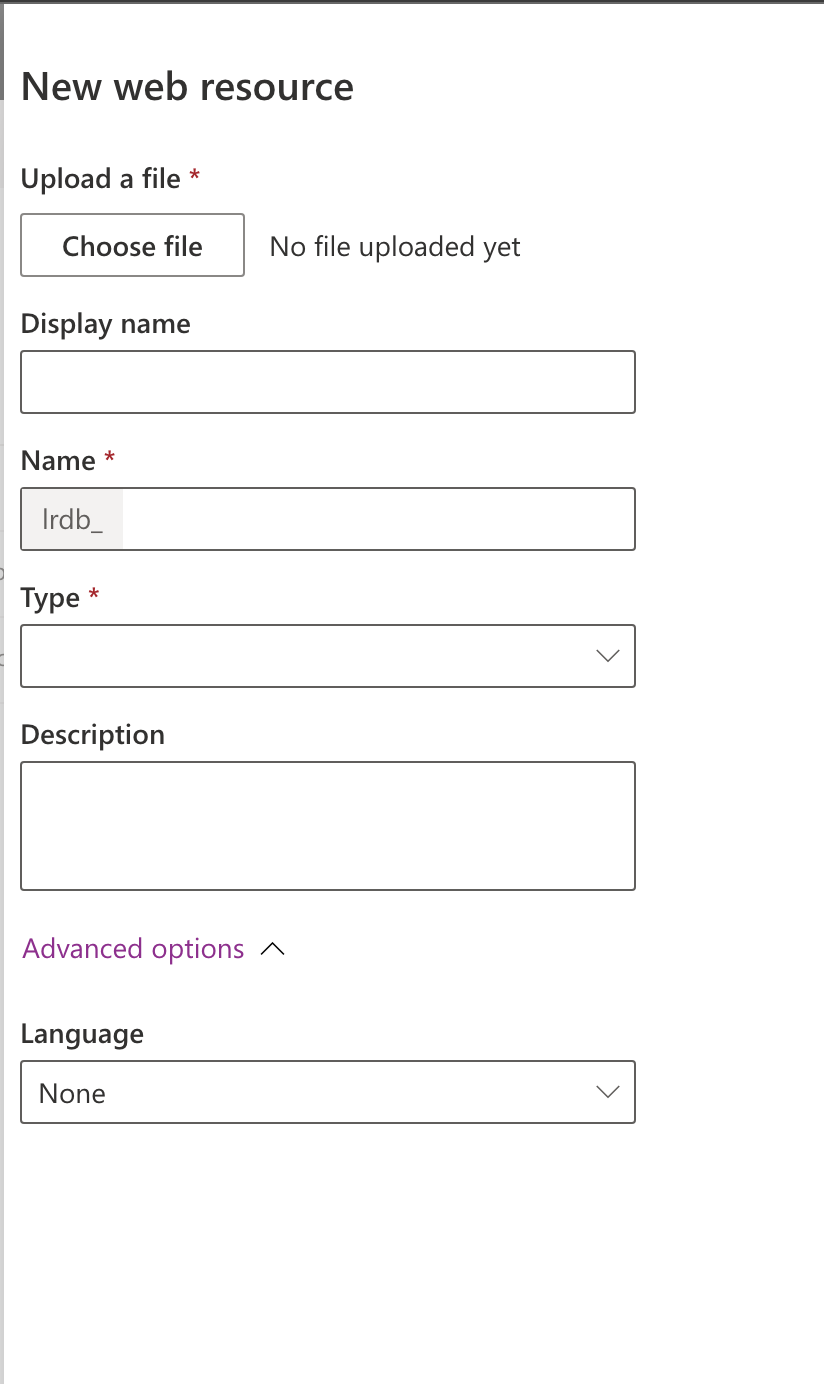
Very simply upload your file that we just created in VS Code, then give your web resource a name and if not already set, set the type to JavaScript. If you like you can give the web resource a description which is definitely recommended if you work in a development team of more than 1 person, then click save.
Now we can go and edit our form to include this JavaScript as an OnLoad event.
Here I’ve created a new main form for my account table which I’m going to edit.
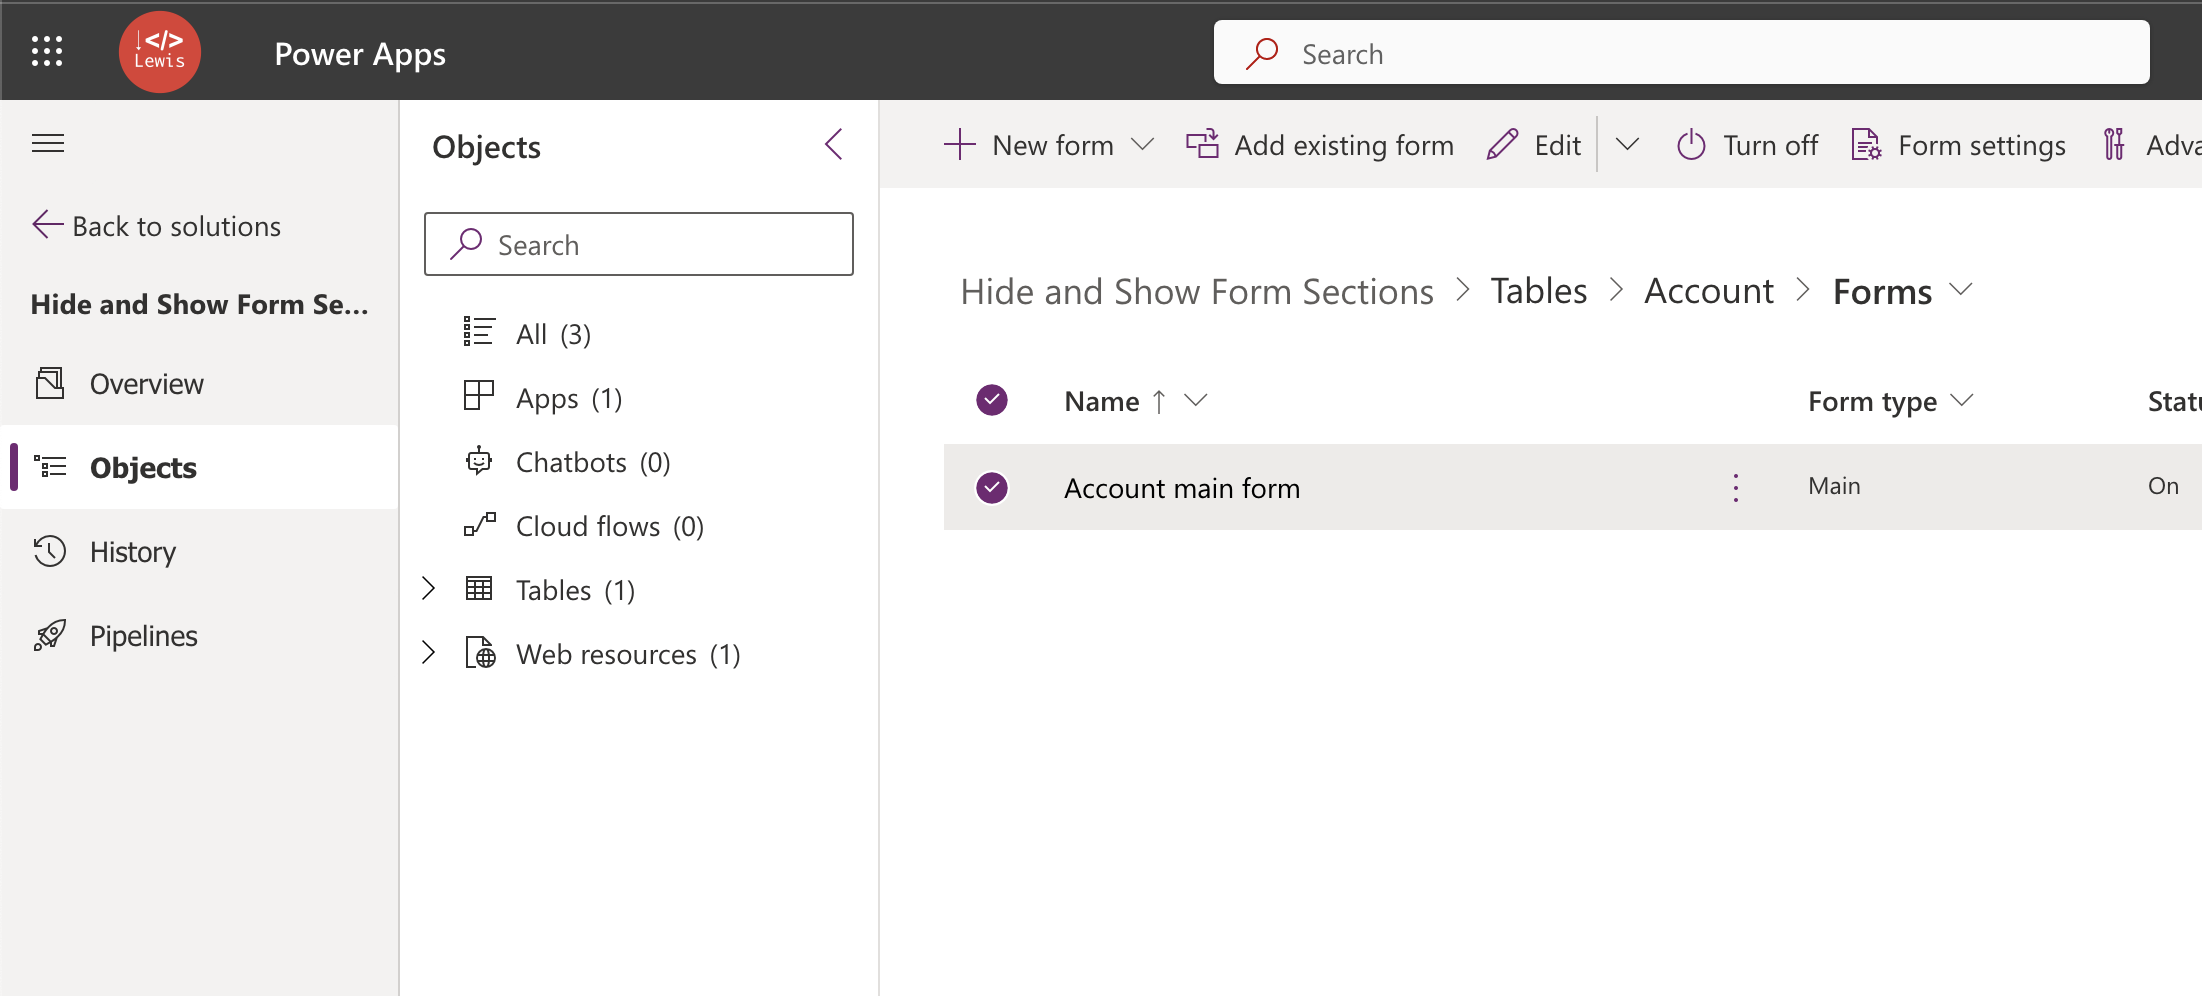
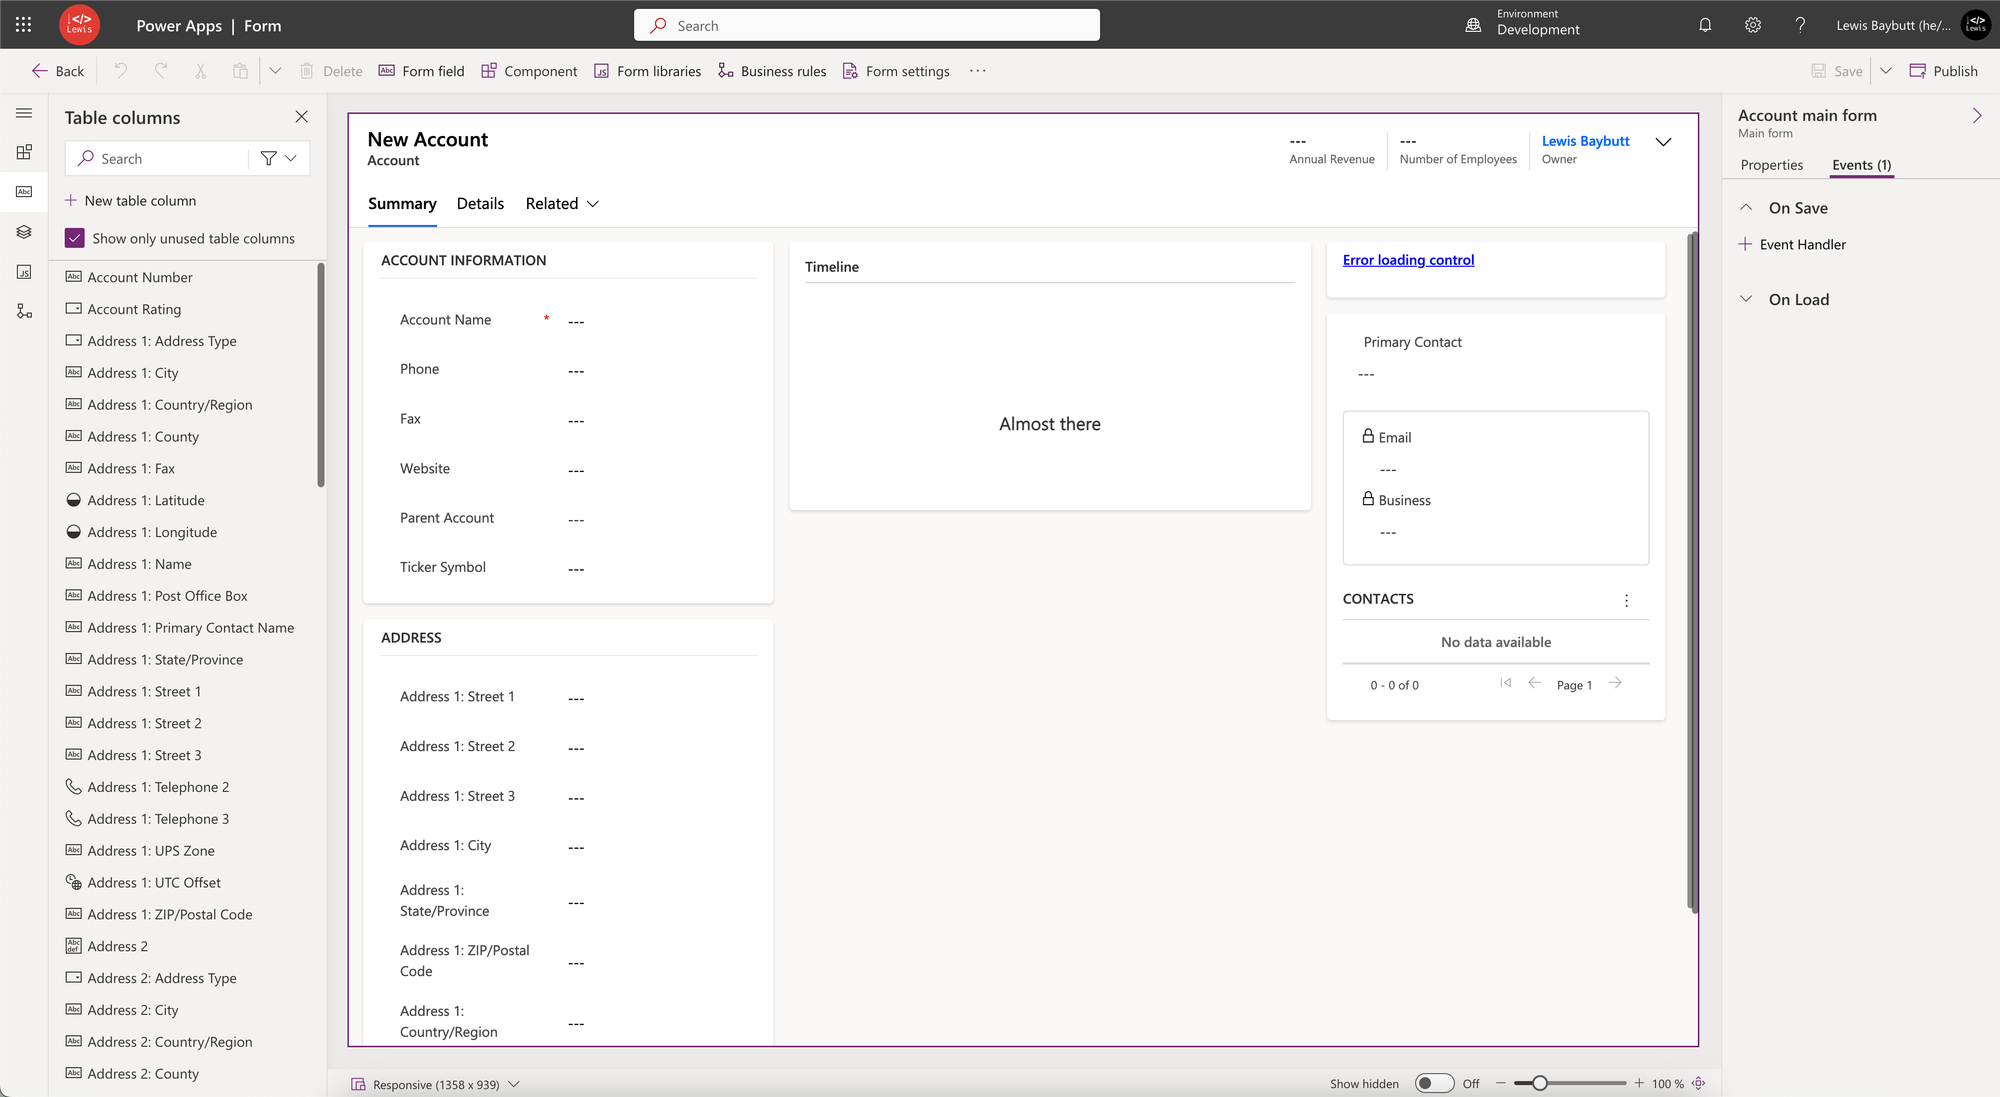
On loading the form editor my form is already selected so I’m not going to click anything inside of my form so that I stay selected at the form being the top level. I’m then in the right hand pane going to select Events and then open up the On Load dropdown to add a new event.
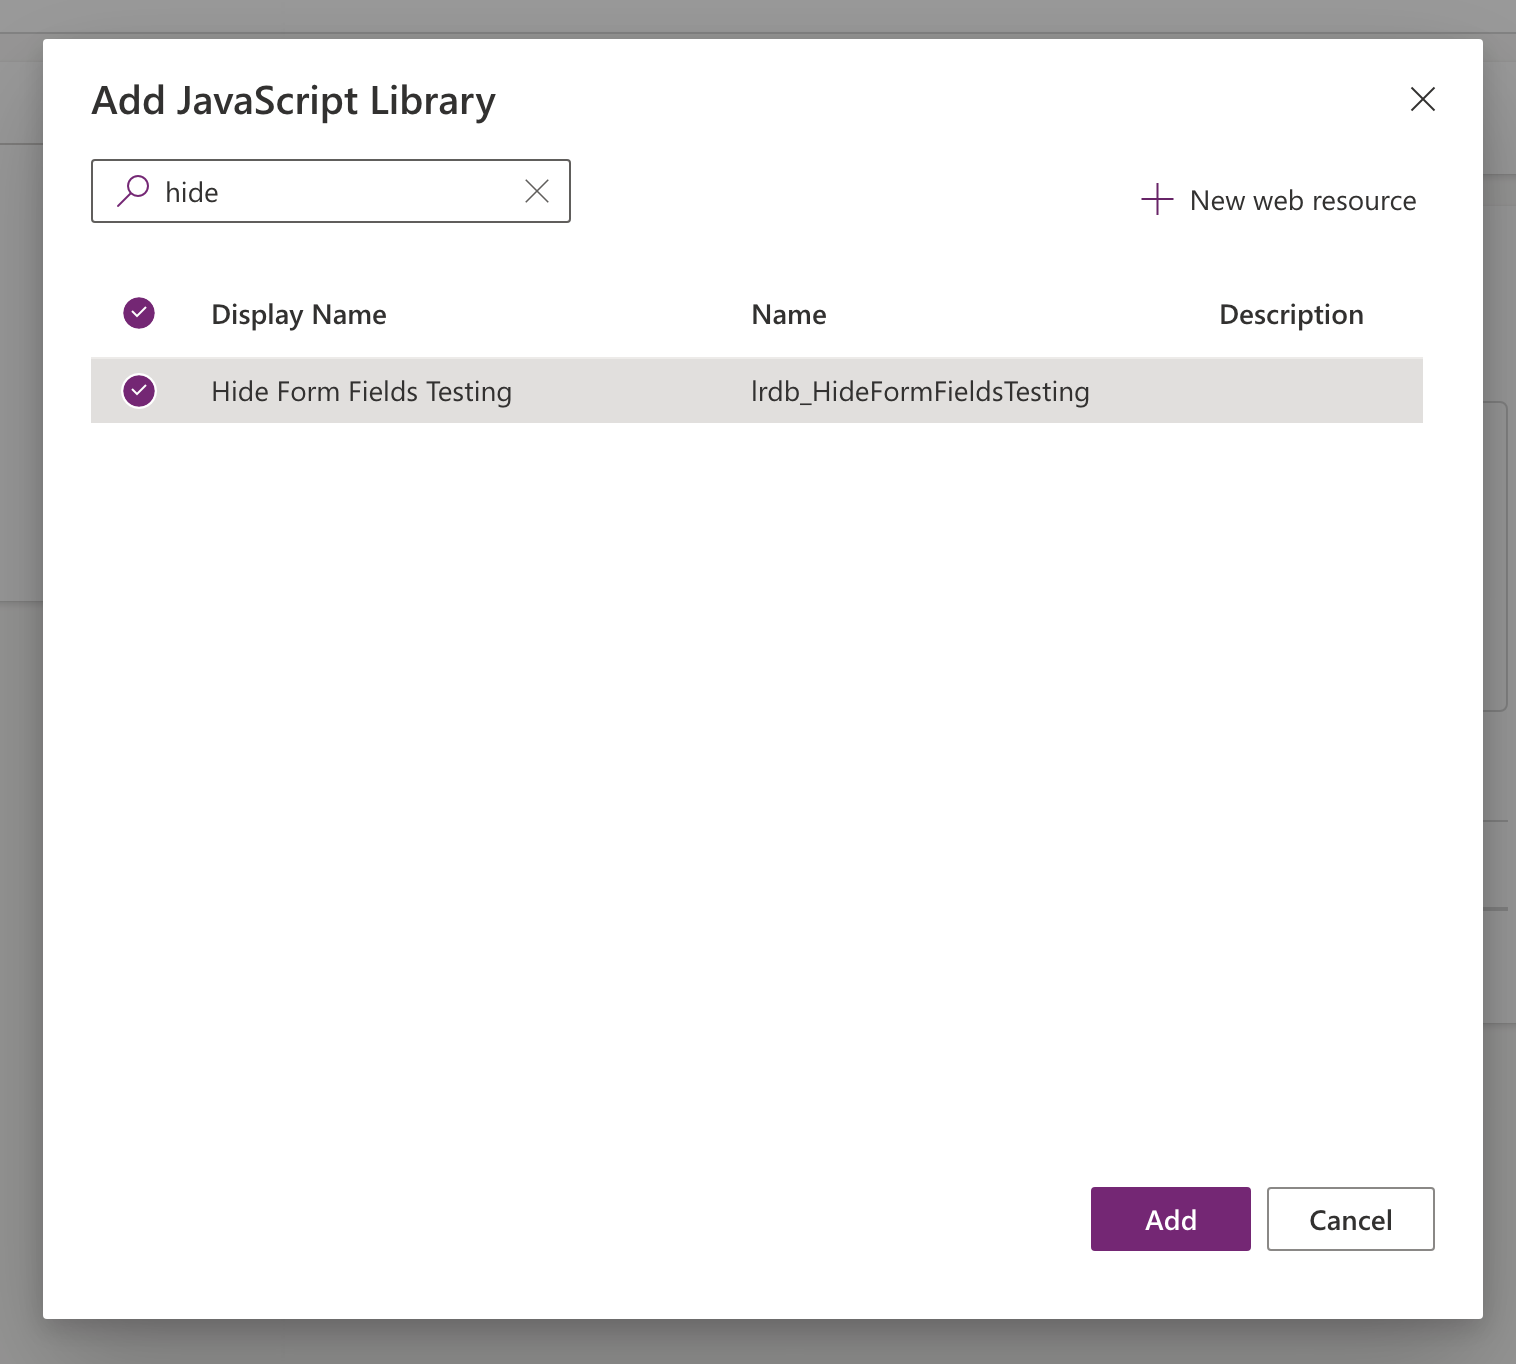
Now I need to add the JavaScript library I uploaded into Dataverse to this form so I can use it in the events here. Select ‘add library’.
Search for your web resource and then select it and click ‘Add’.
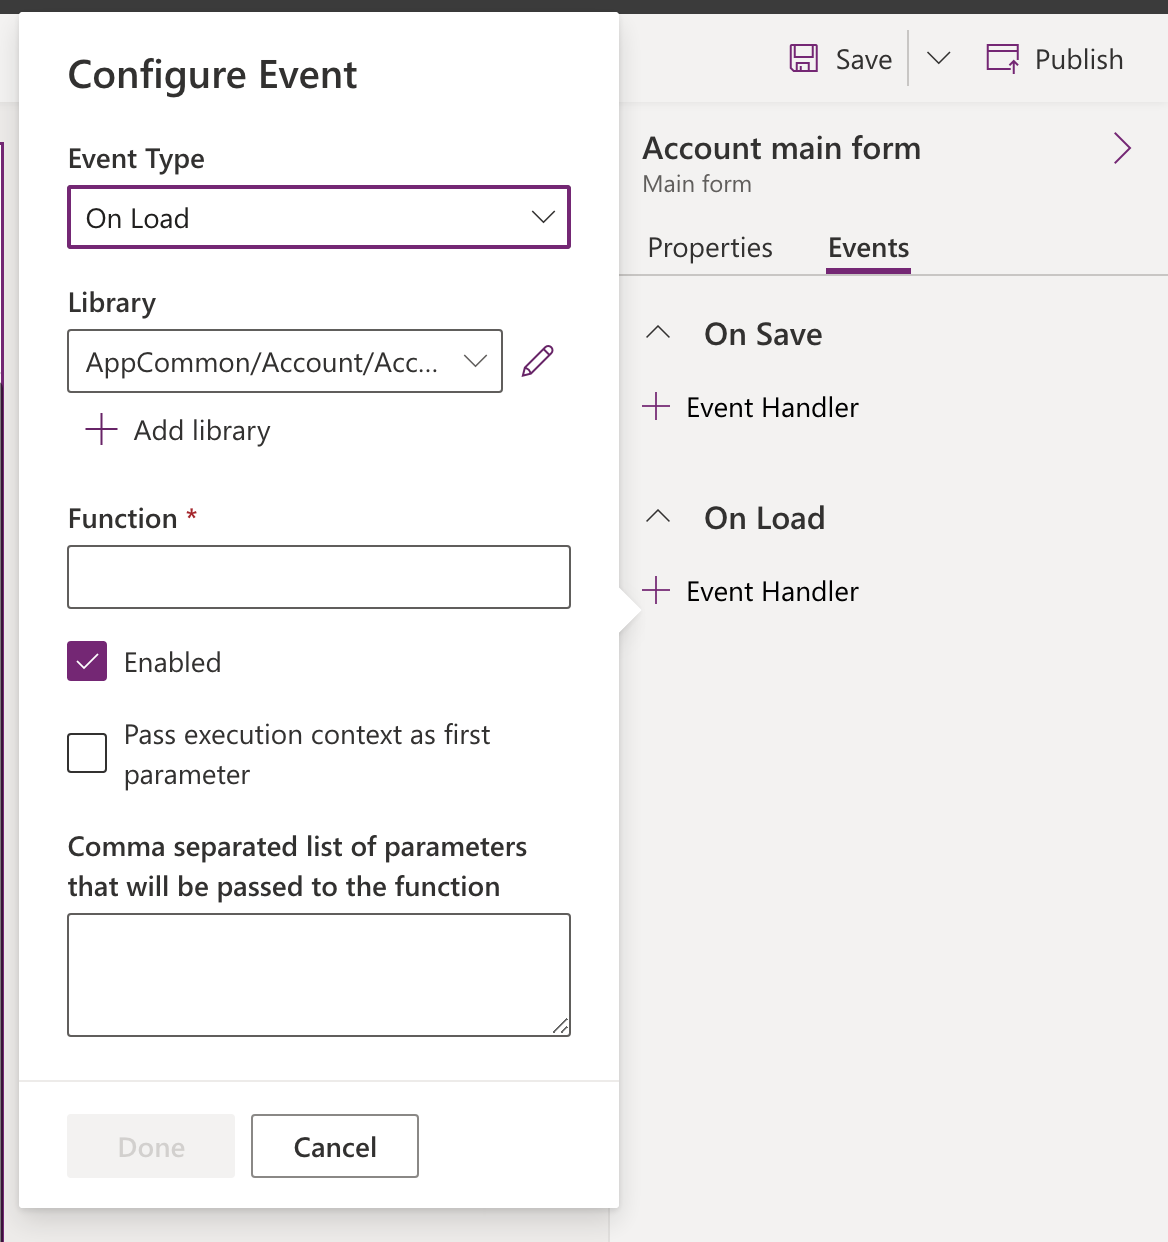
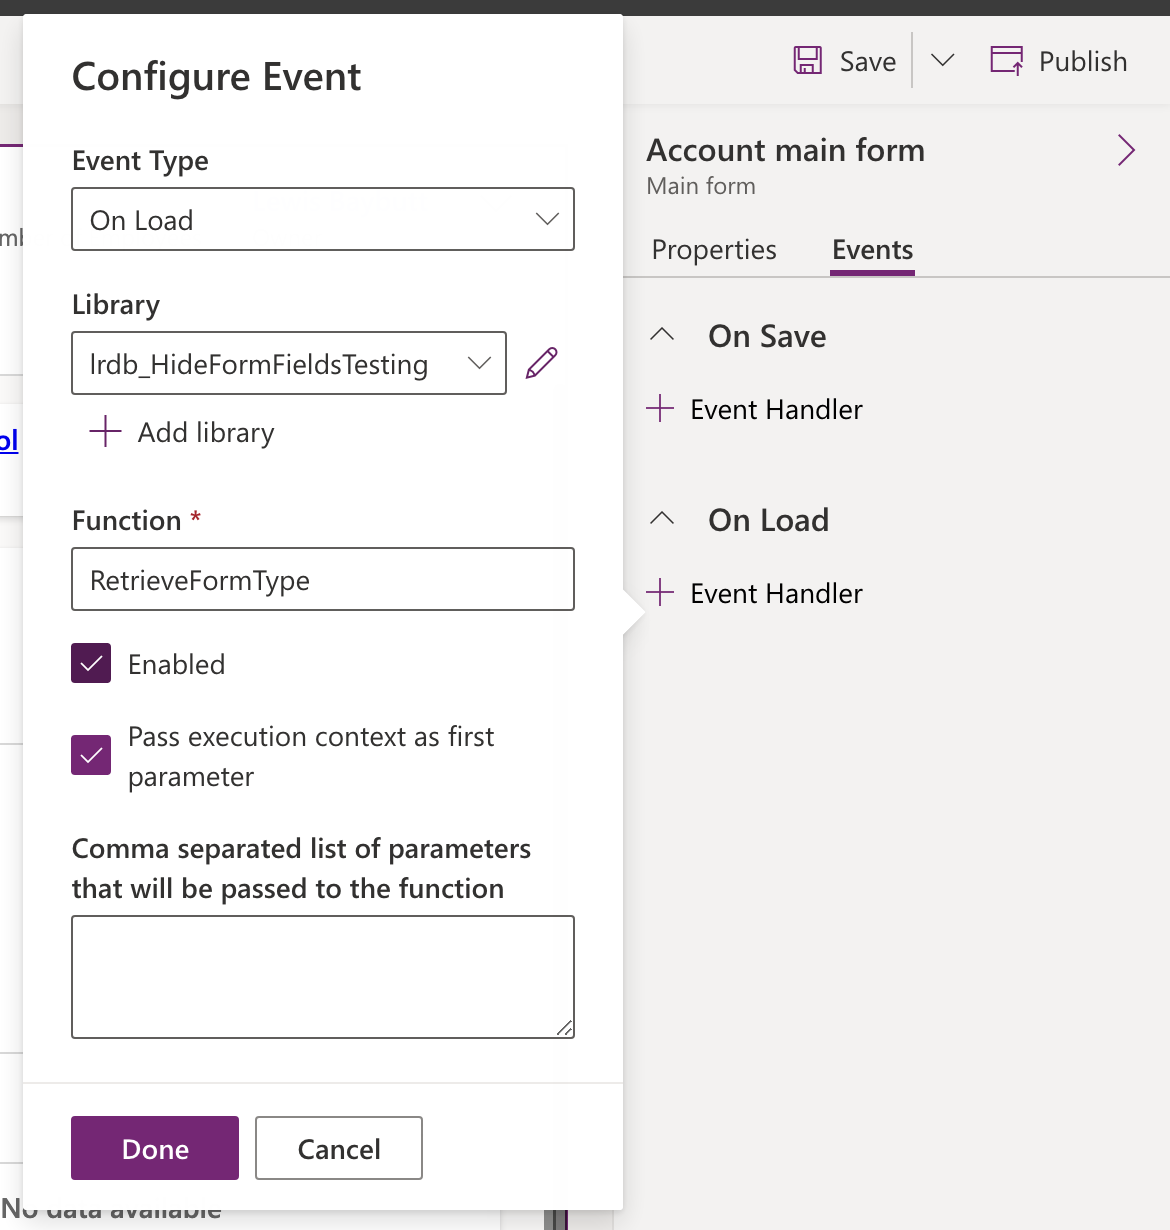
Now we need to do a few things to configure our event. First select the library you just added to your form and which we created earlier as a web resource.
Following that we need to tell the event the function to run in our library. Remember how I said we can have one file or ‘library’ with lots of functions in it and then we choose which one we want to run… well thats exactly what we’re deciding at this point. Here we need to supply this input with the name of our function which is the string we used after the ‘function’ keyword in our file prior to our rounded brackets holding input parameters.
Make sure you have the enabled checkbox ticked as well as the following one to pass execution context in to our function.
Now our JavaScript should be running when we load our form! Well… don’t forget to save and publish all customisations first 😉
Testing getting our form type
Let’s test things out now that we’ve saved and published everything. If we now open our model driven app and navigate to the table we applied the changes to, prior to opening a record or creating a new one, lets do a right click anywhere in our browser and open up the developer tools by selecting Inspect. Then we need to open the console.
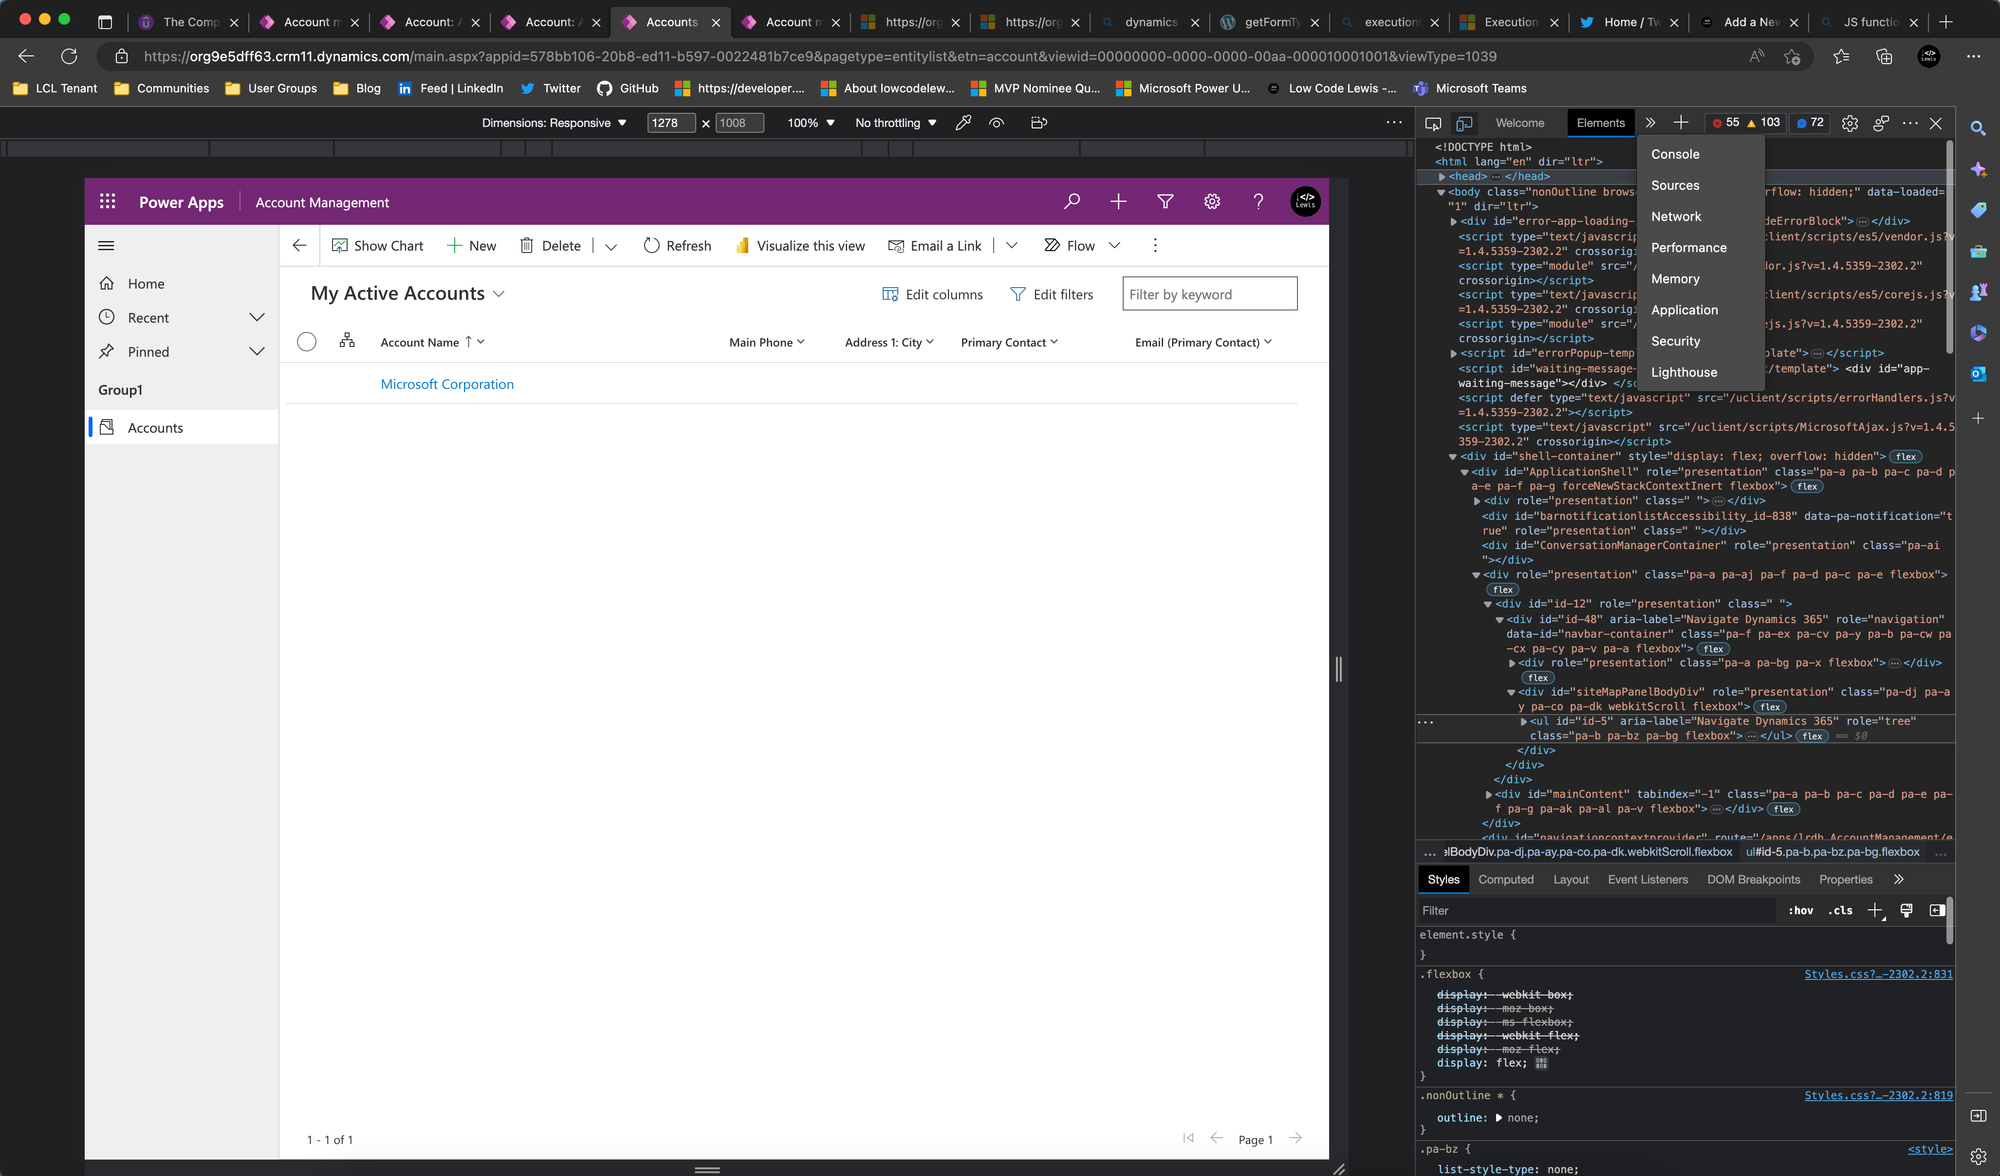
Now we can see everything that is being logged in the console of our browser to see the outputs of our JavaScript code running in our form event. Now we can go and open the form to see the form type returned using console.log()
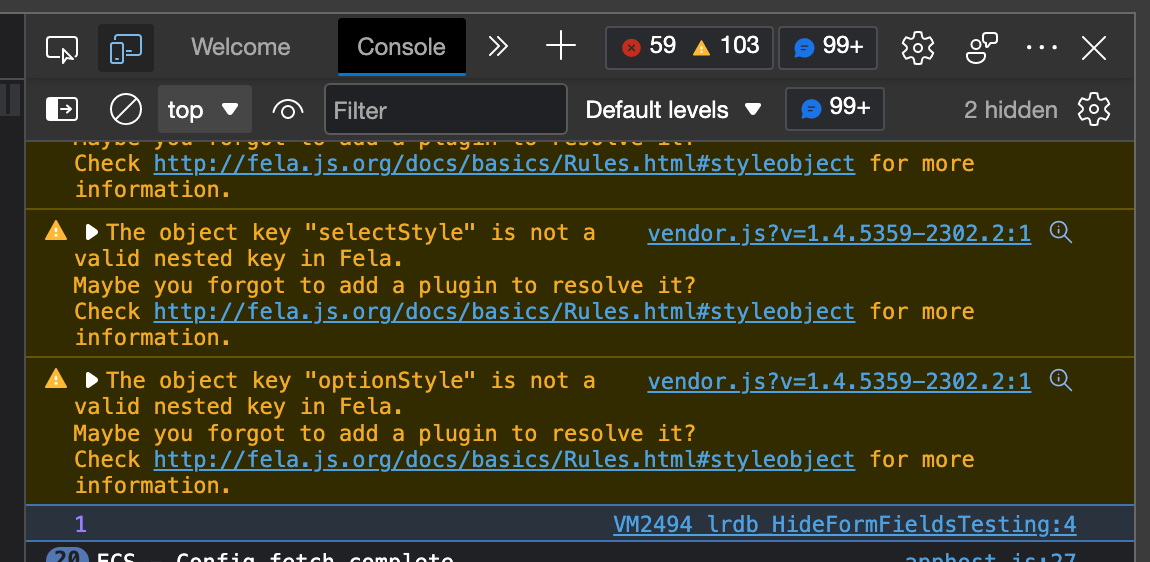
Cool! I can see something has appeared in my console and I’ve got my web resource name right next to it! This is what I’ve written to the console in my RetrieveFormType function being run by my form event. So this is saying the form type is 1… what does that mean though?
Form types in Dynamics 365
So let’s take a look at what the numbers returned by our form type actually mean so we can use them in later code and if statements.
| Undefined | 0 |
| Create | 1 |
| Update | 2 |
| Read Only | 3 |
| Disabled | 4 |
| Bulk Edit | 6 |
Here we have the type of form against the number JavaScript will return. So we know that above I had opened a create form by clicking the ‘New’ button to create a new record.
Now we can go back to Visual Studio Code and start adding some more tasks to our function to do things based on the form type we’re looking at…
Hiding the timeline if our form is in create mode
So now lets bring in a scenario to achieve a requirement. If my form is in create mode, I won’t be able to use the timeline yet. So instead of showing an ‘almost there’ message or something like that which is the behaviour out the box, why don’t we just completely hide the timeline for now! You might not want to do this, but hopefully it’ll give you an idea as to how we can use this functionality.
So first, to be able to control the section that the timeline is within, we need to know the name of this section on the form… so lets grab that before we go and edit our code…
Let’s go back into our form editor and select the section we want to hide, and take note of the name of it.
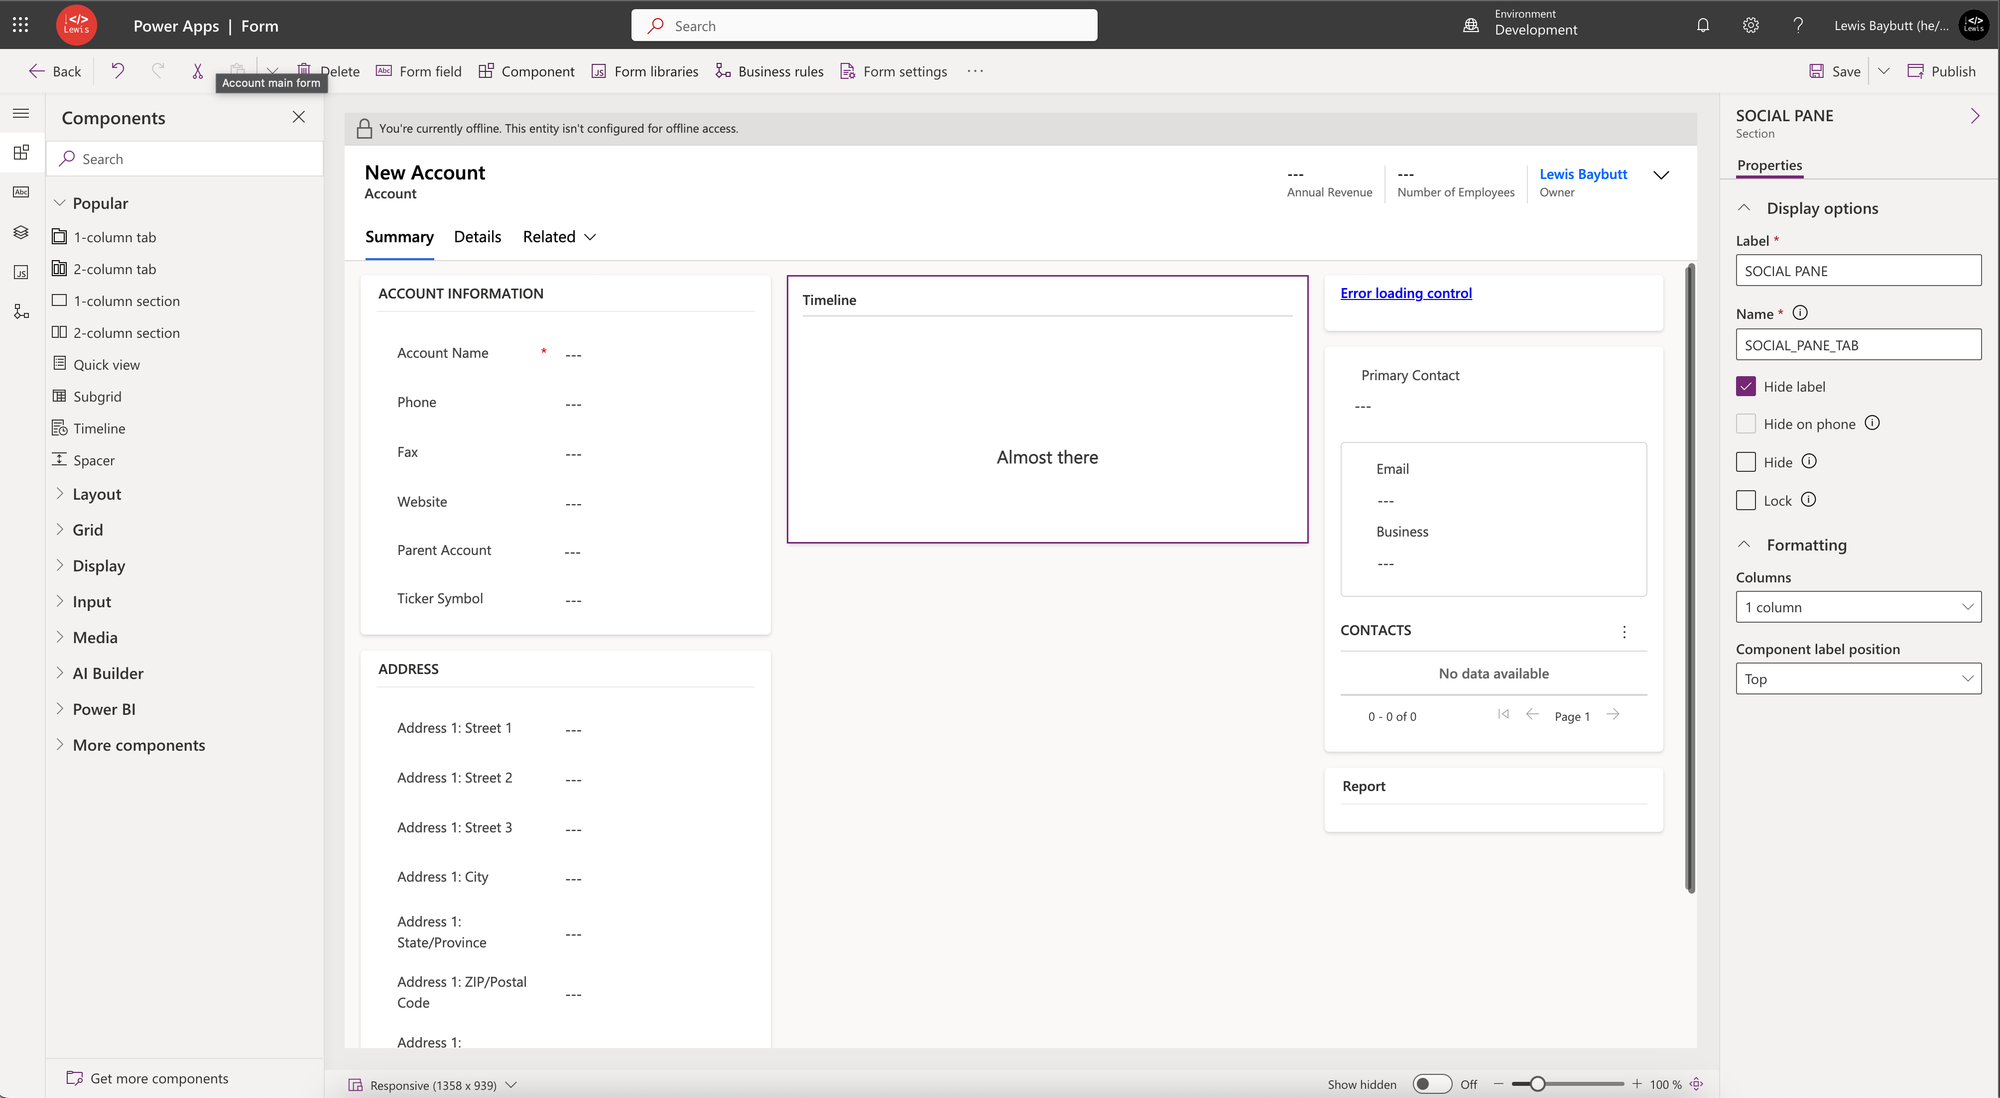
Okay, so the name of my section is “SOCIAL_PANE_TAB”. We’ll need this in a moment.
Now, lets go back to Visual Studio Code with the file we created earlier open…
Inside of our function, so before the last curly bracket / ‘}’, let’s add some more code. We’ll start with an if statement…
Let’s open our statement using if () and then add curly brackets after it to add in the lines to run if the outcome of the statement is true.
Inside our rounded brackets of our statement lets write our statement. I want this to say that if the form type is create then hide the social pane section. We can write this like this…
if (formType == 1)  {
        let tabObj = formContext.ui.tabs.get("SUMMARY_TAB");
        let sectionObj = tabObj.sections.get("SOCIAL_PANE_TAB");
        sectionObj.setVisible(false)
    }
Here you can see I’m getting my tab from my formContext which is holding the reference to my form, then I’m getting my section from my tab using sections.get which I’m then able to use to set the visibility of the section to false.
We have to get the tab object first so we can then get access to the sections object unlike being able to access controls using getControl() with a single command where we can just supply a name or index of the control in the form.
Anyway… our code should now look a little more like this. You can ignore the text on line 5 starting with //… this is just a comment.
function RetrieveFormType(executionContext) {
    let formContext = executionContext.getFormContext();
    let formType = formContext.ui.getFormType();
    console.log(formType);
    let tabObj = formContext.ui.tabs.get("SUMMARY_TAB");
    let sectionObj = tabObj.sections.get("SOCIAL_PANE_TAB");

// If form is create form, hide timeline section held in sectionObj
    if (formType == 1) {
        sectionObj.setVisible(false)
    }
}
We now need to edit our web resource in Dataverse / Dynamics 365. Lets go back to our solution and upload the new file.
Here I’m just uploading a new file and clicking save. Now we’ve got our new JavaScript in Dataverse, our form is already referencing the web resource and the function that we’ve updated, lets publish all customisations and test things out in our app again.
As you can see from the moving image above, when I open an existing record my timeline appears and when I go to create a new record my if statement outcome is true and my further JS code hides the timeline section!
I hope you liked this post which explained how to hide specific form sections based on the type of form being opened in a model driven app or Dynamics 365 CE. If you didn’t understand something, or something isn’t quite working for you, let me know in the comments below!
Happy Power Apping!