

With regards to development best practices and keeping control over development of solutions in an organised fashion, whilst including elements of automation, Azure DevOps can come in pretty handy!
Azure DevOps and various functions within Azure DevOps allows you to control your development projects including complete control over projects and the tasks needed to carry out the work on solution development, the appropriate storing of your code in repositories, pipelines which allows for automation of various things such as environment backups and solution deployments, test plans and more.
In this post, I am going to discuss how you can configure your first Azure DevOps project to work with Microsoft Power Platform.
Creating your project
In order to create your first project in Azure DevOps, go to
dev.azure.comand if you’ve not already set up an organisation, go ahead and set one up to start.
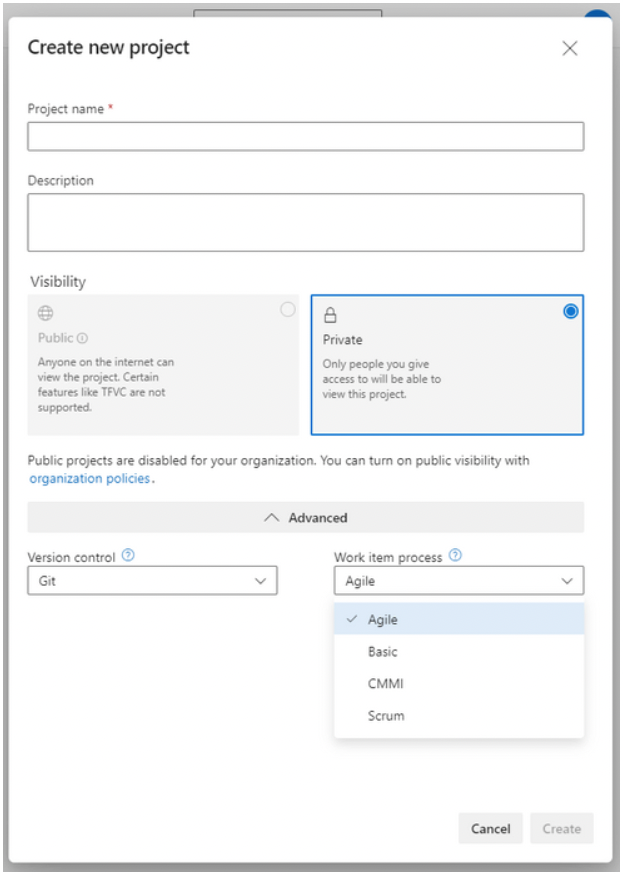
Once you’re in your organisation, you will need to create a new project. Give it a name, a description should you think it necessary, and then set the work item process to Agile. This will give us a couple more options than using something like a ‘Basic’ project.
Give your project a place to hold your code
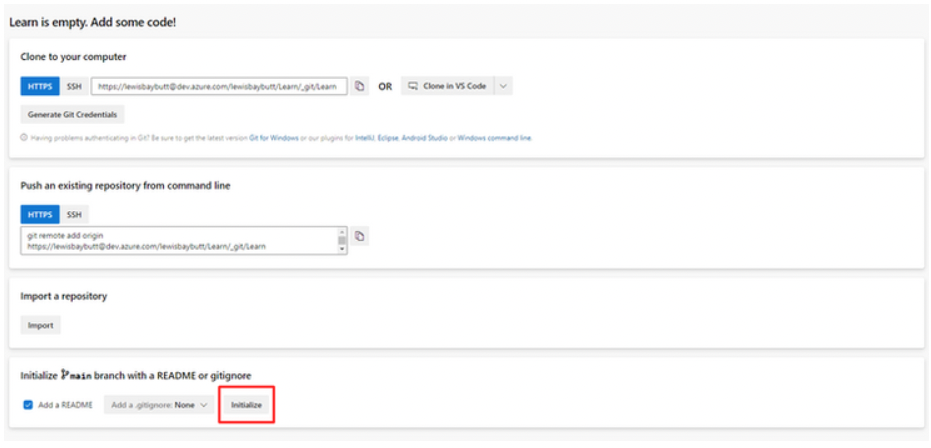
This next step isn’t completely relevant to configuration of Power Platform build tools and connecting to Dataverse environments, however, once you begin to create pipelines and use development automation with Azure DevOps and Power Platform, you’ll need somewhere to hold your code.
In this case, you can either use a repository within Azure DevOps which you can create by initialising the repo inside of DevOps, or in your pipelines you can create connections to external sources such as GitHub.
Making the Connection
So, the reason that you’re here! Now we need to create the connection between our DevOps project and our Power Platform environments to give DevOps access to Dataverse. This requires some steps in Azure and Powershell, not only work in your environment admin center.
First you want to head over to your Azure portal and open up Active Directory for the same organisation as your Power Platform Environments.
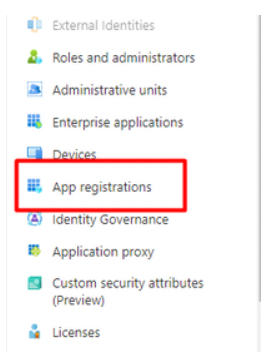
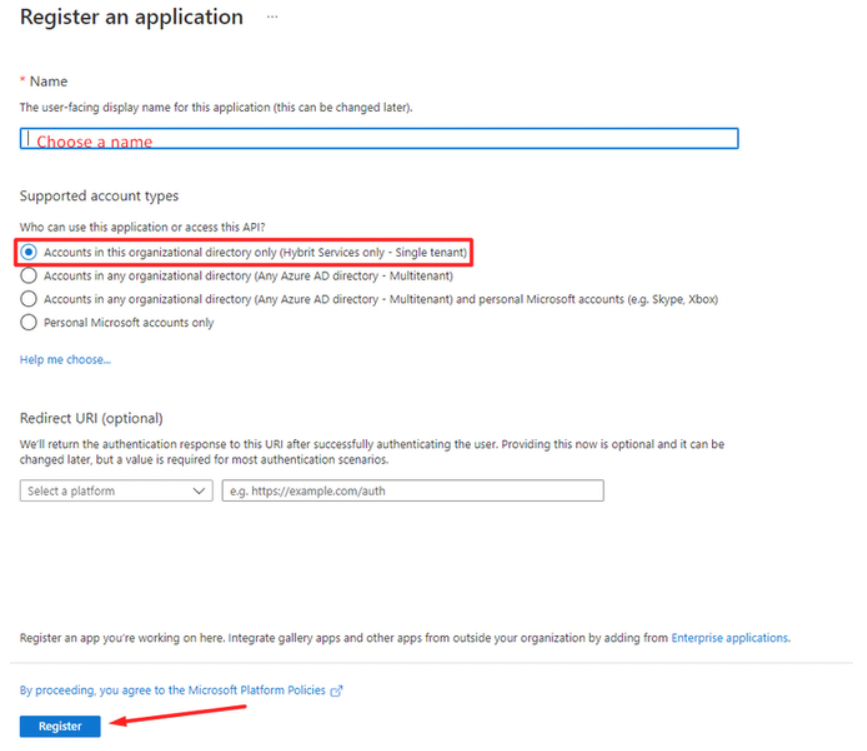
Once you’re in AAD, you want to go to app registrations and create a new app registration to make the connection with Dataverse. Follow the image below for greater detailed steps.
4. Next we need to give our app registration API permissions and create a client secret that we can provide to Azure DevOps later. You will want to add the permissions similar to the screenshot below and ensure you grant admin access to the permissions which may need to be done by a global admin.
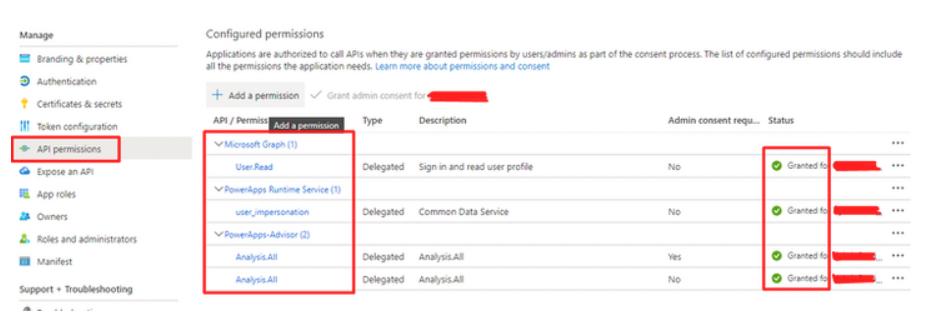
Once you’ve given API permissions to your app registration, go to certificates & secrets, client secrets and create a new client secret. Ensure you make a copy of the client secret value as this will be hidden once you’ve refreshed your page or navigated away.

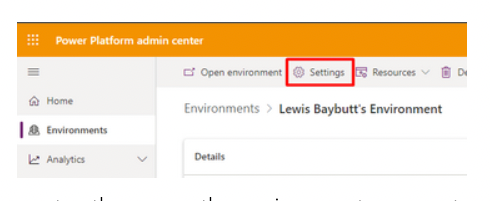
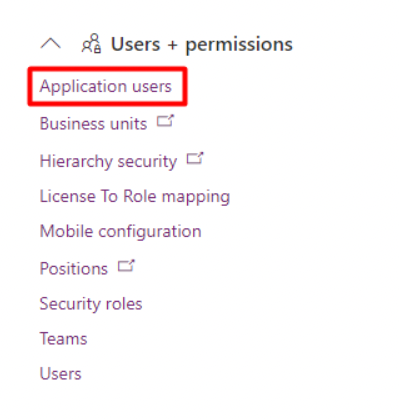
5. Once you’ve created your app registration, we need to add it as an application user in your Power Platform environment. Go to your Power Platform admin center, then open the environment you want to work with in DevOps. Click settings, and under ‘users + permissions’ click ‘application users’, then click ‘new app user’ in the command ribbon.
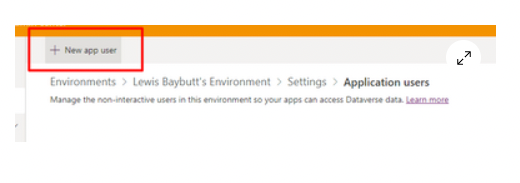
Then you need to click ‘add an app’ and select the app registration you made in AAD’. Select a business unit and apply an appropriate security role. Generally if you’re doing environment edits and solution management you would look at adding a system administrator role.
6. Whilst we have added our app user into our Power Platform environment, we still now need to register our service principal with Microsoft Power Platform using a powershell script. As per
Microsoft Docs, we need to use the following script to register our application created in Azure AD.$appId = "CLIENT_ID_FROM_AZURE_APP" # Login interactively with a tenant administrator for Power Platform Add-PowerAppsAccount -Endpoint prod -TenantID $tenantId # Register a new application, this gives the SPN / client application same permissions as a tenant admin New-PowerAppManagementApp -ApplicationId $appId
7. Now that we have setup and registered our application in Azure and Power Platform, we need to create the service connection in Azure DevOps to give it access to make our Build Tools work. To do this, you need to go back to the new Azure DevOps project you’ve created and head to the ‘Project Settings’. Then we need to head to our ‘Service Connections’. If you haven’t already installed Power Platform Build Tools at this point, you’d need to head to the DevOps extensions market place via Visual Studio Marketplace and browse for Power Platform Build tools and follow the steps to install this in your Azure DevOps organisation.
Now you’re going to need to click to create a new service connection and browse for Power Platform. Click next.
Server URL: Here you need to fill in the environment URL you want to connect to and have created your app registration and service principal in.
Tenant ID: Here you need to fill in your tenant ID that you’re working in which you can find in the Azure portal or in the session details in Power Apps.
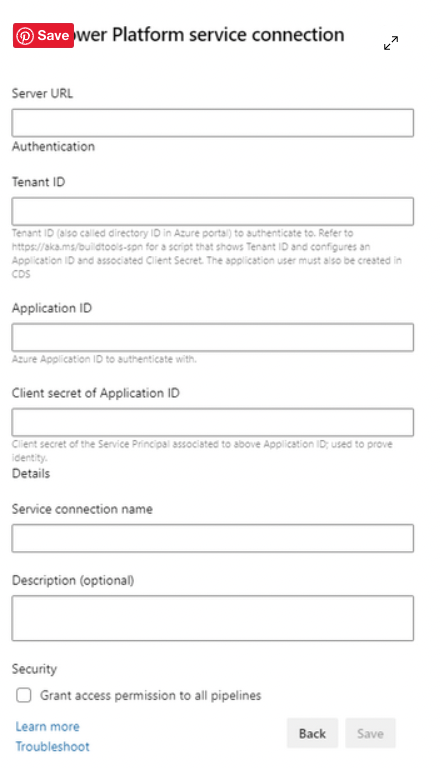
Application ID: Here you want to fill in the application ID of the app registration you created in Azure AD. You can find this on the overview page of the app registration you created.
Client secret of Application ID: here you need to fill in the Client Secret value of the client secret you created and noted down earlier. Remember this is the one you can’t go back to the Azure portal to find!
Finally give your service connection a preferred name and description if you wish and if appropriate grant access permissions to all of your pipelines.
Pipelines
So, now you’ve connected your DevOps organisation project to your Power Platform environment, and you can get to work creating pipelines using Microsoft Power Platform build tools!
You might want to check out this post on SharePains by Pieter Veenstra to get started on your first pipeline, this will show you how to automate exporting a solution in your environment and pushing it to a repository.
Step 1 in Application Lifecycle Management and the Power Platform (sharepains.com)