

Want to ensure your users have a wide scope of methods to login to your Power Pages *-+ business website using, without them having to create yet another account on another platform just to interact with your services?
In Power Pages, we have the capability of enabling and configuring a number of different identity providers for our users to sign in using. In this post, I’ll show you how to configure Google as an identity provider so that users can sign in to our business website using their google accounts.
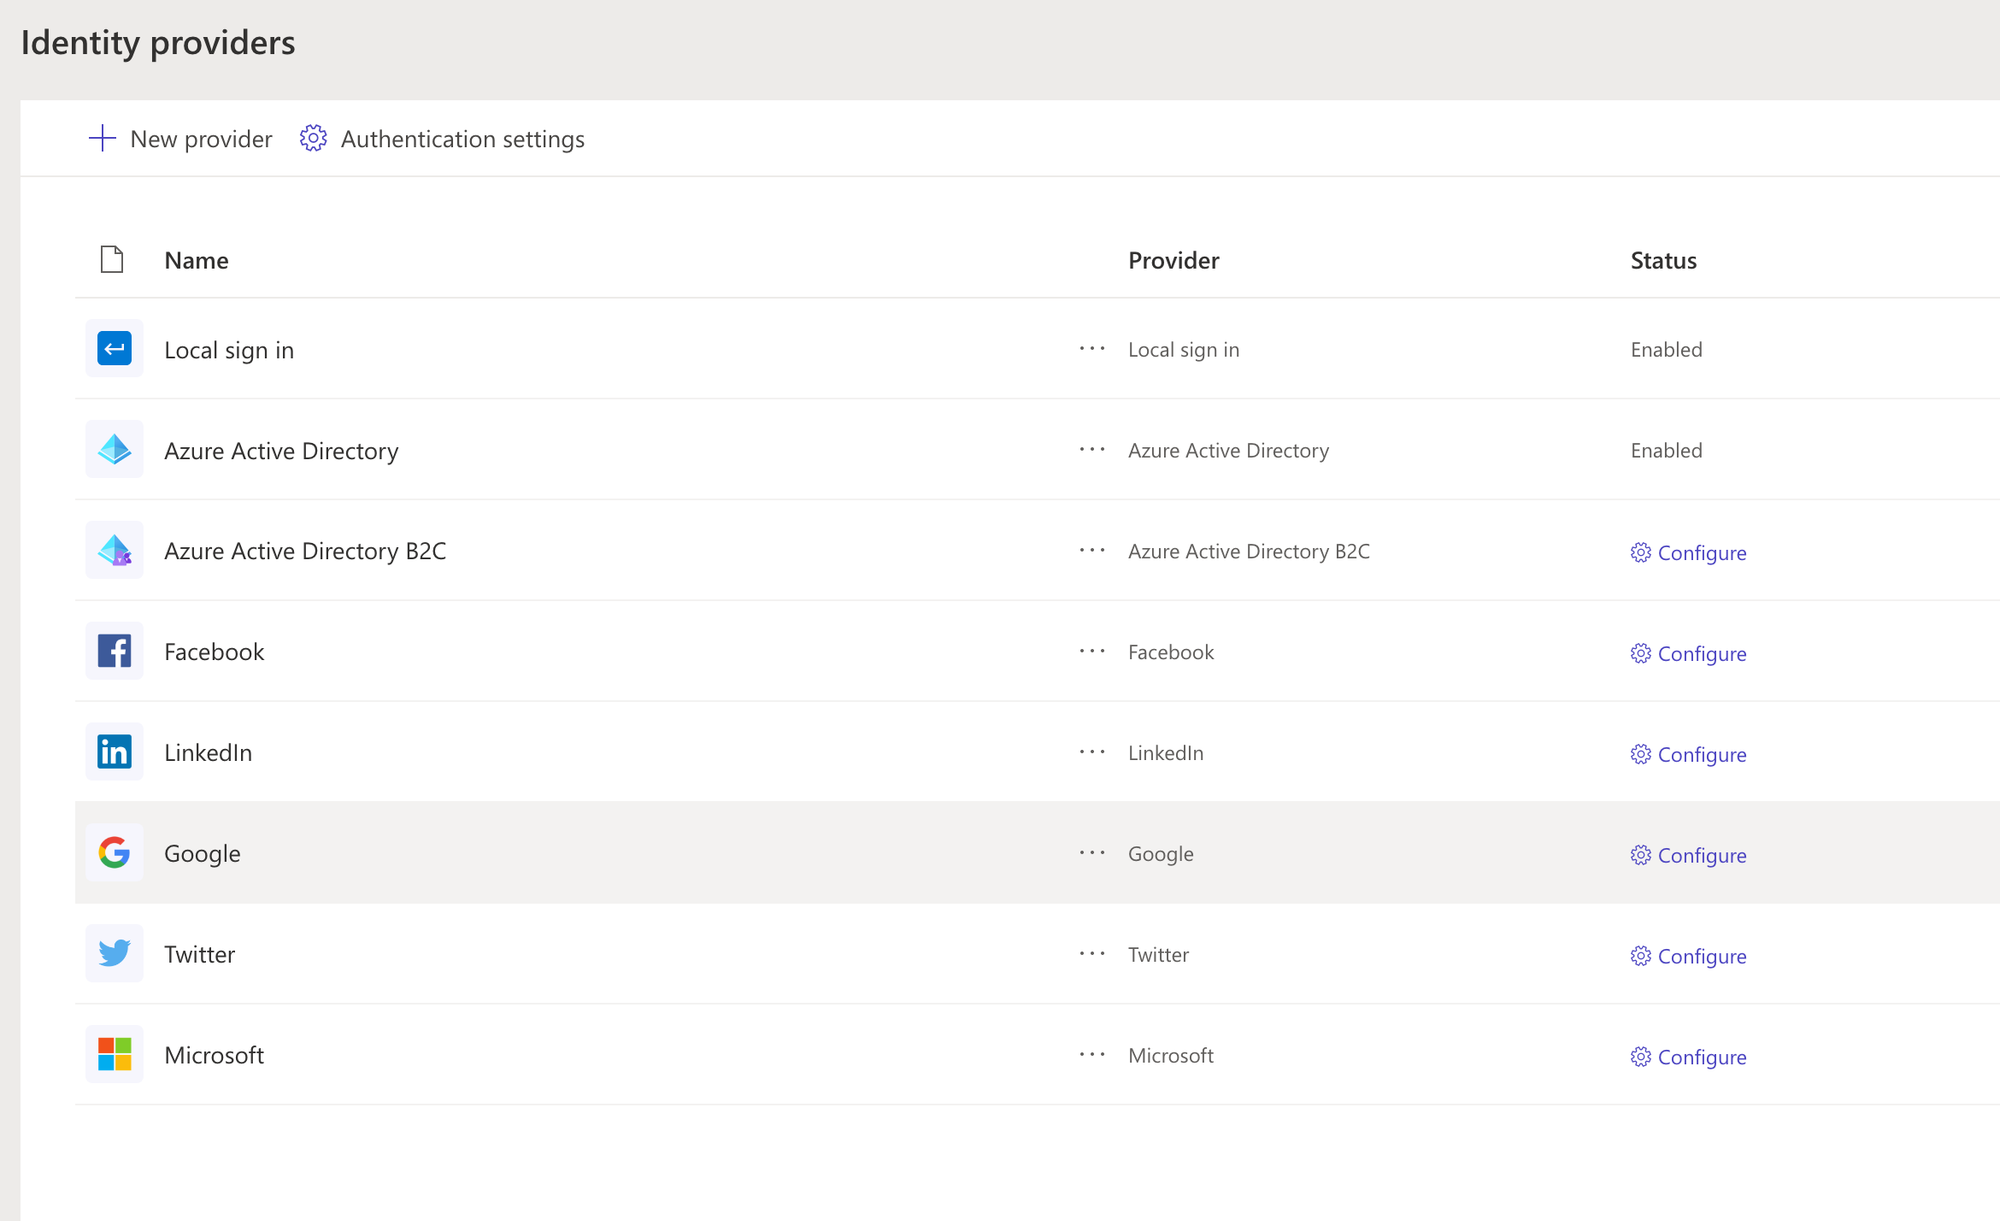
Identity providers in Power Pages
To start, head to your business website in Power Pages and open it up in the edit mode. Then head to setup in the left hand navigation and then select Identity providers from there. Then within identity providers, select configure next to Google.
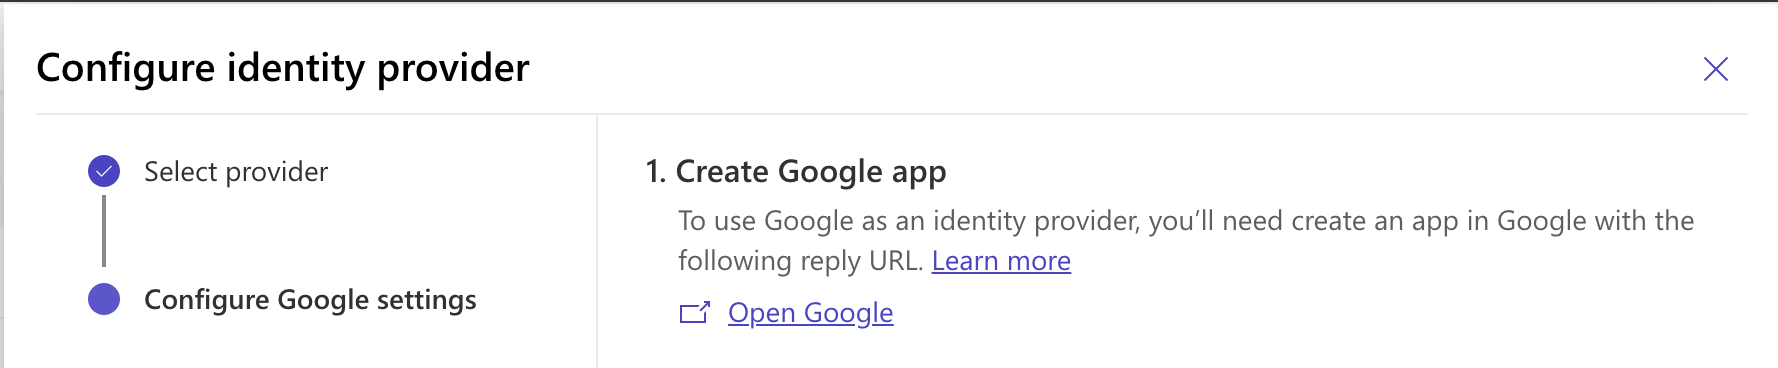
Now select next to configure google settings and select the link to open Google where you’ll be able to create an app in Google for authentication. This is similar to us creating an app registration in Microsoft Entra ID.
Configuring an app in Google Cloud
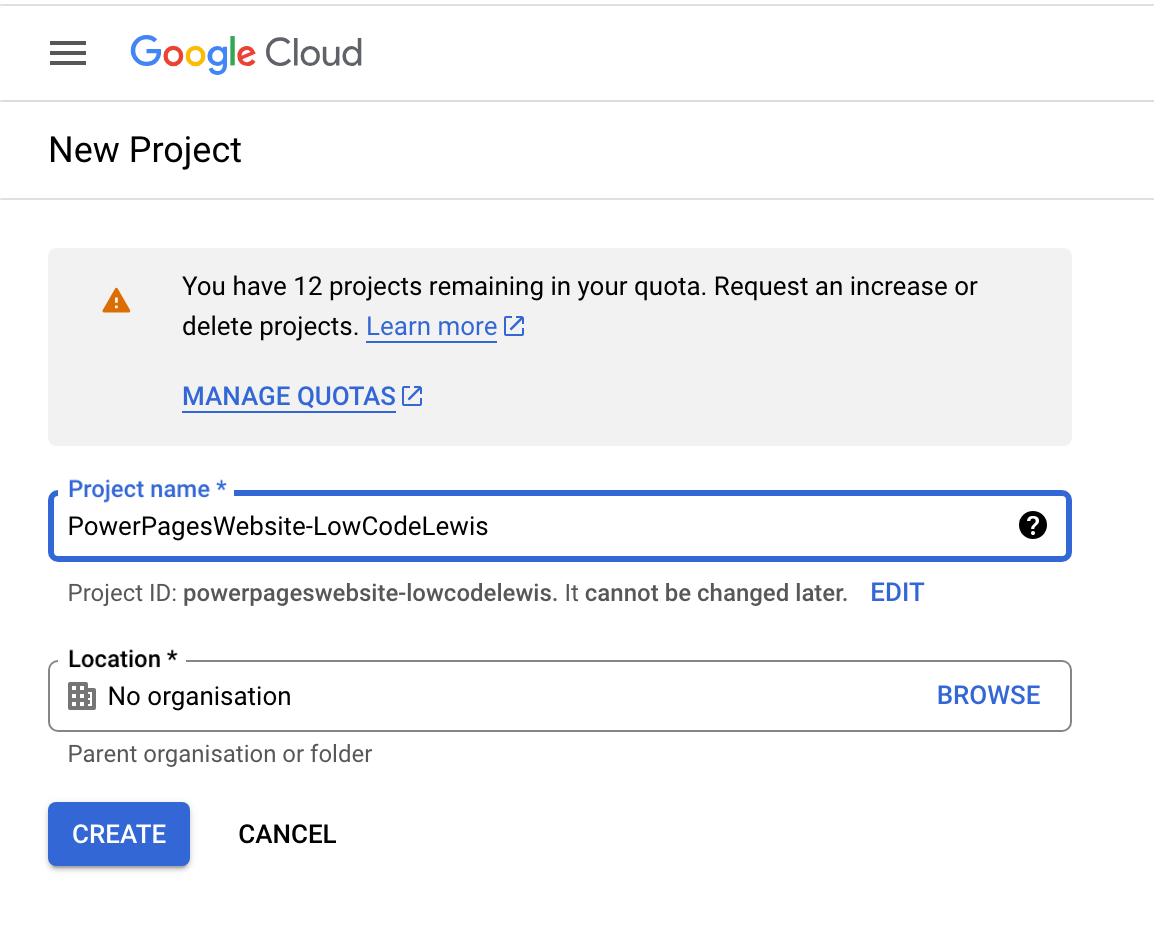
Now in Google Cloud we’ll need to start by creating a project. This is like how in Azure we might create resource groups or subscriptions and things like that. This is something all of our apps will sit in. Create a new project and give it a name.
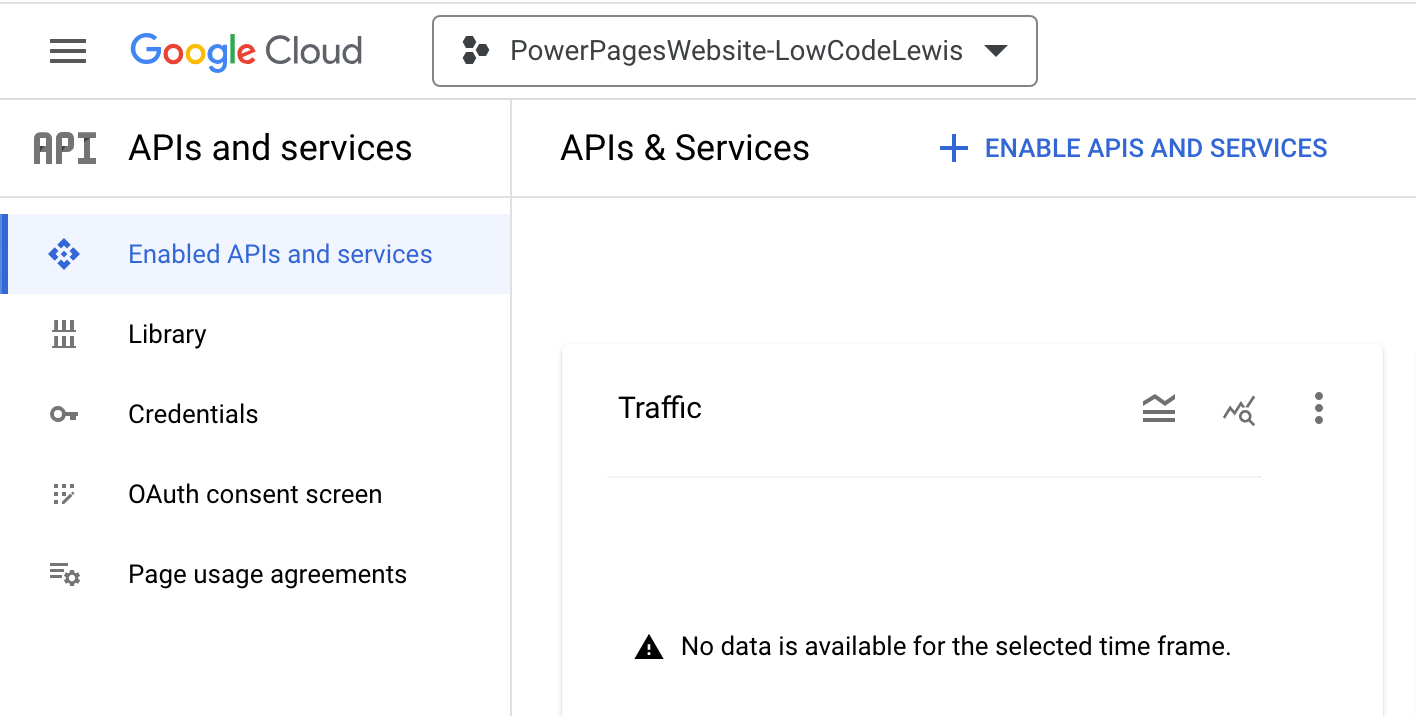
Now we’ll create an app in Google Cloud with a redirect URL set to our website. Inside of your API project, select ‘enable APIs and Services’.
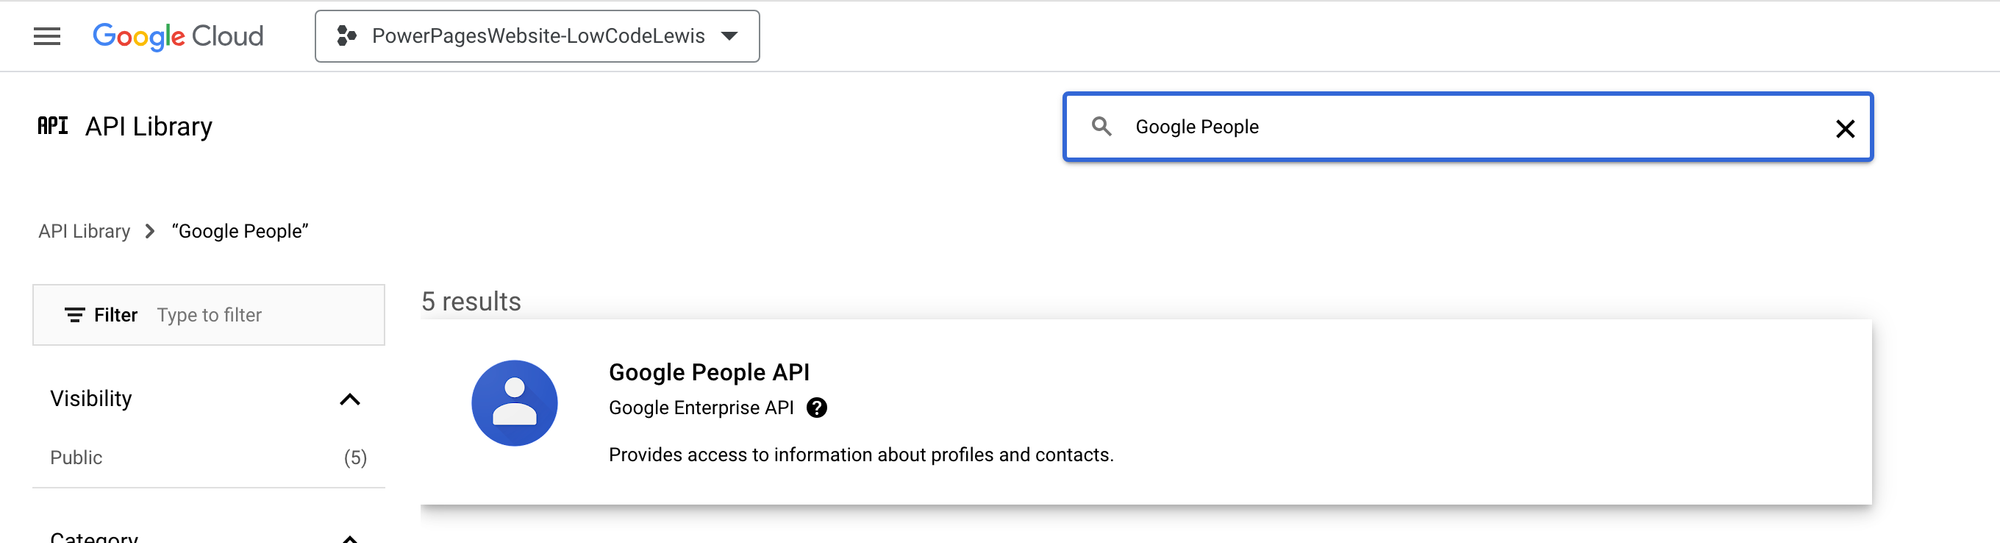
Now search for the Google People API and enable it.
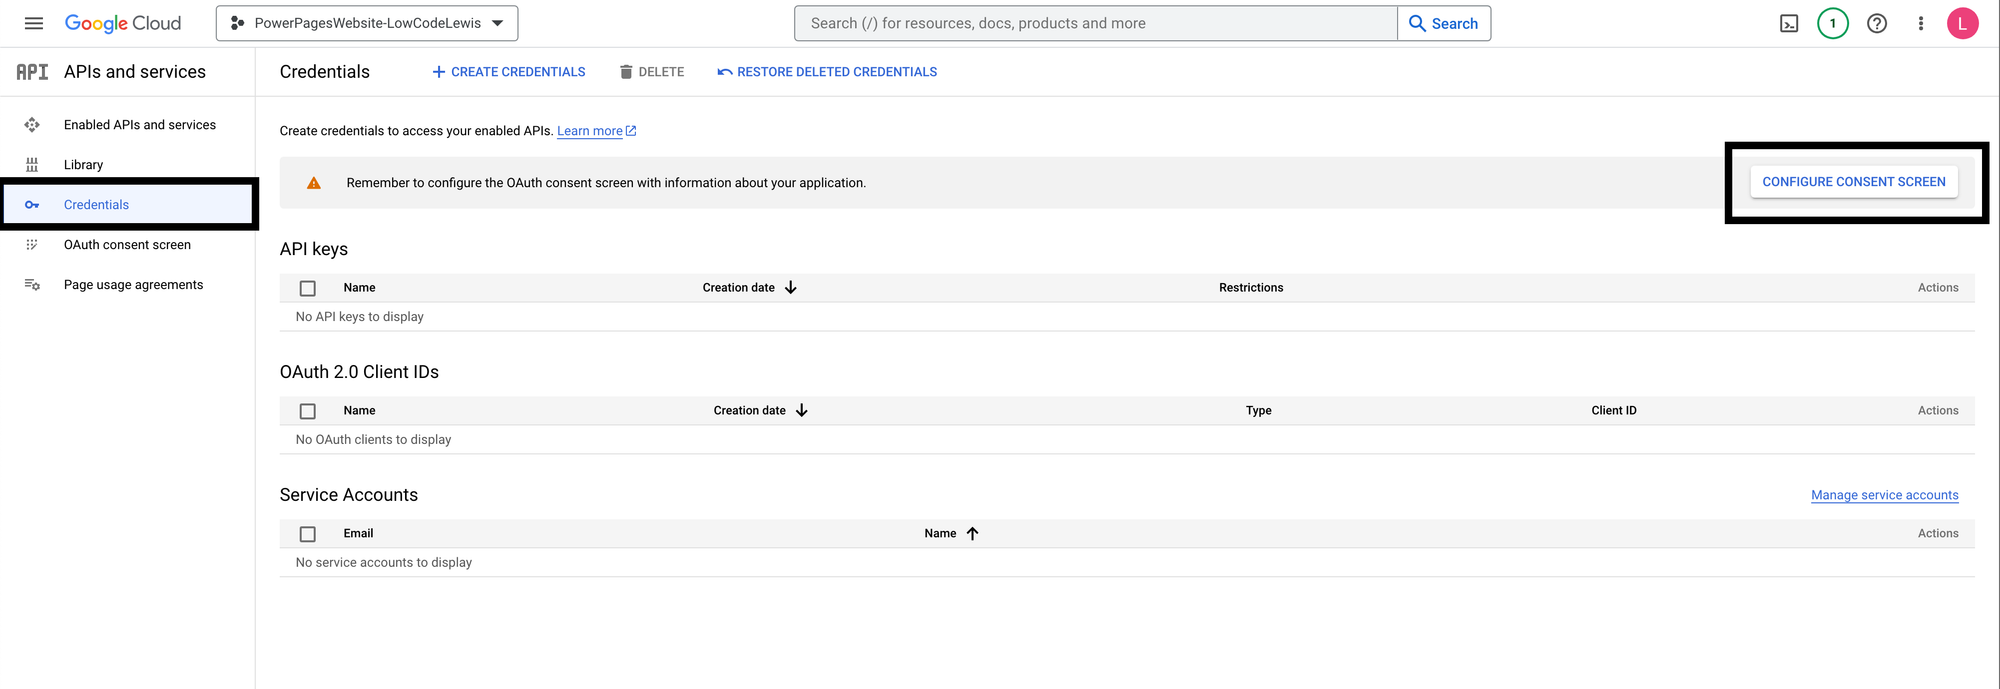
Now head to the credentials tab and then select ‘configure consent screen’.
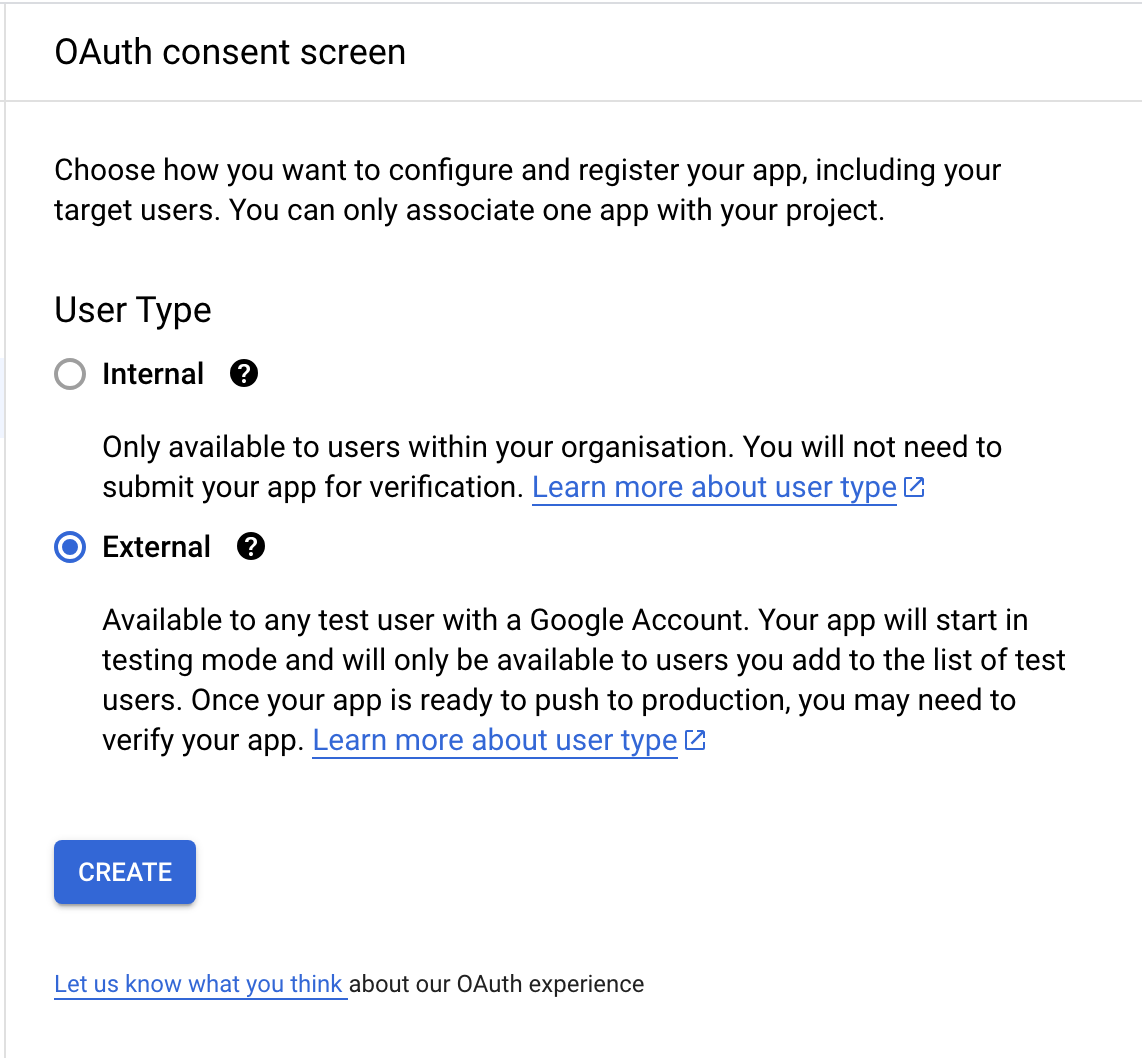
Now select the external user type and select create.
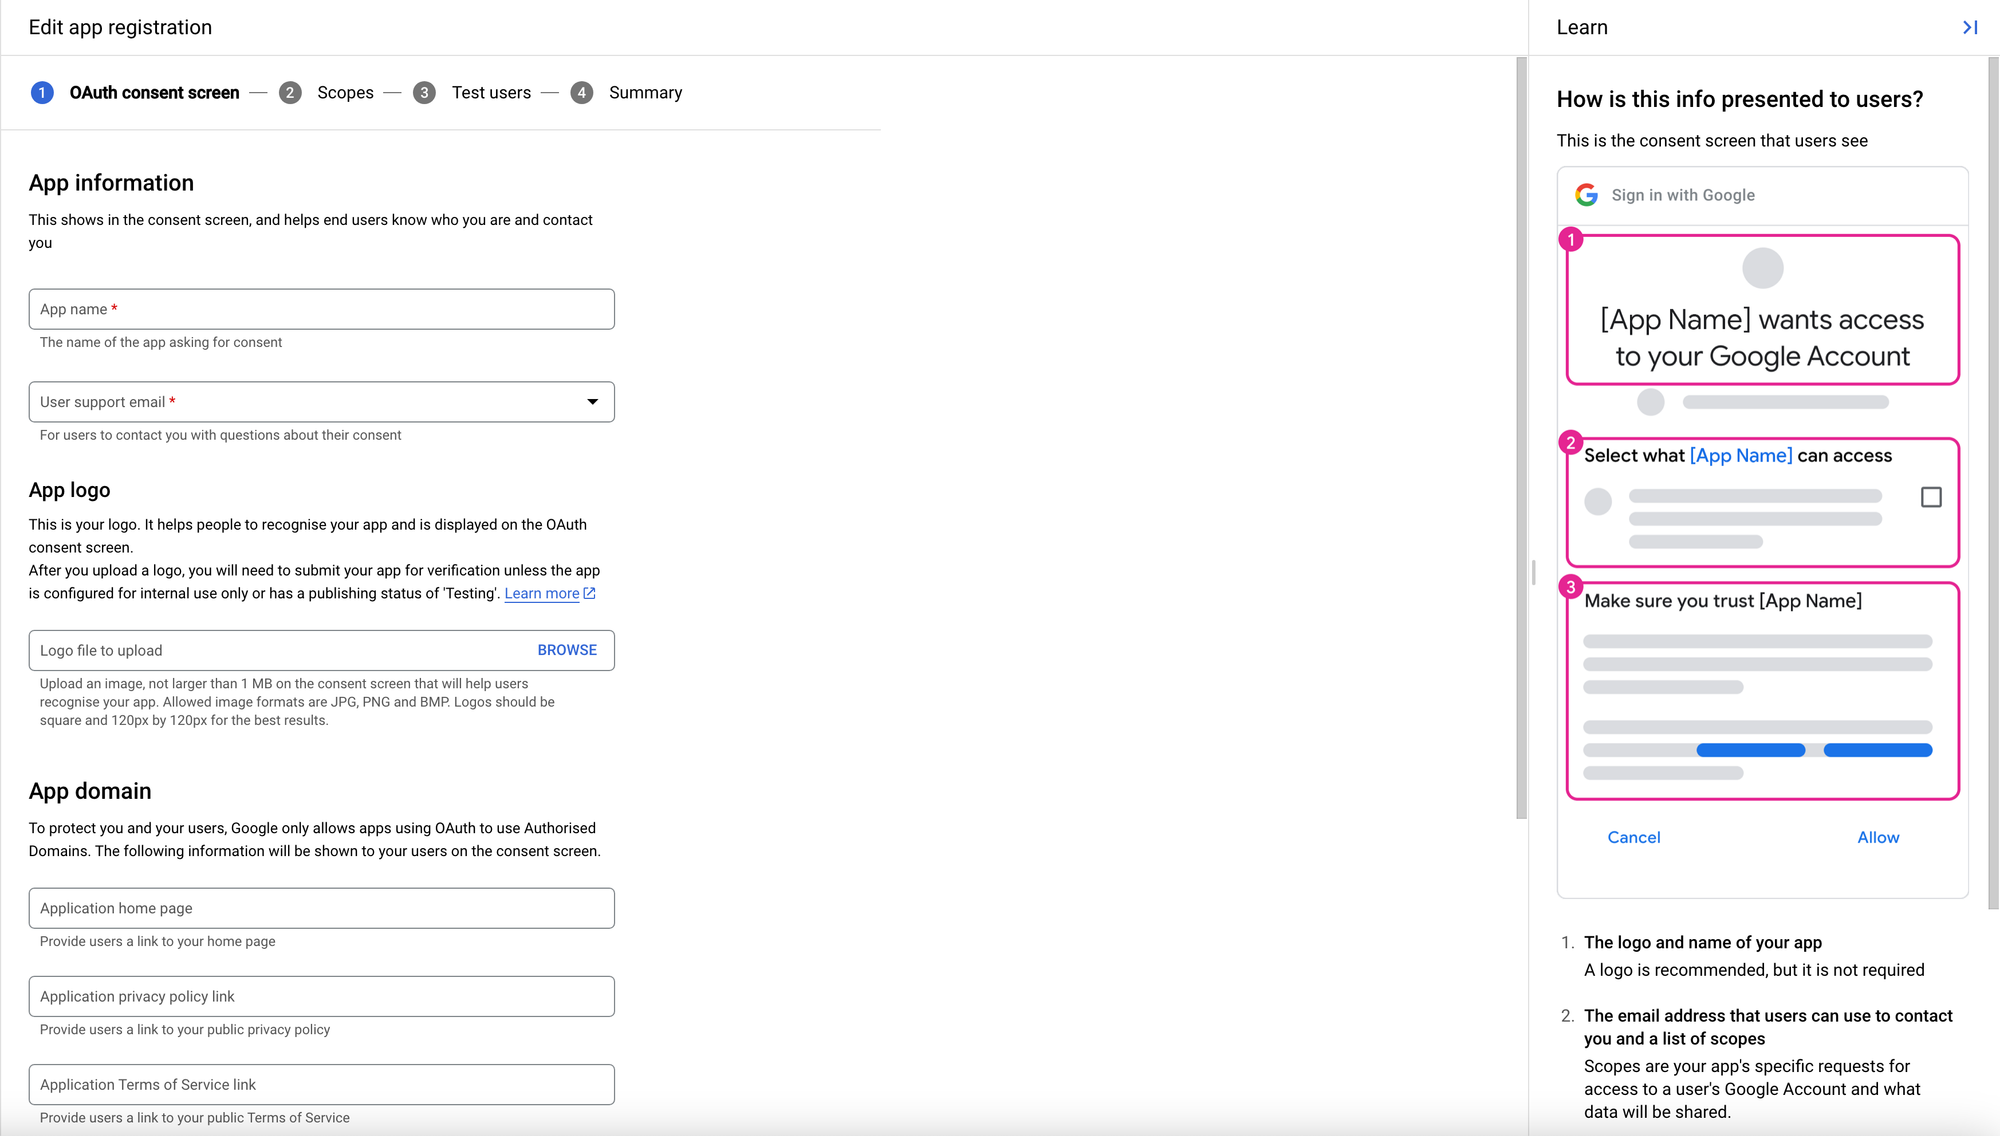
Now configure the app registration, supplying a name and user support email, a logo for your business website (application) and then provide an app home page (website home page), privacy policy link and app terms of service link. You’ll see how users will have the information presented to them in the right hand side bar.
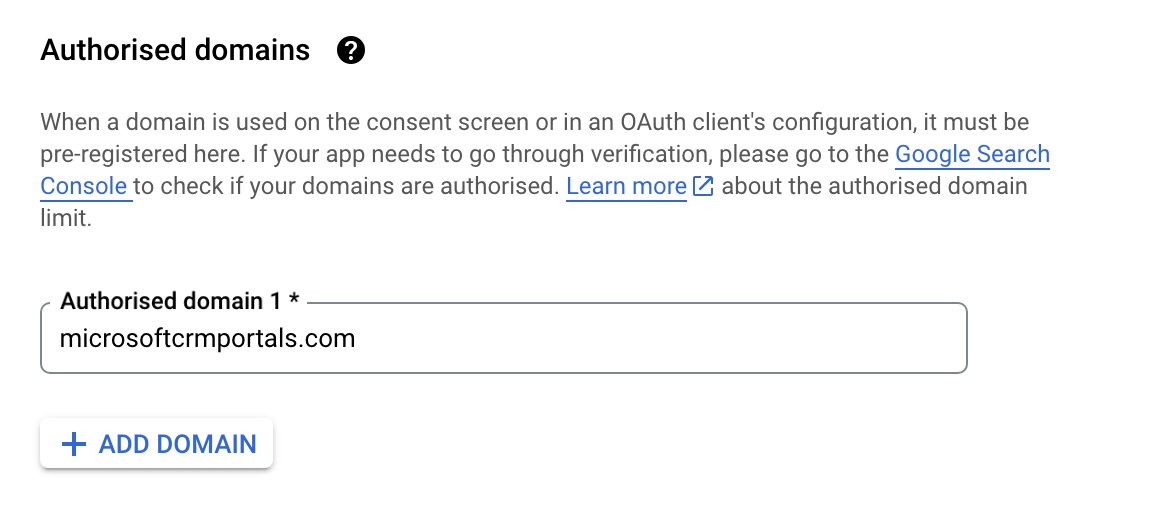
Under authorised domains on this page you’ll need to add your Power Pages website domain. If you have a custom domain, add that here, though if you haven’t added a custom domain for your Power Pages website yet, add ‘microsoftcrmportals.com’ here.
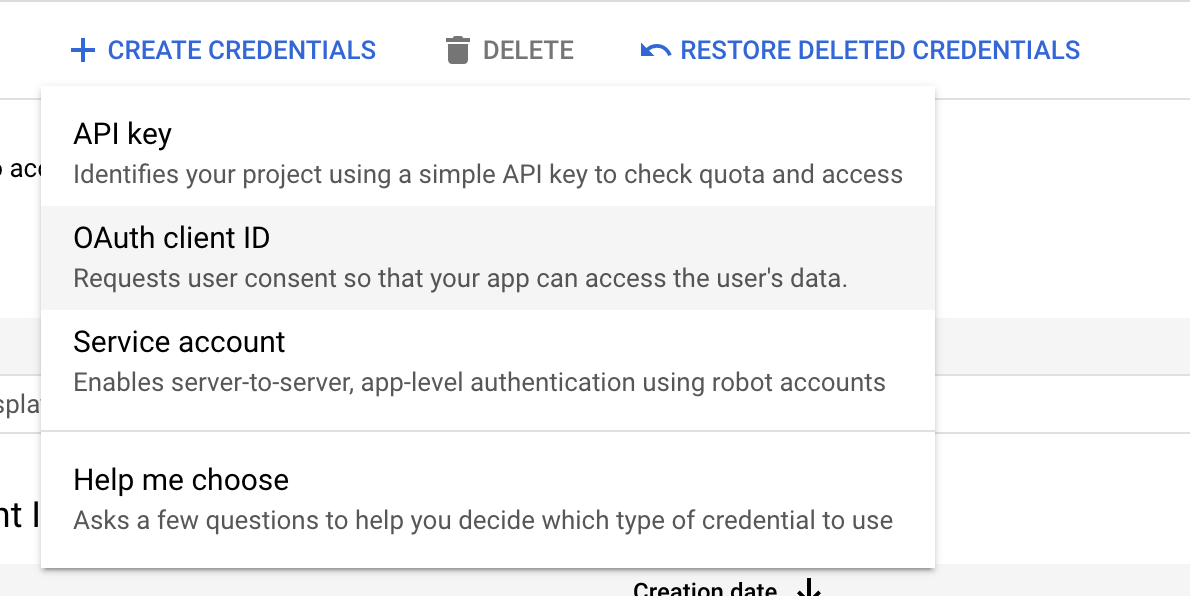
Finish up by selecting save and continue. Now head back to credentials. Select create credentials then ‘OAuth Client ID’
Now select the application type as web application, and add an authorised JavaScript origin. Here add your website URL without a forward slash at the end. Then do the same under redirect URIs with ‘/signin-google’ appended to your URL.
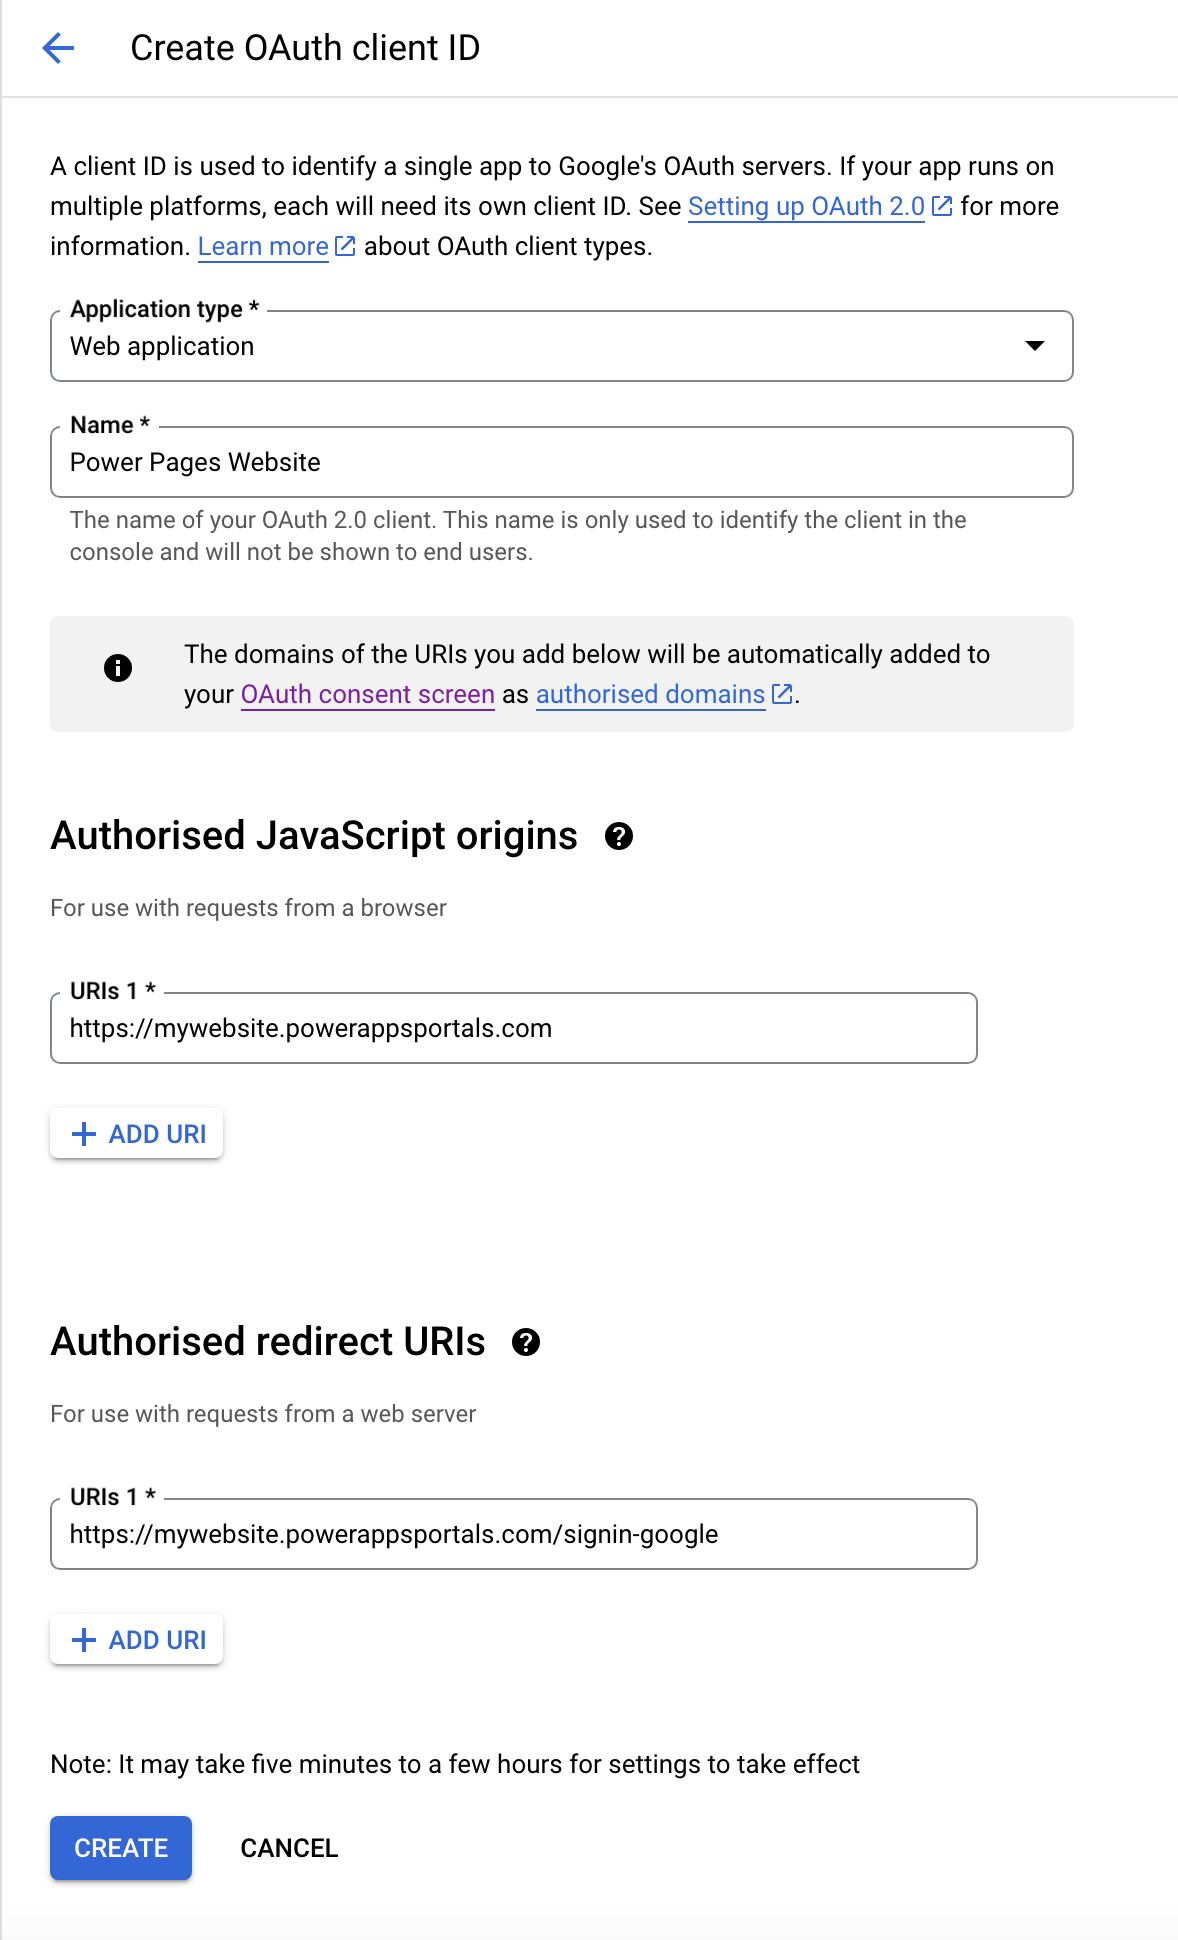
Now finish up by selecting create. Now copy the client ID and client secret that you’re provided with in the pop up following selecting create.
Configure in Power Pages
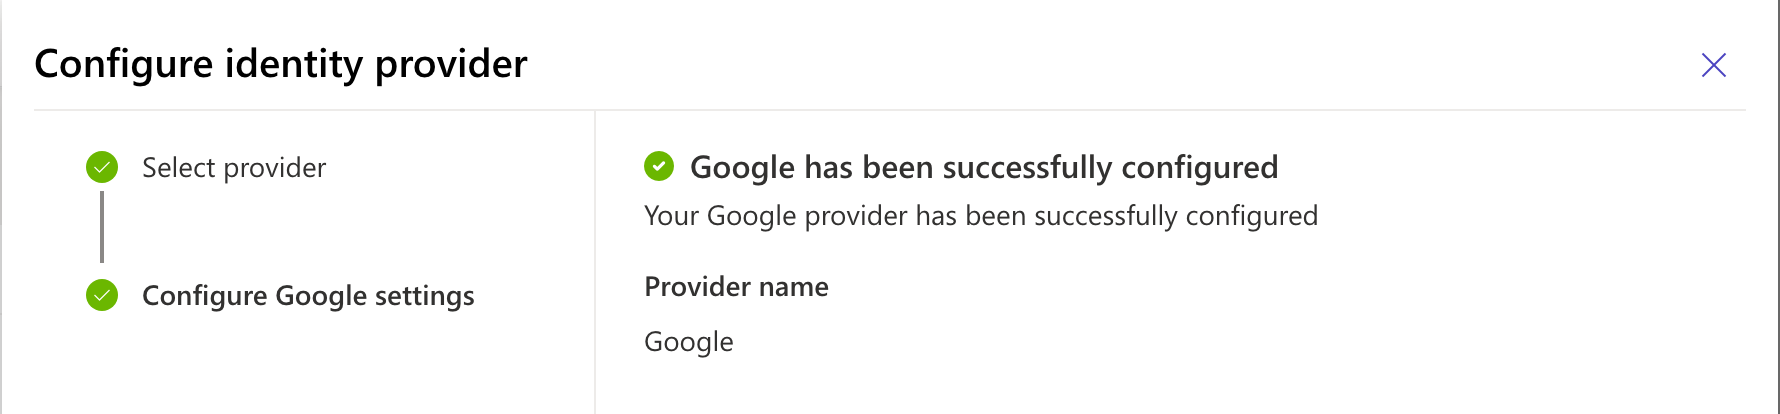
Now in Power Pages continue following the steps in the side pane to configure Google as an identity provider. Paste in the client ID and secret that Google provided here. Then select confirm. If you did things right, Power Pages should say you successfully configured Google.
Test things out with sign in!
Now preview your Power Pages website and select the sign in button. Here you’ll be able to select Google as an option for sign in now. Simply select it and sign in with a Google account!
Here, note that if you set your app to testing mode in Google Cloud, then you’ll only be able to sign in with specified Google accounts you configured. If you published your app to production mode you’ll be able to sign in with any google account.
Anyway, let’s sign in with a Google account.

So I’ve selected Google. Now I get the option to sign in with a Google account as below.
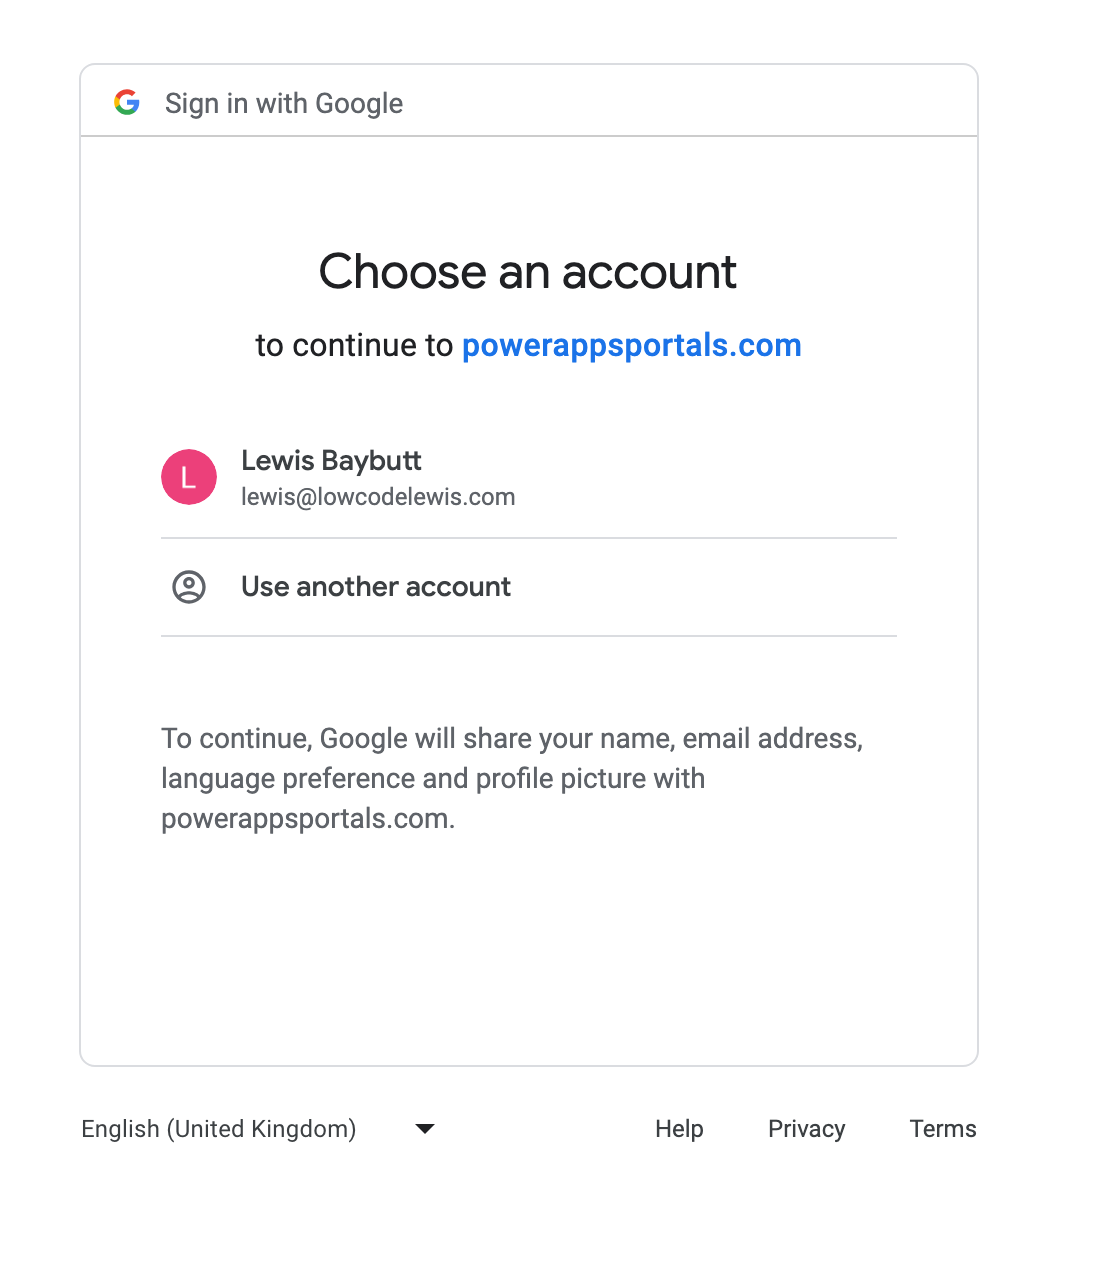
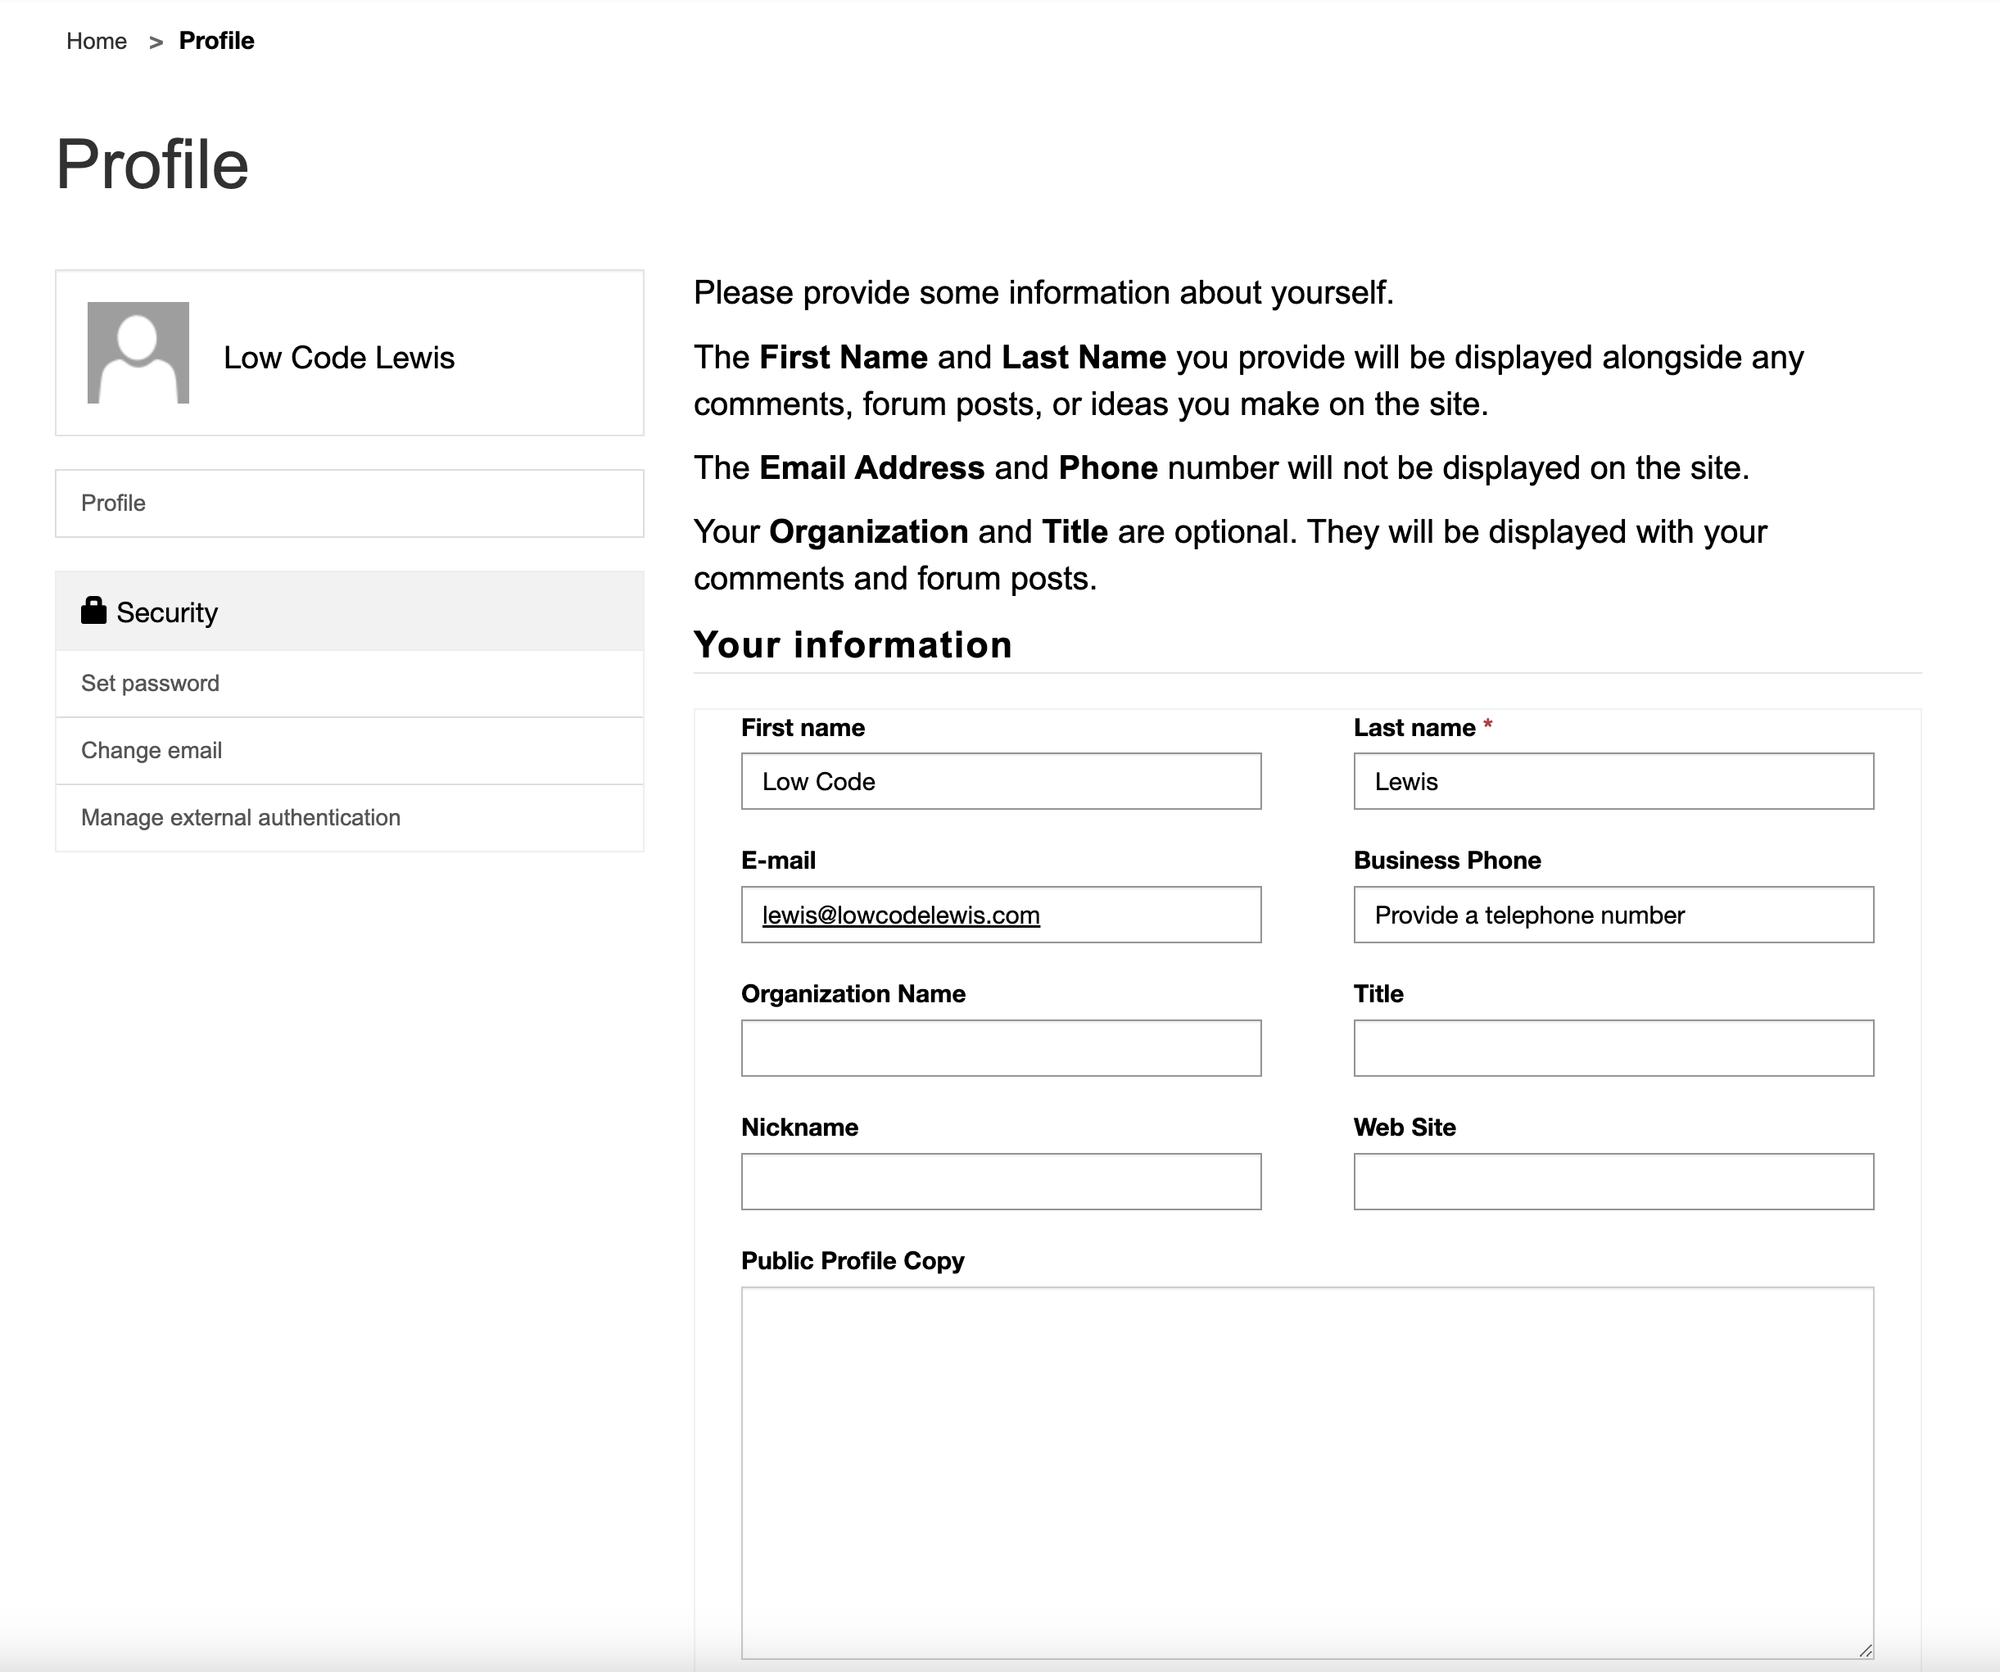
And finally once signed in with Google, I’ll get redirected back to my Power Pages site with my new profile setup there! Awesome!
Did you like this content? 💖
Did you like this content? Check out some of the other posts on my blog, and if you like those too, be sure to subscribe to get my posts directly in your inbox for free!
Subscribe