

In this next post in what has become a bit of a Power Pages series, we’re going to look at how you can disable and auto populate fields on a basic form in Power Pages using some JavaScript. We’re going to do this by putting our JavaScript into a function which we will trigger when we select a radio button or change a dropdown, or perhaps even select a button. I’ll go with the option of selecting a radio button in this guide, but its a very similar approach you’ll need to take if you want to trigger your script to run on another change or event.
Editing code
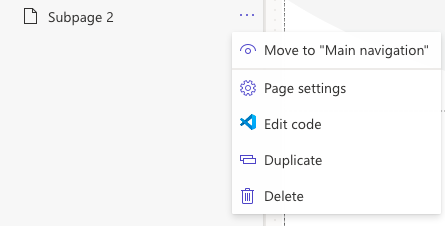
To start with we need to write a function in our JavaScript file of our page. We can do this by selecting edit code on the page we want to make our changes to.
A condition
So there’s multiple ways we could trigger our JavaScript function to run. In my case I’d like it to run when I select a specific radio button on my website page which I’ve added using some HTML.
My code for my two radio buttons looks a little like this. In each opening tag for my radio buttons which is an input tag, I have an onclick property set to the function I want to run.
<form>
        <input type="radio" id="option1" name="option" value="Hide" onclick="disableAndPopulateFields()"/>
        <label for="option1" class="containerRadio">Auto populate my fields</label>
       <br>
       <input type="radio" id="option2" name="option" value="Show" onclick="enableAndClearFields()"/>
       <label for="option2" class="containerRadio">Let me make changes</label>
       <br>
      </form>
Simple! That’s all I need to do in this example to run my function. You might do something different such as use a button, or perhaps use a dropdown and trigger your function to run onchange of the function. It’s up to you!
Writing the function – JavaScript
So lets now write our function in our JavaScript file. Select the JavaScript file in your workspace which will start with a JS icon.
Now to declare a function we will write function then follow it with a name, followed by open and closed rounded brackets to hold any parameters we want to pass into that function and then we’ll place our tasks that the function should execute inside curly brackets after the rounded brackets.
Like this…
function disableAndPopulateFields () {
}
Now we need to give our function disableAndPopulateFields some things to do. Lets start by populating our fields with what we want them to have as values. To do this we’ll need to identify the id of the element we want to update. To do this you can use the inspect element tools in your browser and the select element tool to be able to select the element on the page and then have it highlighted in the elements pane. From there you’ll be able to see the id of the element in the opening tag.
Now we can use this to get the element and set the value for it with the following syntax…
document.getElementById("idValue").value = Value of your choiceYou might want to set the value of your element using the value of another or something like that, it’s up to you!
Next we can focus on disabling our input element. You might also want to use some CSS here to make a greater change in look of your element if what happens using this doesn’t do enough for your requirements.
Anyway, heres what we need to use to disable our input.
document.getElementById("idValue").disabled = trueSo this leaves our function looking a bit like this…
function disableAndPopulateFields() {
   document.getElementById("idValue").value = Value of your choice;
document.getElementById("idValue").disabled = true
}
And this will set our field value and disable it so the user cannot change it!
Achieving the opposite
But what if we now wanted to re-enable the fields and clear them…
You’ll want to take the same approach except your function will look a little more like this…
function enableAndClearFields() {
   document.getElementById("idValue").value = ""
document.getElementById("idValue").disabled = false
}
And its as simple as that! Hopefully this helped you understand how you can use a bit of HTML and JavaScript to tap into those basic forms in Power Pages and get a little more custom with them!
If you didn’t understand something in this post, just let me know in the comments below.