

In this post, I’ll show you how to create HTML & CSV tables in Power Automate from an array or some data from a previous action!
Why?
You might wonder, why would I need to create a HTML or CSV table in Power Automate? Well… here’s some use cases!
- Creating exports of data from within a canvas app to be delivered in a specific file format such as pdf or csv
- Delivering briefing emails with selected records of data on a daily basis to people as a reminder of outstanding work or cases to look over.
There’s a couple, I’m sure you’ve got loads more though!
Getting some data
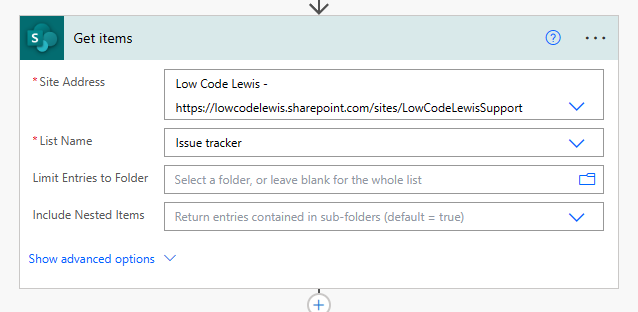
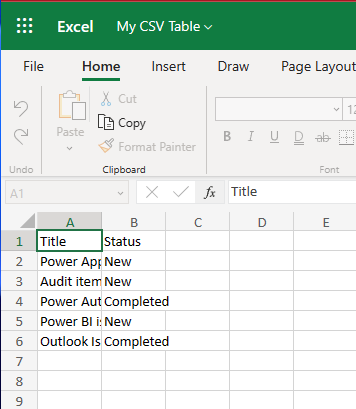
So, before we can create a HTML or CSV table, we need some data to populate it with. I’ve got a pretty small SharePoint list ready to use with only a handful of records, so I’m going to do a get items against that list, and not use an OData query given the small size of the dataset.
Awesome! I’ve got some data to work with… now I can start to create tables!
Creating a CSV Table
To create a CSV table to use in our flow, lets add the ‘Create CSV table’ action.
In your ‘from’ input for your create csv table action, you can use ‘value’ for your list of items if you’re using a get items from SharePoint. The dynamic content might vary based on other data sources. But here, my value is my array of objects from my SharePoint list.
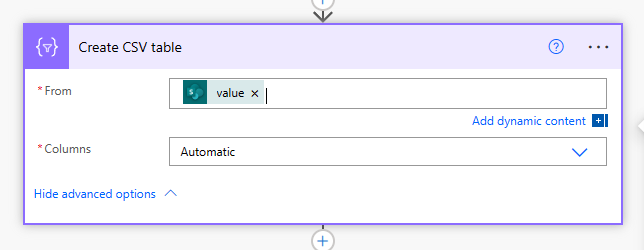
Now we have two options for the data we want to display in our CSV table. If select automatic for columns, the step will display the columns itself, but if we choose custom, we’ll be able to input header names and match the value from each individual field from our dataset.
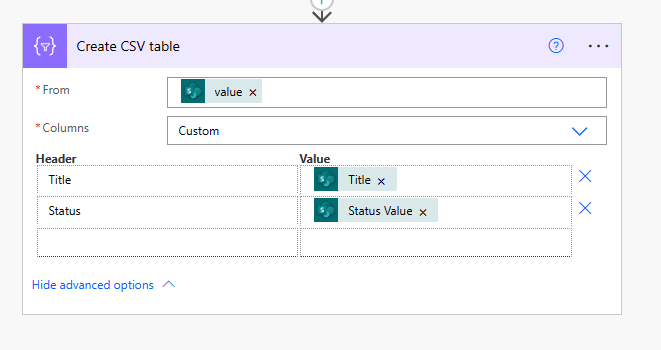
So, here I’ve selected custom for my columns and I’ve created two columns, one called title and one called status. Then I’ve placed the dynamic content from my SharePoint list in the value of those new columns to correspond against their appropriate description.
Creating a file to store our CSV table in
Now that we’ve created a CSV table, we need to do something with it. We might want to put this into a CSV file to view in Excel or another spreadsheet software. Let’s create this file and save it in our OneDrive.
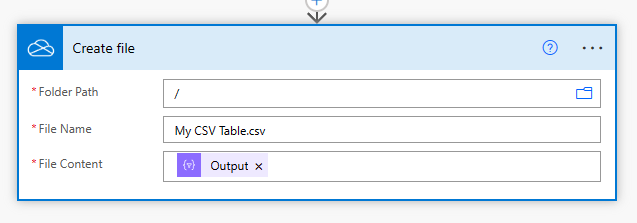
Add a ‘create file’ step to your flow using the OneDrive for Business connector.
First select where you want to be saving this folder, then give it a name and add the extension “.csv”
Then finally you can use the dynamic content ‘output’ from your create csv table action!
Now I’ve given my flow a run and I’ve taken a look at OneDrive and I can see my file 😉😉

Create HTML Table
Now let’s look at a different scenario. Let’s say you want to produce your file as a pdf with a table inside of it or perhaps you want to do that thing where you send someone the table in an email… this is where we’ll use a HTML table!
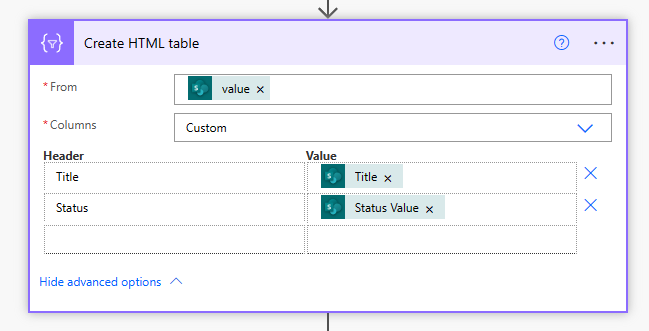
So now in my flow, instead of adding the create csv table action, I’ll use the create HTML table action.
This step actually requires identical inputs as the csv table action. The only difference is that it works differently to give us outputs in HTML.
So, go ahead and give your HTML table action your array of objects, then select whether you want to use automatic columns or define your own columns like we did before in the csv table action.
Sending a HTML table in an Email
So now we have our HTML table, lets do something with it. It’s super simple to just add this into an email and have it delivered to someone’s inbox. Let’s try it out!
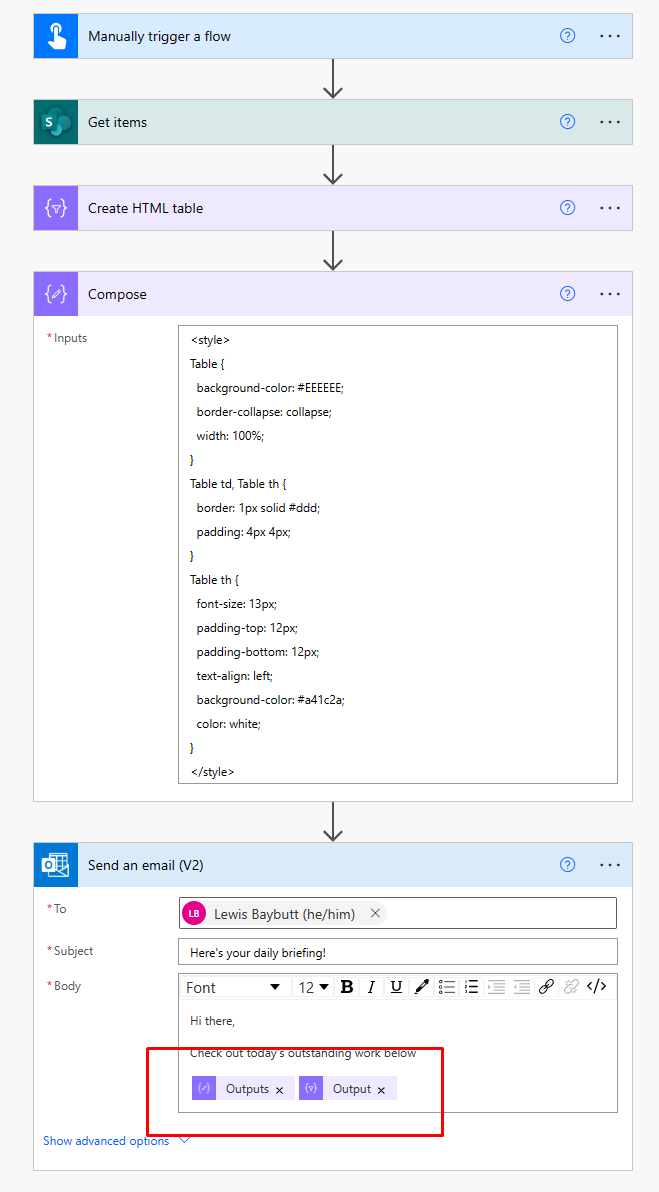
Very simply, I’ve added a Send an email step using the Outlook connector, and I’ve populated my to and subject fields. Then in my body I’ve written a short message and to add in my table, I’ve simply used the output dynamic content from my create HTML table step and this will now populate my email with my HTML table!

Let’s see the result…

Awesome! There’s our table in an email! 😎
Styling our table…
Okay, but what if we want to make our table look a little nicer. We can do that with some handy CSS! 😍
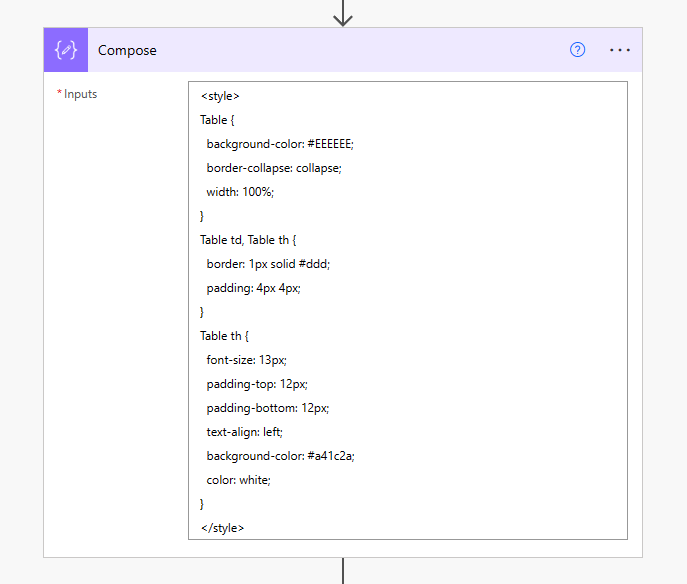
Lets add a compose action to our flow to place our styling inside and then use later in our email step. You can use this code or other CSS that works better for your brand.
<style>
Table {
  background-color: #EEEEEE;
  border-collapse: collapse;
  width: 100%;
}
Table td, Table th {
  border: 1px solid #ddd;
  padding: 4px 4px;
}
Table th {
  font-size: 13px;
  padding-top: 12px;
  padding-bottom: 12px;
  text-align: left;
  background-color: #a41c2a;
  color: white;
}
</style>
So I’ve added this to a compose, now I just need to link up my output from my HTML table with the outputs my compose action will give me of my CSS.
All we need to do is place the outputs of our compose step first, directly followed by the output from our HTML table step! Simple!
Now save your flow and give it another run! And we have a gorgeously styled HTML table in our email to our recipients. Awesome 💖

I hope this post helped you to get started with using CSV and HTML tables in your Power Automate flows! I’d love to know what you use this functionality for in solutions. Let me know in the comments below.