

In this post on Power Pages, we’ll take a look at how to produce a list entity on a page that filters based on some FetchXML. To do this we will need to create a custom list entity using HTML and Liquid, where we will also use our FetchXML to get the data that we want to look at.
A use case
In my example, I want to be able to pass in a GUID using a query string in my URL which will get me a certain record, then I want to produce a list of records related to that passed in record that are in another table.
Query string part
To start with in my HTML I’m going to use liquid to get my record and assign it to a variable. I’ll use the following code.
{% assign variableName = entities['entityName'][request.params.id] %}The above line of liquid code relies on us using ‘id’ as the parameter in our url after a ‘?’ on our page. Your URL should end with something like ‘?id=GUID’ where GUID is replaced with an actual record guid on the correct table for your requirements.
FetchXML
Now we need to either write some FetchXML or we can get this from a model driven app.
Head to the table in a model driven app that you’d like to write a query for if you’re not comfortable writing XML by yourself. Select ‘Edit filters’ and apply the filters that you want. In my case I’ll say that the lookup column on my records needs to equal to one of the records in my lookup table. The Fetch XML will then include a condition where the lookup column needs to equal to a GUID. I will then replace that GUID in my XML before putting it into my HTML file on my Power Pages website. For now, lets get that FetchXML though.
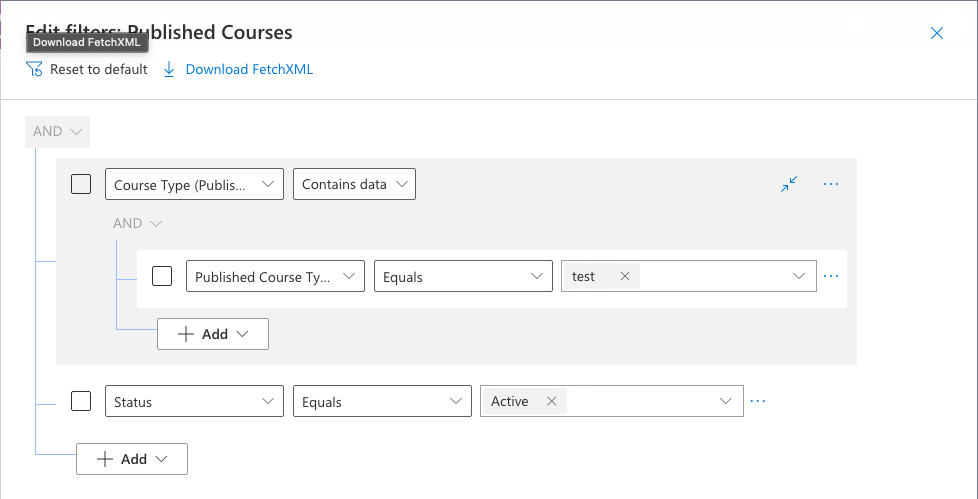
Once you’ve got your filters applied, select ‘Download FetchXML’.
Now within my filter which is within the link-entity part in my XML I am going to remove uiname completely and then remove the GUID value which is there ready to replace in a moment.

Adding our FetchXML into Liquid in the page HTML file
To add fetch XML into our Power Pages HTML file we need to put it between two lines of liquid to then pull data out of when we create our HTML table later.
Here are the lines of liquid we need to put our FetchXML between
{% fetchxml nameForFetchXML %}

// fetch xml goes here

{% endfetchxml %}
Remember if you’re doing something like me where you’re producing almost like a custom subgrid of related records to the record that you passed in, in the first place, you’ll need to make sure you replaced that guid for the condition we looked at in the FetchXML!
Creating the HTML table
Now we can start to create our html table. Lets create a table and give it an id. Then we can start to create our header and body. To bring our data in we’ll need to look through our results of our FetchXML using some more liquid, then in each of the fields for the body we’ll reference the fields of our data using dot notation from our result object.
The code will look something like this…
<table id="relatedRecords" class="table1">
        <thead>
          <tr>
            <th>Name</th>
            <th>Number of People</th>
          </tr>
        </thead>
        <tbody>
          {% for result in availableCourses.results.entities %}
          <tr>
            <td>{{ result.lbl_name }}</td>
            <td>{{ result.lcl_numberofpeople }}</td>
          </tr>
          {% endfor %}
        </tbody>
      </table>
CSS
Now it’s important we apply some styling to our table of course. We’ll make this very simple with the following stylesheet which matches up to the class we used in the HTML above.
.table1 {
font-family:'Segoe UI', Tahoma, Geneva, Verdana, sans-serif;
margin: 10px;
padding: 10px;
border: 1px solid black;
}
Testing
Now testing this out, I’ve passed in my record URL.

And you can see here below is the table being rendered on my Power Pages website page showing related records to the record I have passed in using my query string.

Hopefully this post helped you to get started with producing a custom HTML table of records in your Power Pages website using data from Dataverse. If you’ve got any questions on how to make this work, let me know!