

In my last post on Omnichannel for Customer Service we began to look at the capabilities in Omnichannel for sentiment-based analysis on incoming work items to Omnichannel! In this post we’ll start to take this further now that we’ve enabled the feature and we’ll look at how to use the machine learning model to route live chat messaging work items! 🚀
Creating a workstream
To begin with in Customer Service Admin Centre let’s create a new workstream!
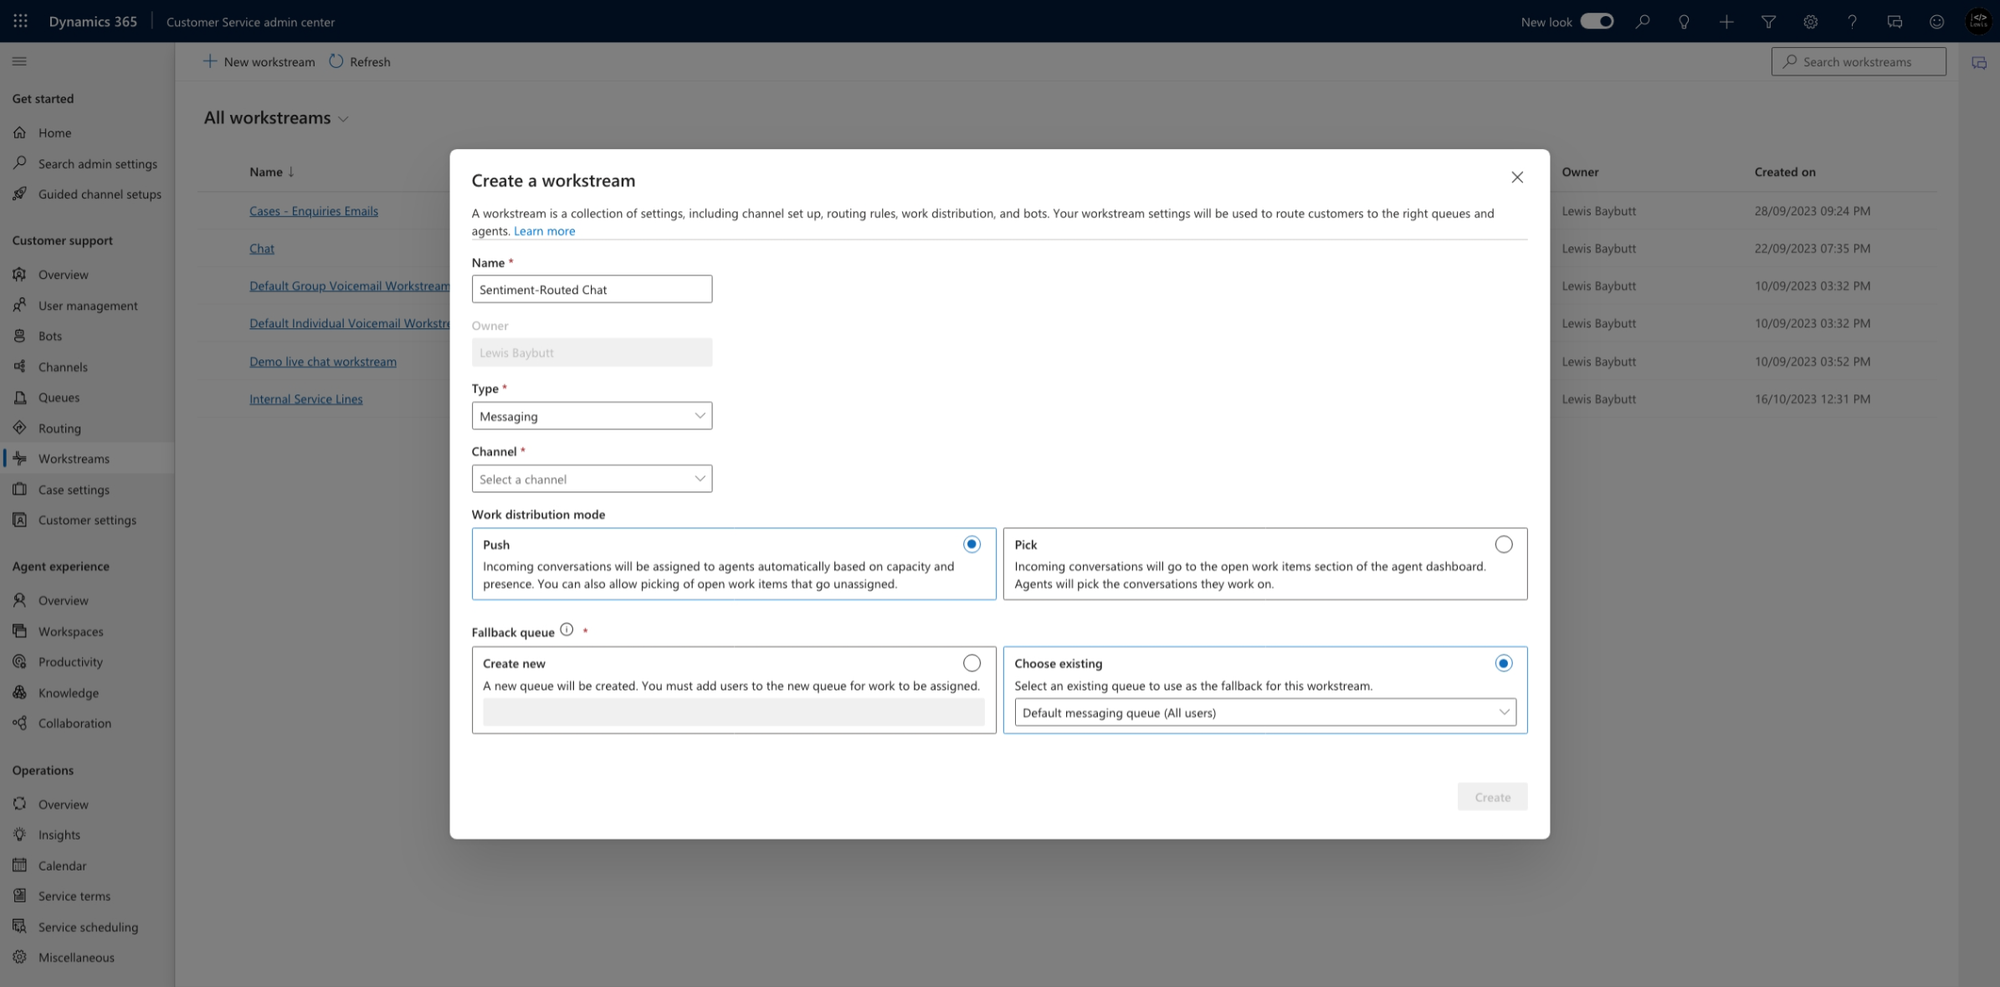
Now continue to set up your live chat channel and the rest of your workstream as you would normally.
Pre-Conversation Survey
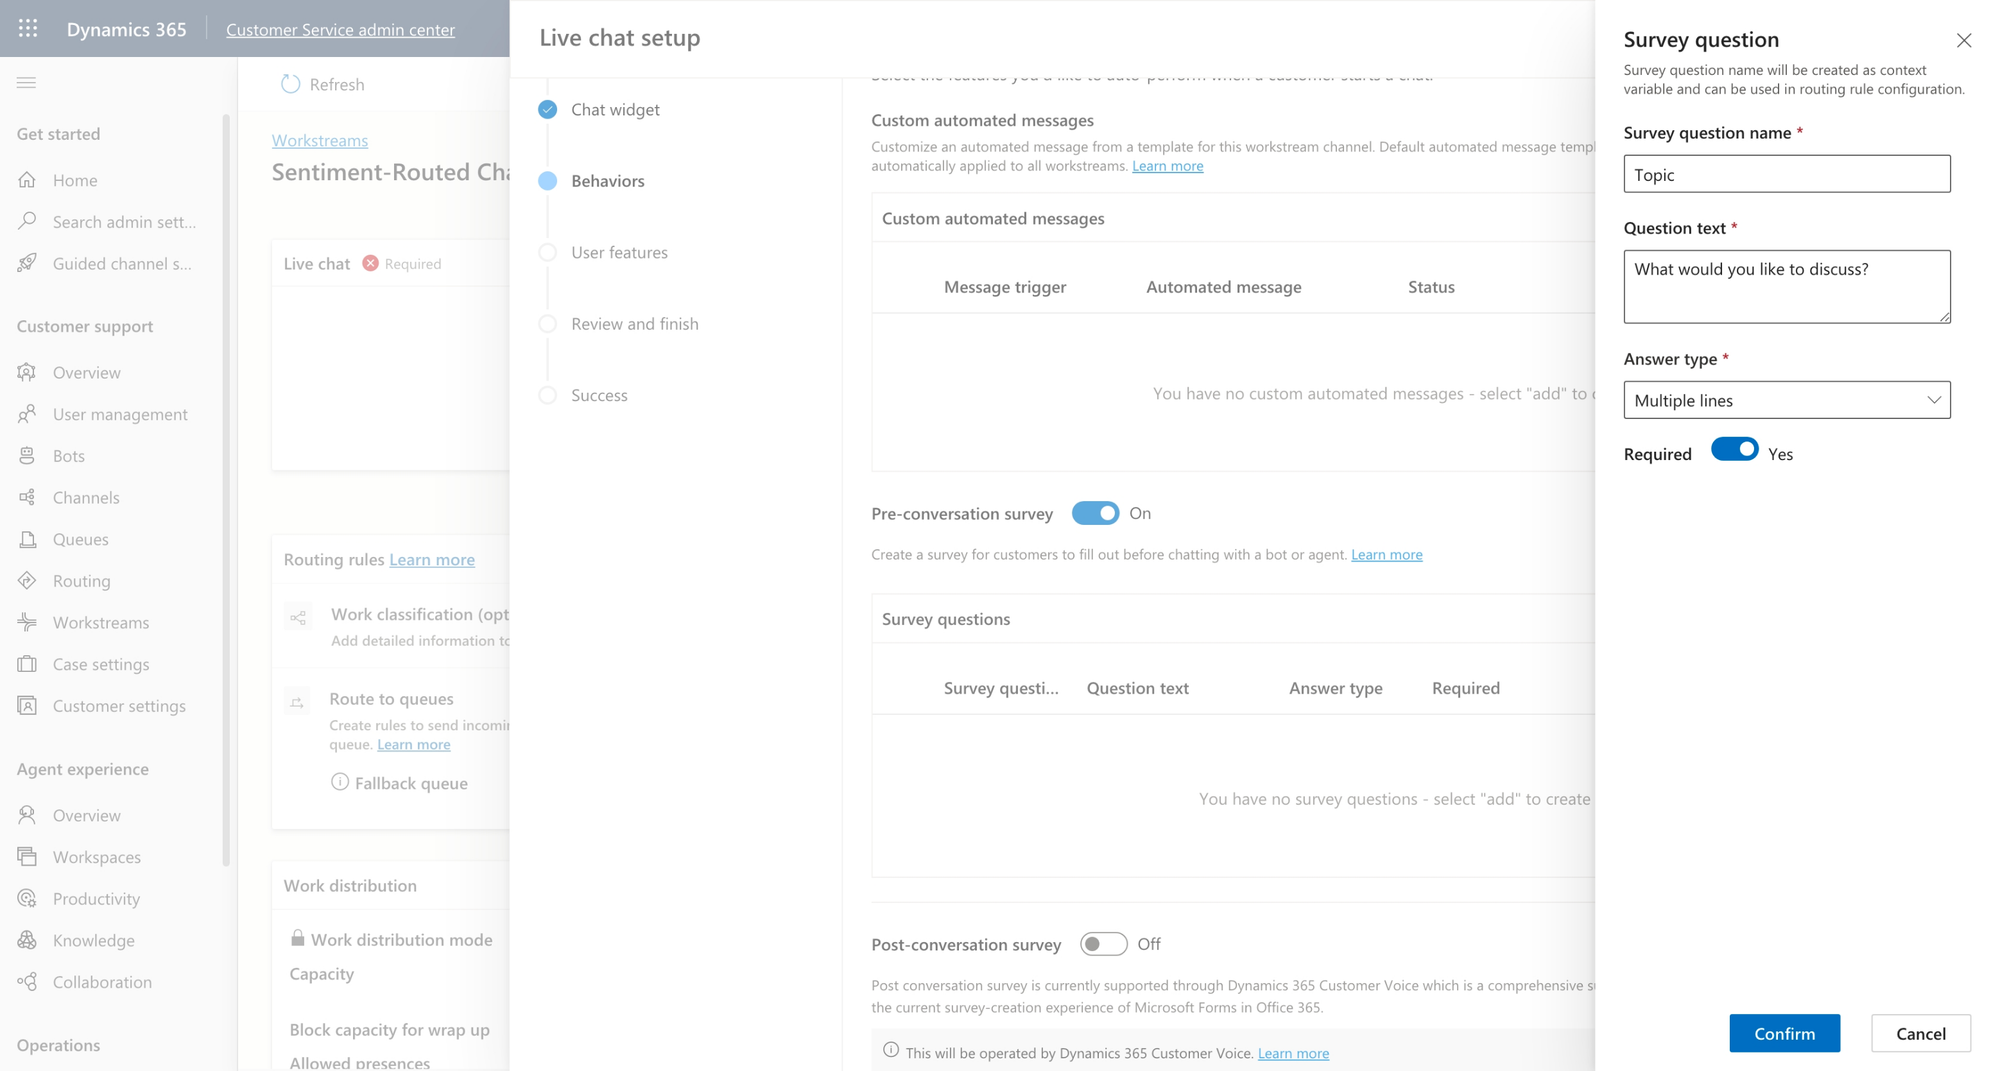
Now one of the things we need to include in some form on our chat channel is a pre-conversation survey. Without this we won’t be able to use sentiment-based routing as we cannot use messages in the chat to route the conversation. Routing happens before the conversation!
What we do by implementing this is we allow customers to give us some data before they submit the request to create a chat. So it means that when routing starts, we can use this information to route the chat i.e. the information we will do sentiment analysis on.
Create a pre-conversation survey on the chat channel and we’ll use the context variables to do the sentiment analysis on for routing.
Configuring work classification
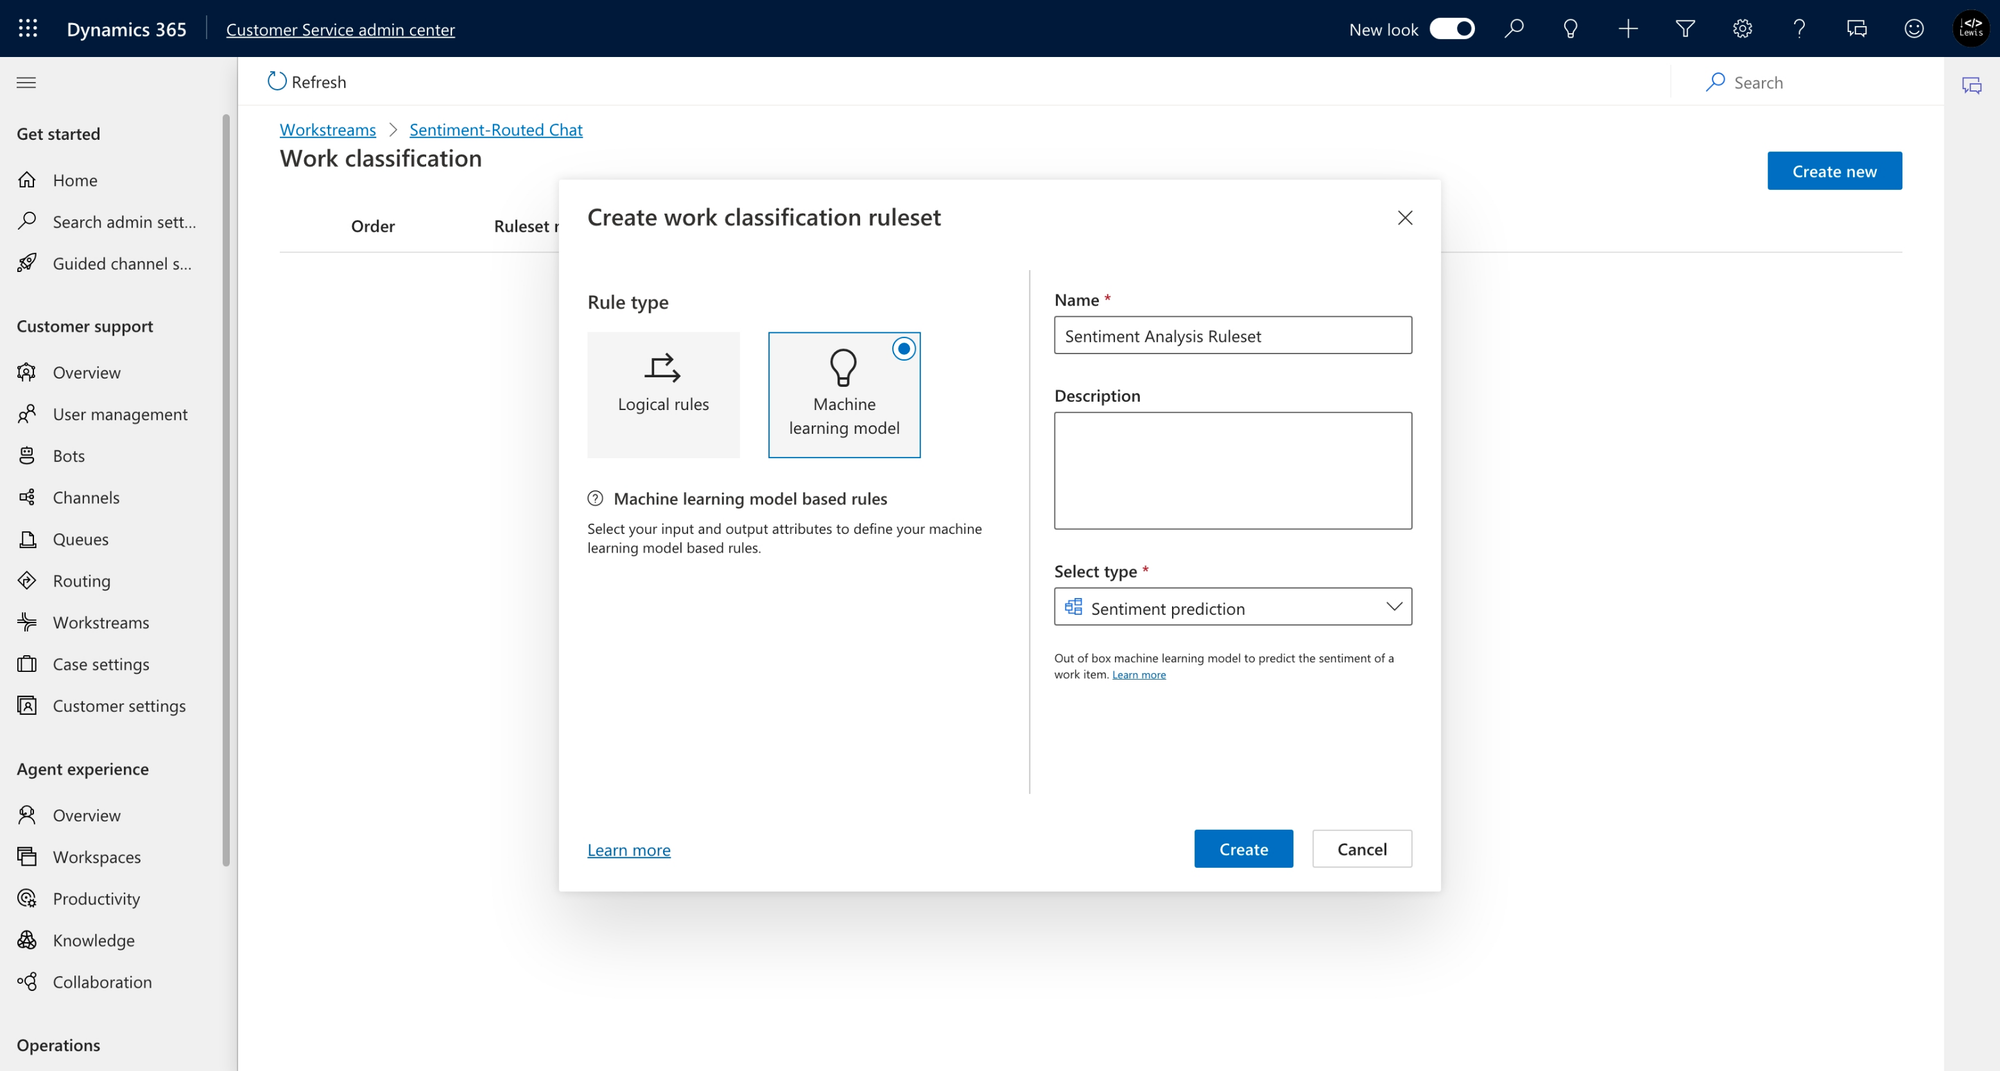
Now to implement the sentiment analysis part we’ll configure the work classification element of routing rules. Create a work classification ruleset, of type machine learning model and select the sentiment prediction model.
Now within the configuration for the ruleset which is our machine learning model we simply need to add attributes for anything we want it to analyse. In my case it’s just the one context variable which is our topic.
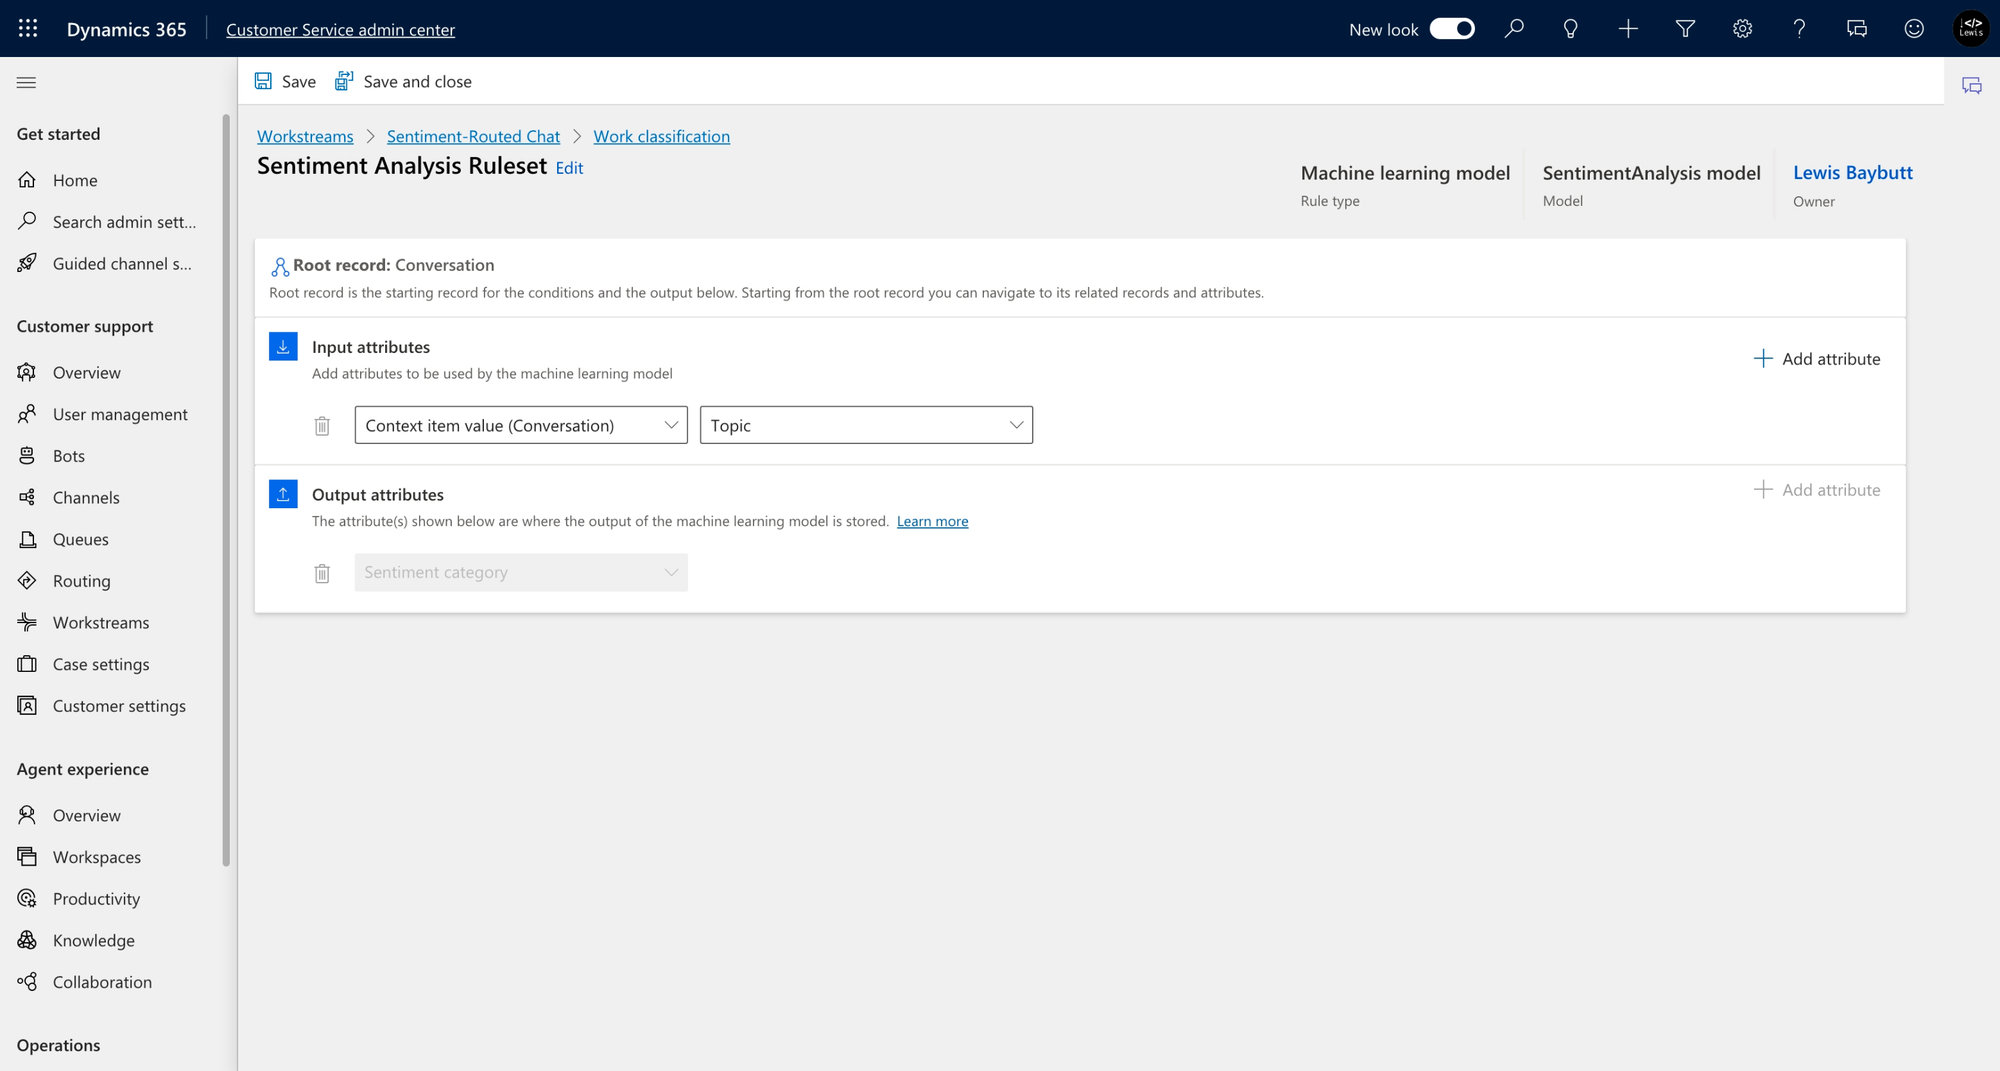
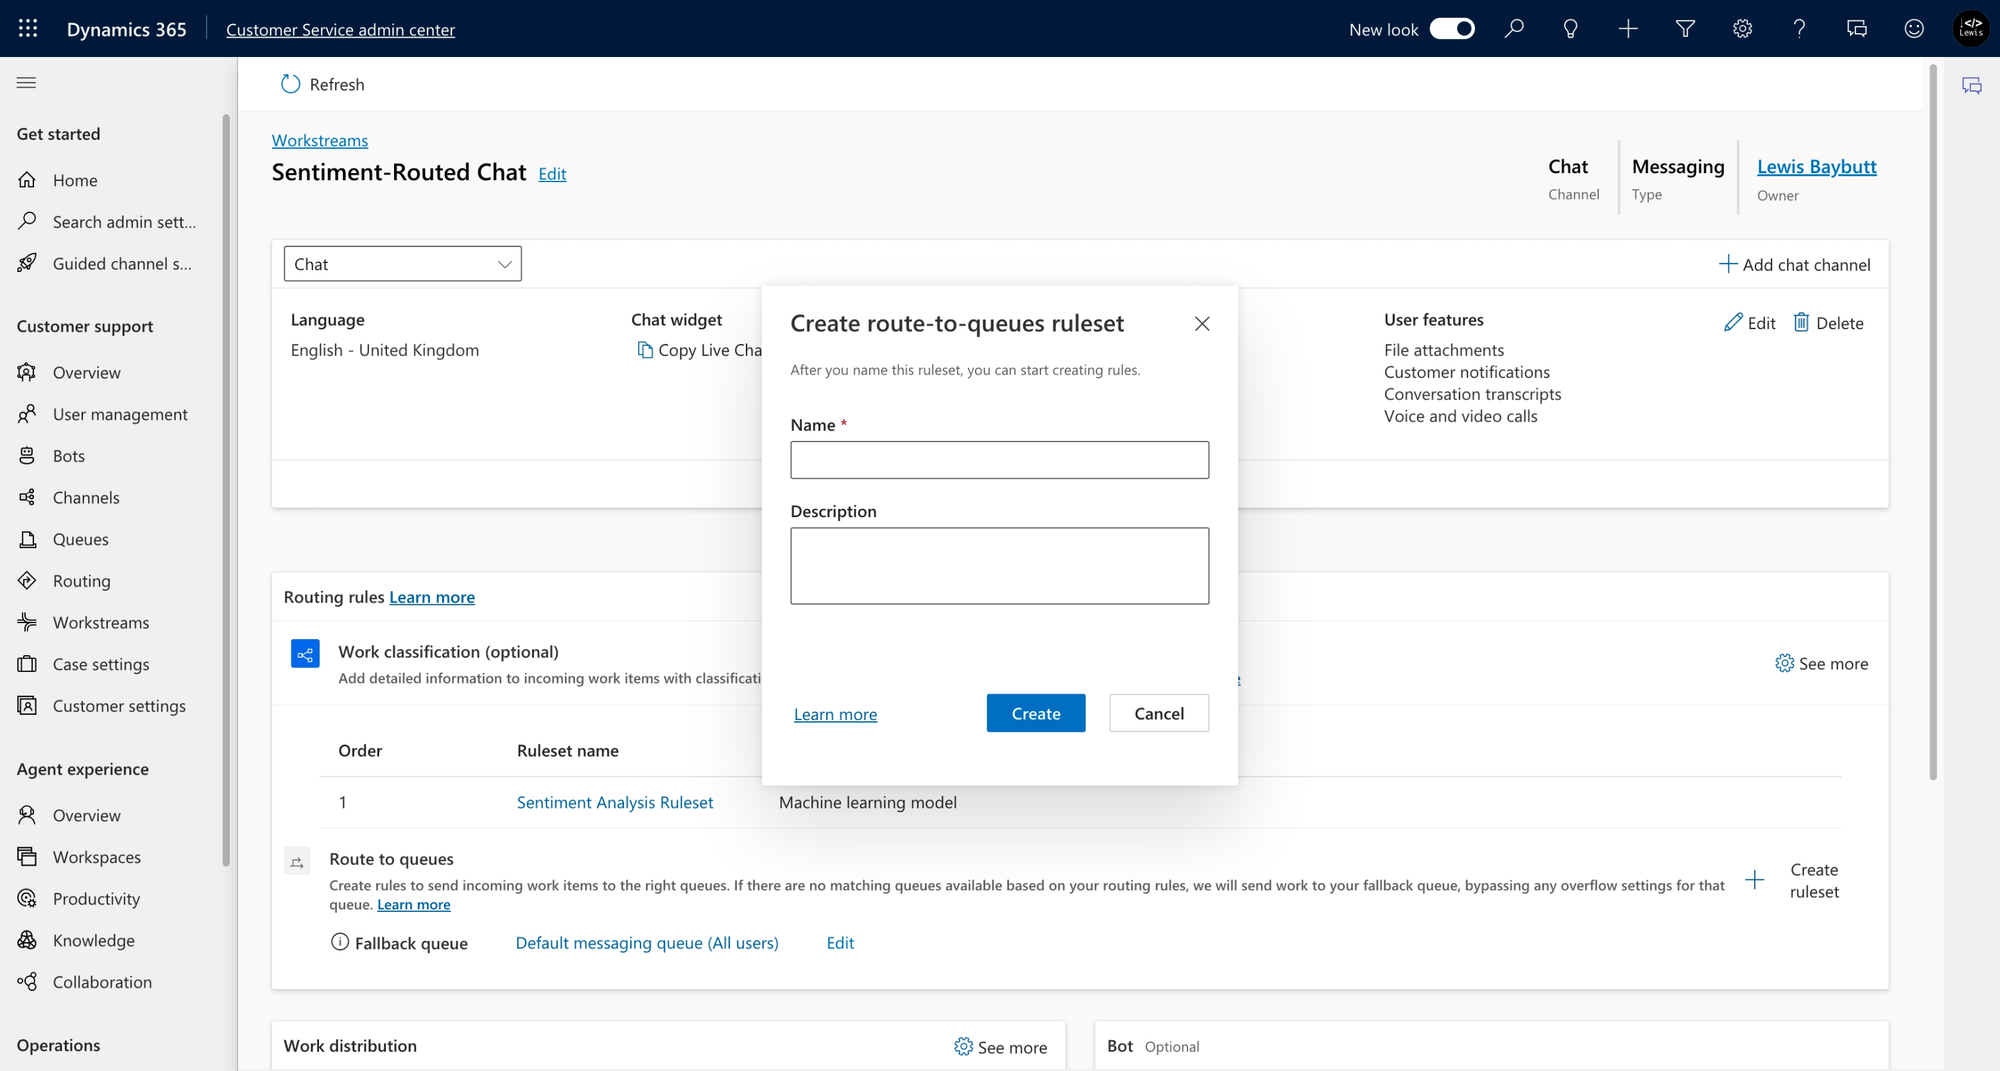
Once you’ve added the attributes you want to analyse select save and close. From there we can begin working on the route-to-queues ruleset, where we can effectively say if there was a negative sentiment identified, then route to a certain queue.
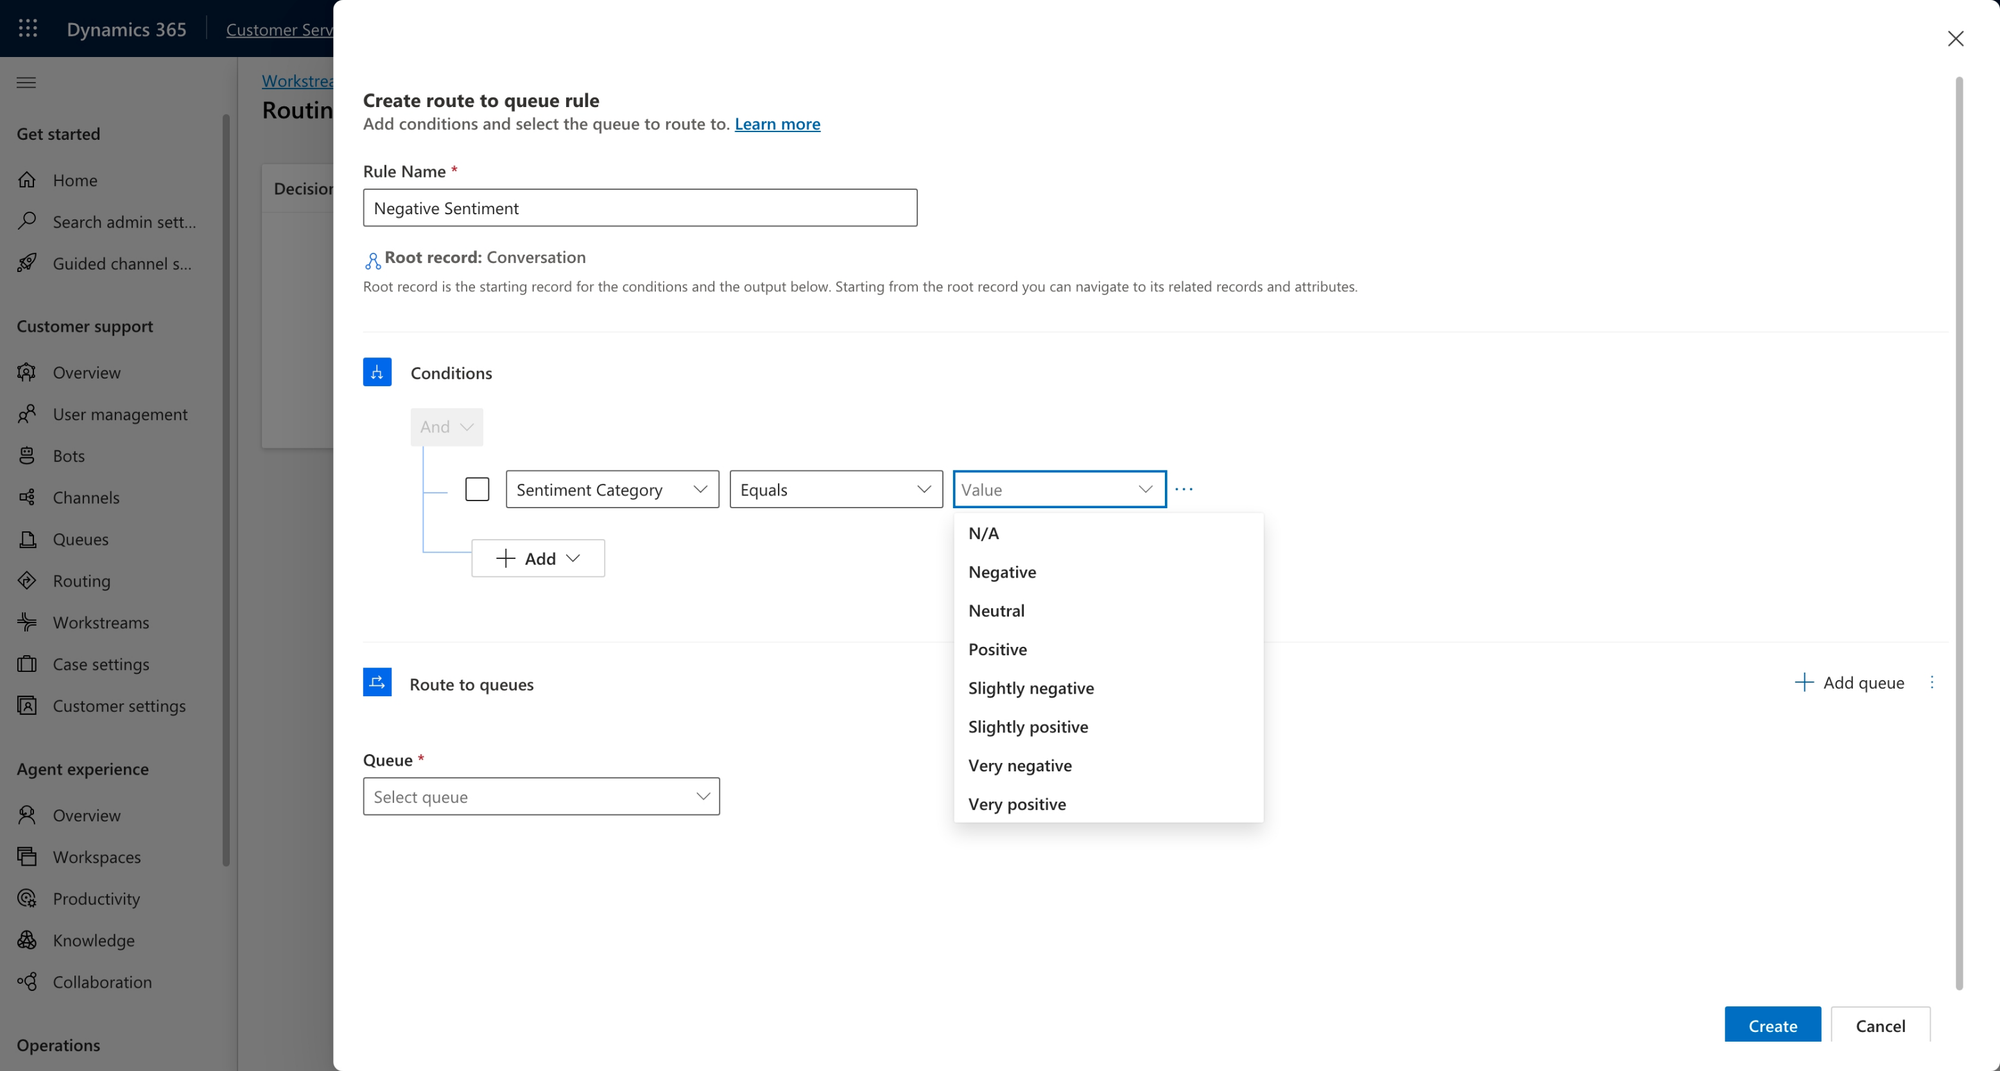
The last step we have to implement is adding in the rules to the ruleset. To do this add conditions to each rule using the Sentiment Category column and create rules for each value or a couple of values in each rule which come close in similarity to each other.
And that’s it! Now your conversations will get routed to queues based on the sentiment that is identified in the pre-conversation survey your customers fill out!
Did this help?
Let me know if this post helped you out with implementing sentiment based routing in Dynamics 365 Omnichannel for Customer Service, and if you need help with something else comment down below with what you’re looking for! 🚀