

It’s always a pain when users aren’t able to do something in your app for a reason that, you might not even be sure of. Permissions are often the source of plenty of issues when working with an app someone has developed.
In this blog post, we’ll look at how you can check and display permissions for a data source and then display to users the permissions they have against the data sources in your app.
Note that this only currently works with Dataverse.
Creating a screen to display permissions
So let’s create a new screen in our app to display our permissions on. Now in my application, I’m just working with a single Dataverse table, so things are nice and simple and we’re only going to need to display information for one data source.
First I’ve just added a few text labels to the top of my screen to explain what is on the screen. Next I’m going to add 4 icons and 4 text labels for each of the permission checks against my data source as follows
- Create
- Delete
- Edit
- Read
I’m going to do this using a gallery so that I don’t add repeated controls to my screen that could be repeated using a gallery. So within a vertical gallery I will have an icon on the left and a text label on the right with them horizontally aligned.
Creating the collection
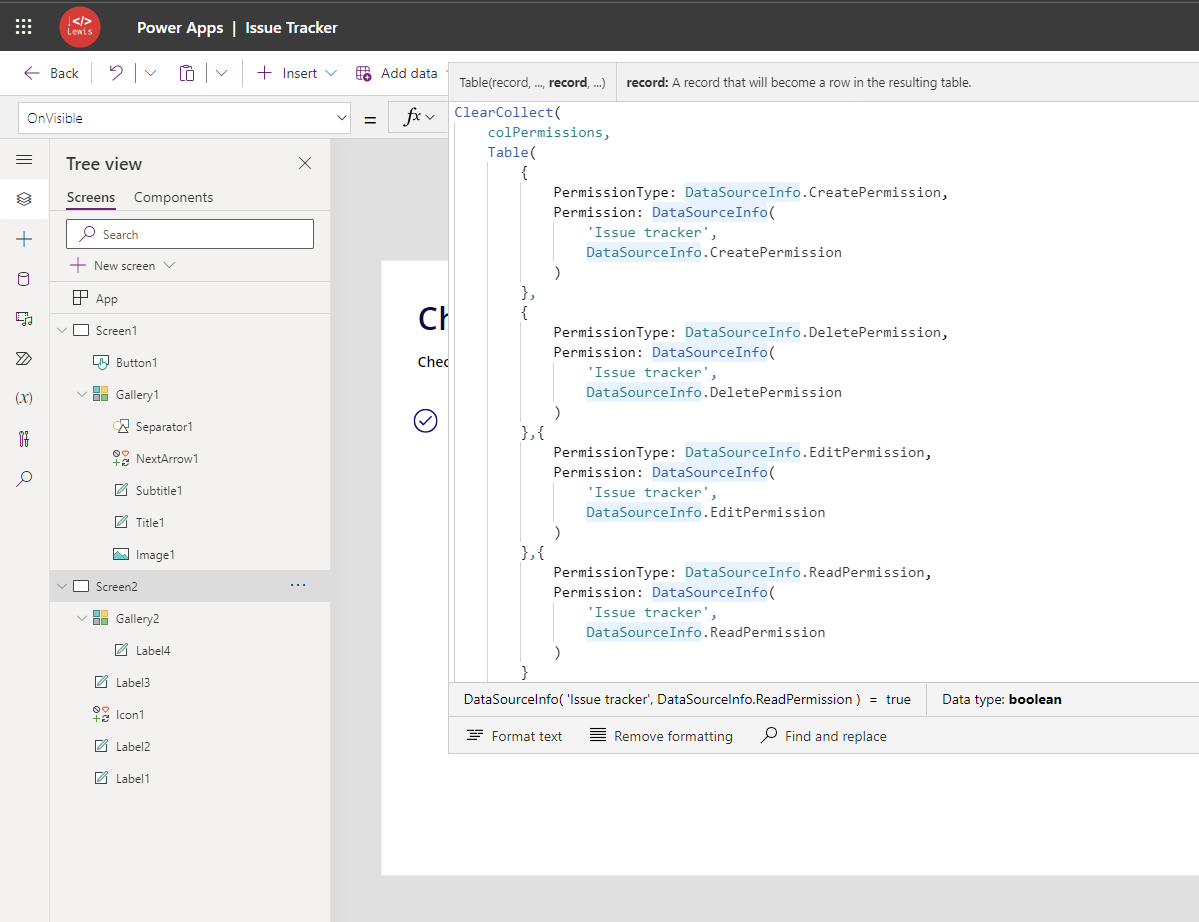
Okay so in our gallery we’re going to need to display some data. So let’s create this in the OnVisible property of our screen using a ClearCollect() function.
I’m going to use this formula in the OnVisible property of my screen.
ClearCollect(
    colPermissions,
    Table(
        {
            PermissionType: DataSourceInfo.CreatePermission,
            Permission: DataSourceInfo(
                'Issue tracker',
                DataSourceInfo.CreatePermission
            )
        },
        {
            PermissionType: DataSourceInfo.DeletePermission,
            Permission: DataSourceInfo(
                'Issue tracker',
                DataSourceInfo.DeletePermission
            )
        },{
            PermissionType: DataSourceInfo.EditPermission,
            Permission: DataSourceInfo(
                'Issue tracker',
                DataSourceInfo.EditPermission
            )
        },{
            PermissionType: DataSourceInfo.ReadPermission,
            Permission: DataSourceInfo(
                'Issue tracker',
                DataSourceInfo.ReadPermission
            )
        }
    )
)
Here I’m creating a collection which will have records containing two properties. One being the type of permission I’m assessing, and then whether there actually are permissions or not for the current user using the following syntax.
DataSourceInfo('Issue tracker', DataSourceInfo.CreatePermission)Then I’ll use these properties to display whether there are permissions or not using the true or false value returned my my property ‘Permission’ for each permission type returned by my property ‘PermissionType’
Creating the gallery
So I’m now going to add my vertical gallery to my screen and I’ll simply add two controls to the template being an icon and a text label. Rearrange these to suit your UI needs.
In the text label I’m going to need to use another slightly big formula to drive the conditional needs of my text.
I’ll use this in the text property of my text label.
Switch(
    ThisItem.PermissionType,
    DataSourceInfo.CreatePermission,
    If(
        ThisItem.Permission,
        "You have create permissions for issues.",
        "You do not have permission to create issues."
    ),
    DataSourceInfo.DeletePermission,
    If(
        ThisItem.Permission,
        "You have permission to delete issues.",
        "You do not have permission to delete issues."
    ),
    DataSourceInfo.EditPermission,
    If(
        ThisItem.Permission,
        "You have permission to edit issues.",
        "You do not have permission to edit issues."
    ),
    DataSourceInfo.ReadPermission,
    If(
        ThisItem.Permission,
        "You have permission to read issues.",
        "You do not have permission to read issues."
    )
)
Now let’s work on the icon.
In the icon property of my icon, I want to write a formula that will show a tick if I have permissions for the current permission type, and a cross badge if I don’t. I’ll use the following formula to do this.
Switch(
    ThisItem.PermissionType,
    DataSourceInfo.CreatePermission,
    If(
        ThisItem.Permission,
        Icon.CheckBadge,
        Icon.CancelBadge
    ),
    DataSourceInfo.DeletePermission,
    If(
        ThisItem.Permission,
        Icon.CheckBadge,
        Icon.CancelBadge
    ),
    DataSourceInfo.EditPermission,
    If(
        ThisItem.Permission,
        Icon.CheckBadge,
        Icon.CancelBadge
    ),
    DataSourceInfo.ReadPermission,
    If(
        ThisItem.Permission,
        Icon.CheckBadge,
        Icon.CancelBadge
    )
)
Now I’m going to need to do some work with the colours of my icons. I’ll use a very similar formula to the one above in my colour and fill properties of my icon, except I’ll change the results of my if statements to have colour values in them.
This is the formula I’m going to use in my colour properties
Switch(
    ThisItem.PermissionType,
    DataSourceInfo.CreatePermission,
    If(
        ThisItem.Permission,
        Color.ForestGreen,
        Color.DarkRed
    ),
    DataSourceInfo.DeletePermission,
    If(
        ThisItem.Permission,
        Color.ForestGreen,
        Color.DarkRed
    ),
    DataSourceInfo.EditPermission,
    If(
        ThisItem.Permission,
        Color.ForestGreen,
        Color.DarkRed
    ),
    DataSourceInfo.ReadPermission,
    If(
        ThisItem.Permission,
        Color.ForestGreen,
        Color.DarkRed
    )
)
Okay now lets take a look at how my gallery is looking…
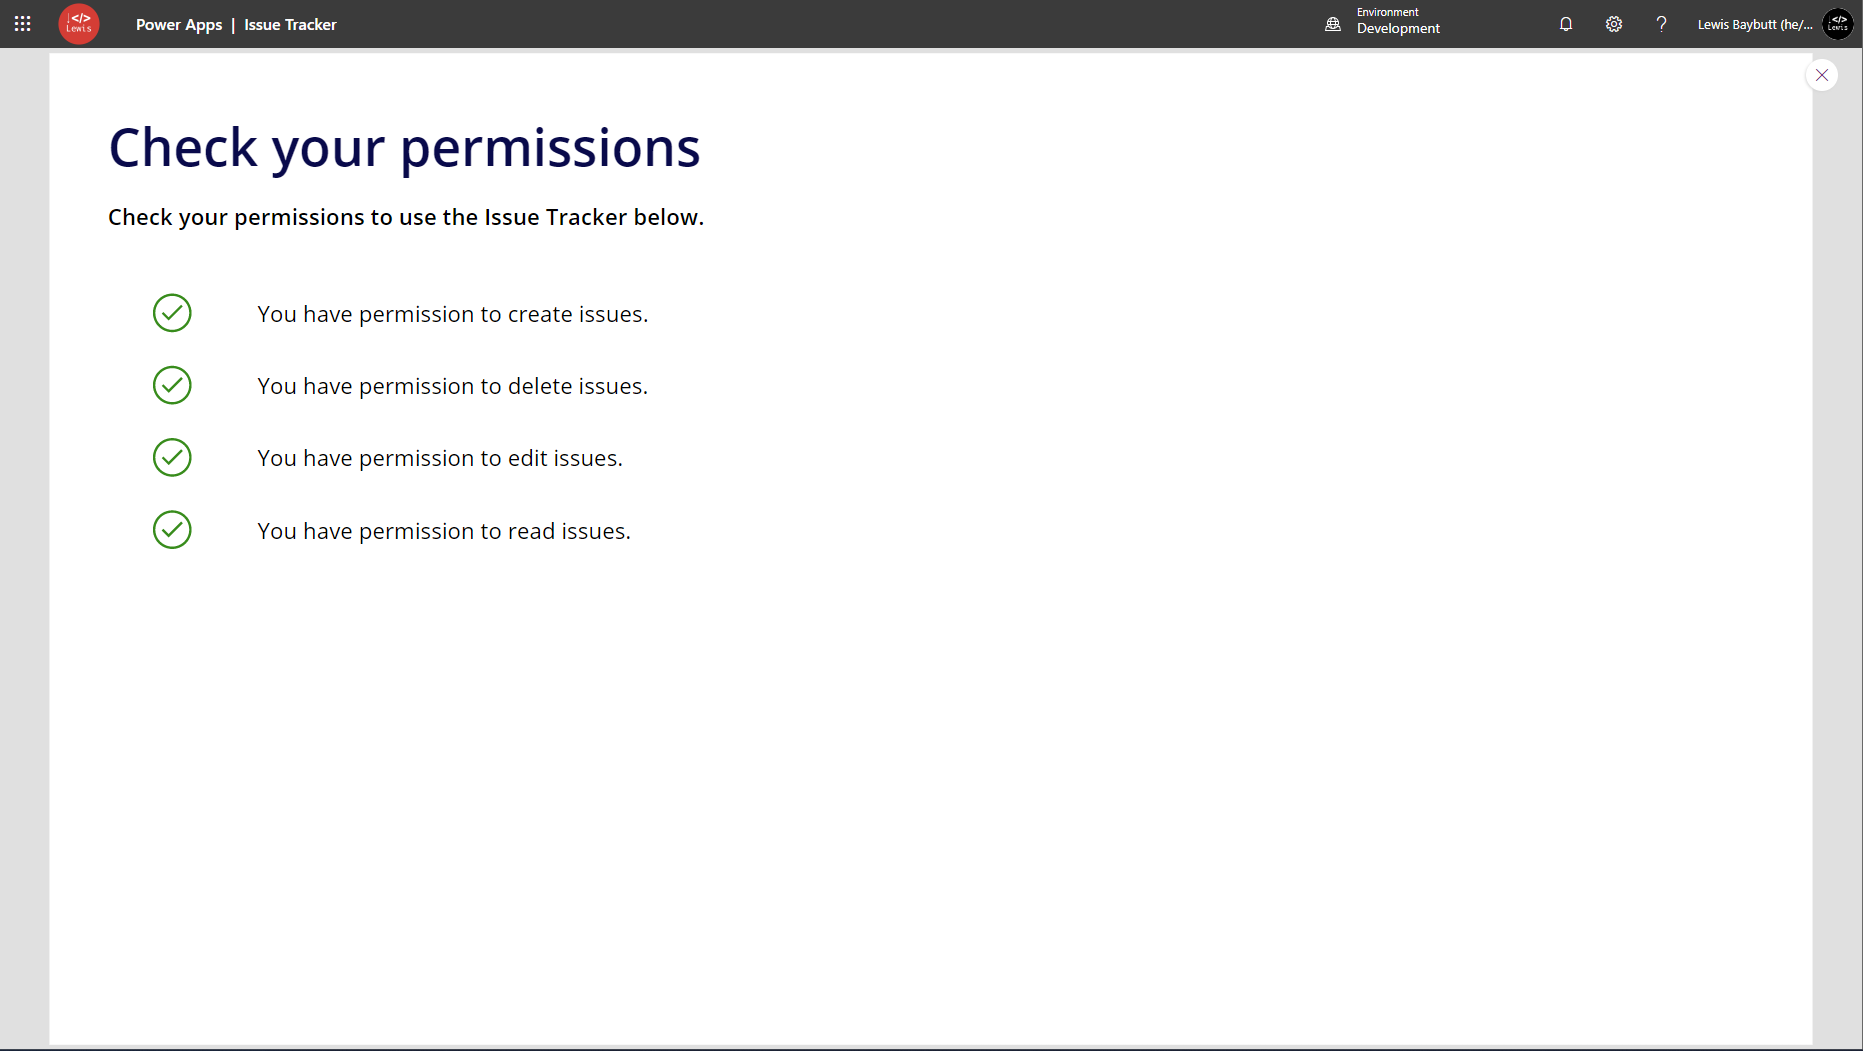
There you go! There’s my screen showing my current users permissions! Awesome!
Testing without permissions
Okay so I’ve just created myself a new user in my tenant. John Doe is the new user and we’re going to use John’s account to test his permissions in my app. I’m only going to share access to the app and not the data source and we will see what happens.
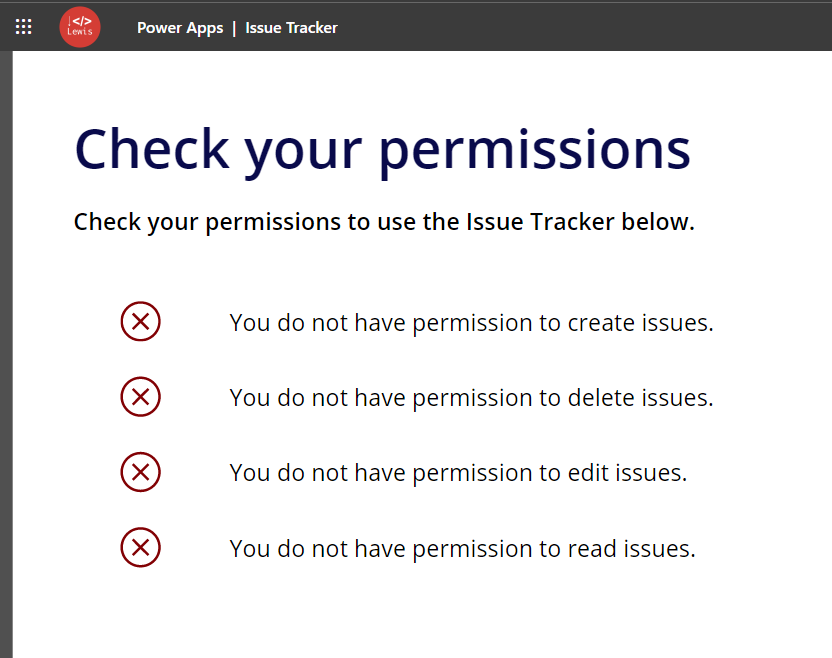
And there you have it. John’s view of the permission checker shows that he doesn’t have permissions to do things in the issue tracker.
Some important points
It’s important to note a few things about this function that could make it a little unreliable to work with.
- If Power Apps isn’t able to determine permissions for a user, the value returned by the function will be true.
- If a user isn’t in an environment, at present, the value returned will be true.
- If the user is in the environment, but has a security role assigned that doesn’t have table permissions for the specified table, correct false values will be returned.