

Typically model-driven apps are comprised of tables, forms and views, and possibly business process flows, and PCFs. I less commonly see the use of things like pop up dialog’s and side panes which are both possibilities for model-driven apps!
Recently I blogged about the ability to launch a pop up in a model driven app which is powered by a Canvas App, and surfaced using an IFRAME in a web resource. I also highlighted Matthew Devaney’s blog post where he showed how it is possible to use a custom page for a pop up in a model-driven app.
In this post, I’ll show you how to launch a side pane in a model-driven app which you can design using a custom page and canvas, drag n’ drop functionality.
Building the custom page
First, we’ll need to design and build a custom page to populate a side pane with for our app. In my scenario, I’m going to take the same situation I had with the pop up in my last post on that, and I’ll create a prescribe side bar for my doctors surgery app.
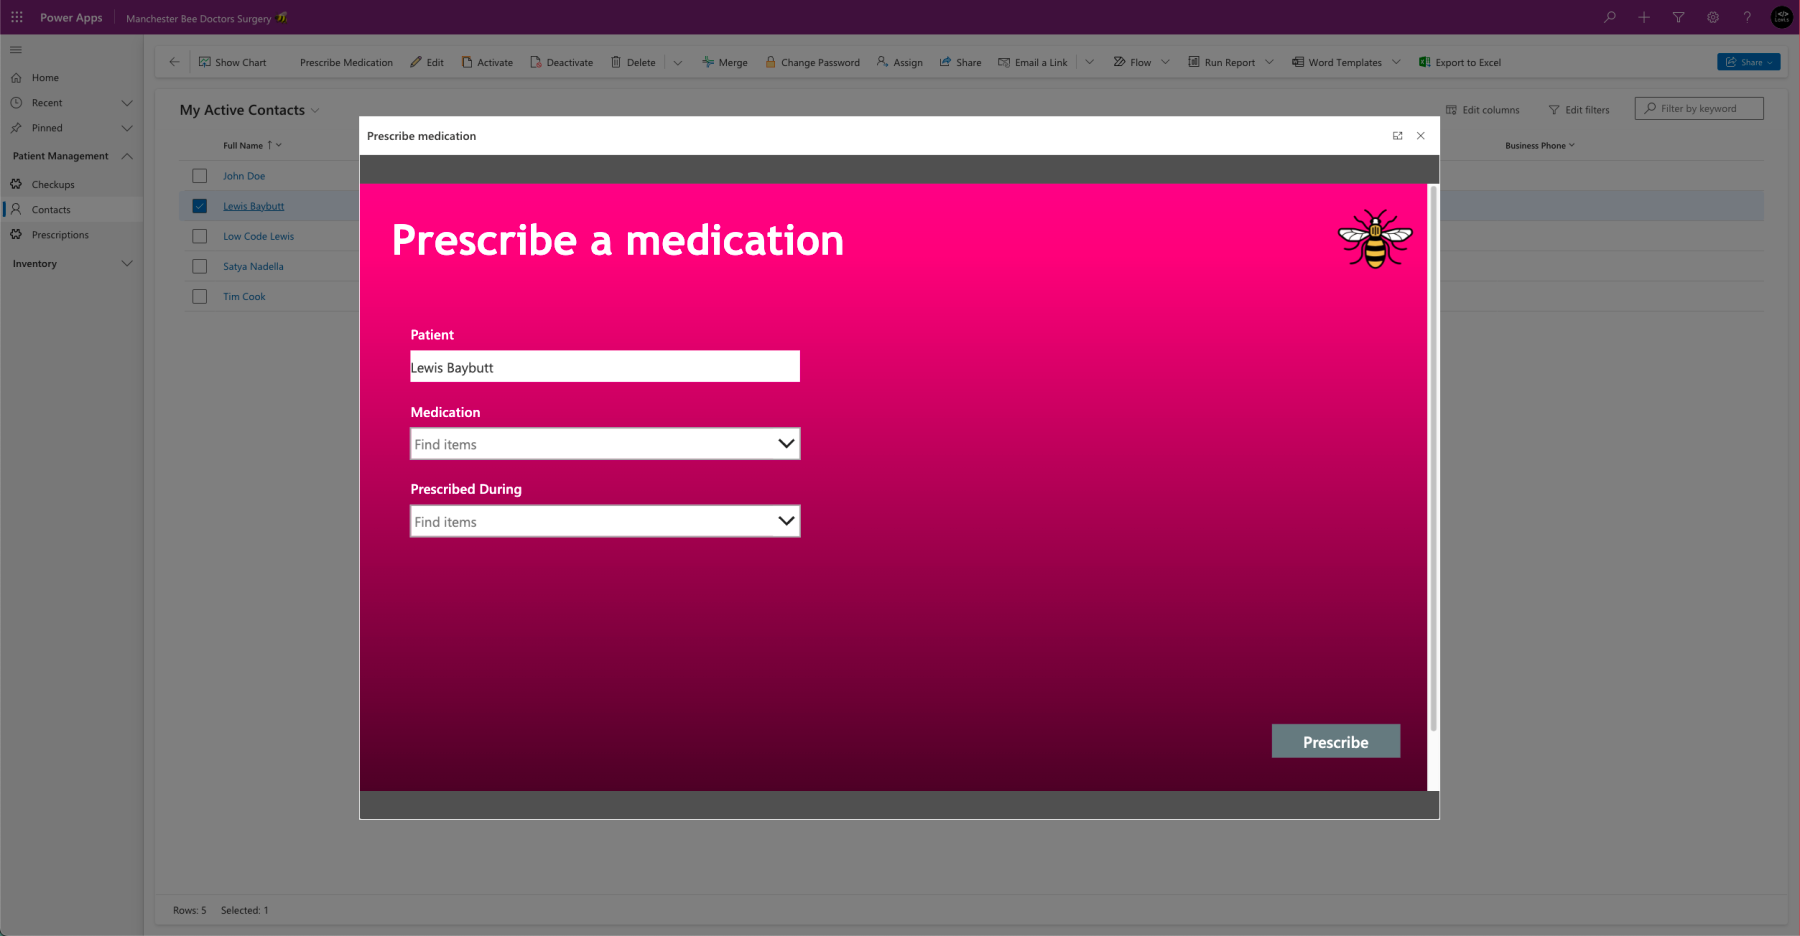
So I’ll now build this same interface but fit for a sidebar. I’ll use custom pages and make this responsive rather than using Canvas Apps as I have done for the pop up above.
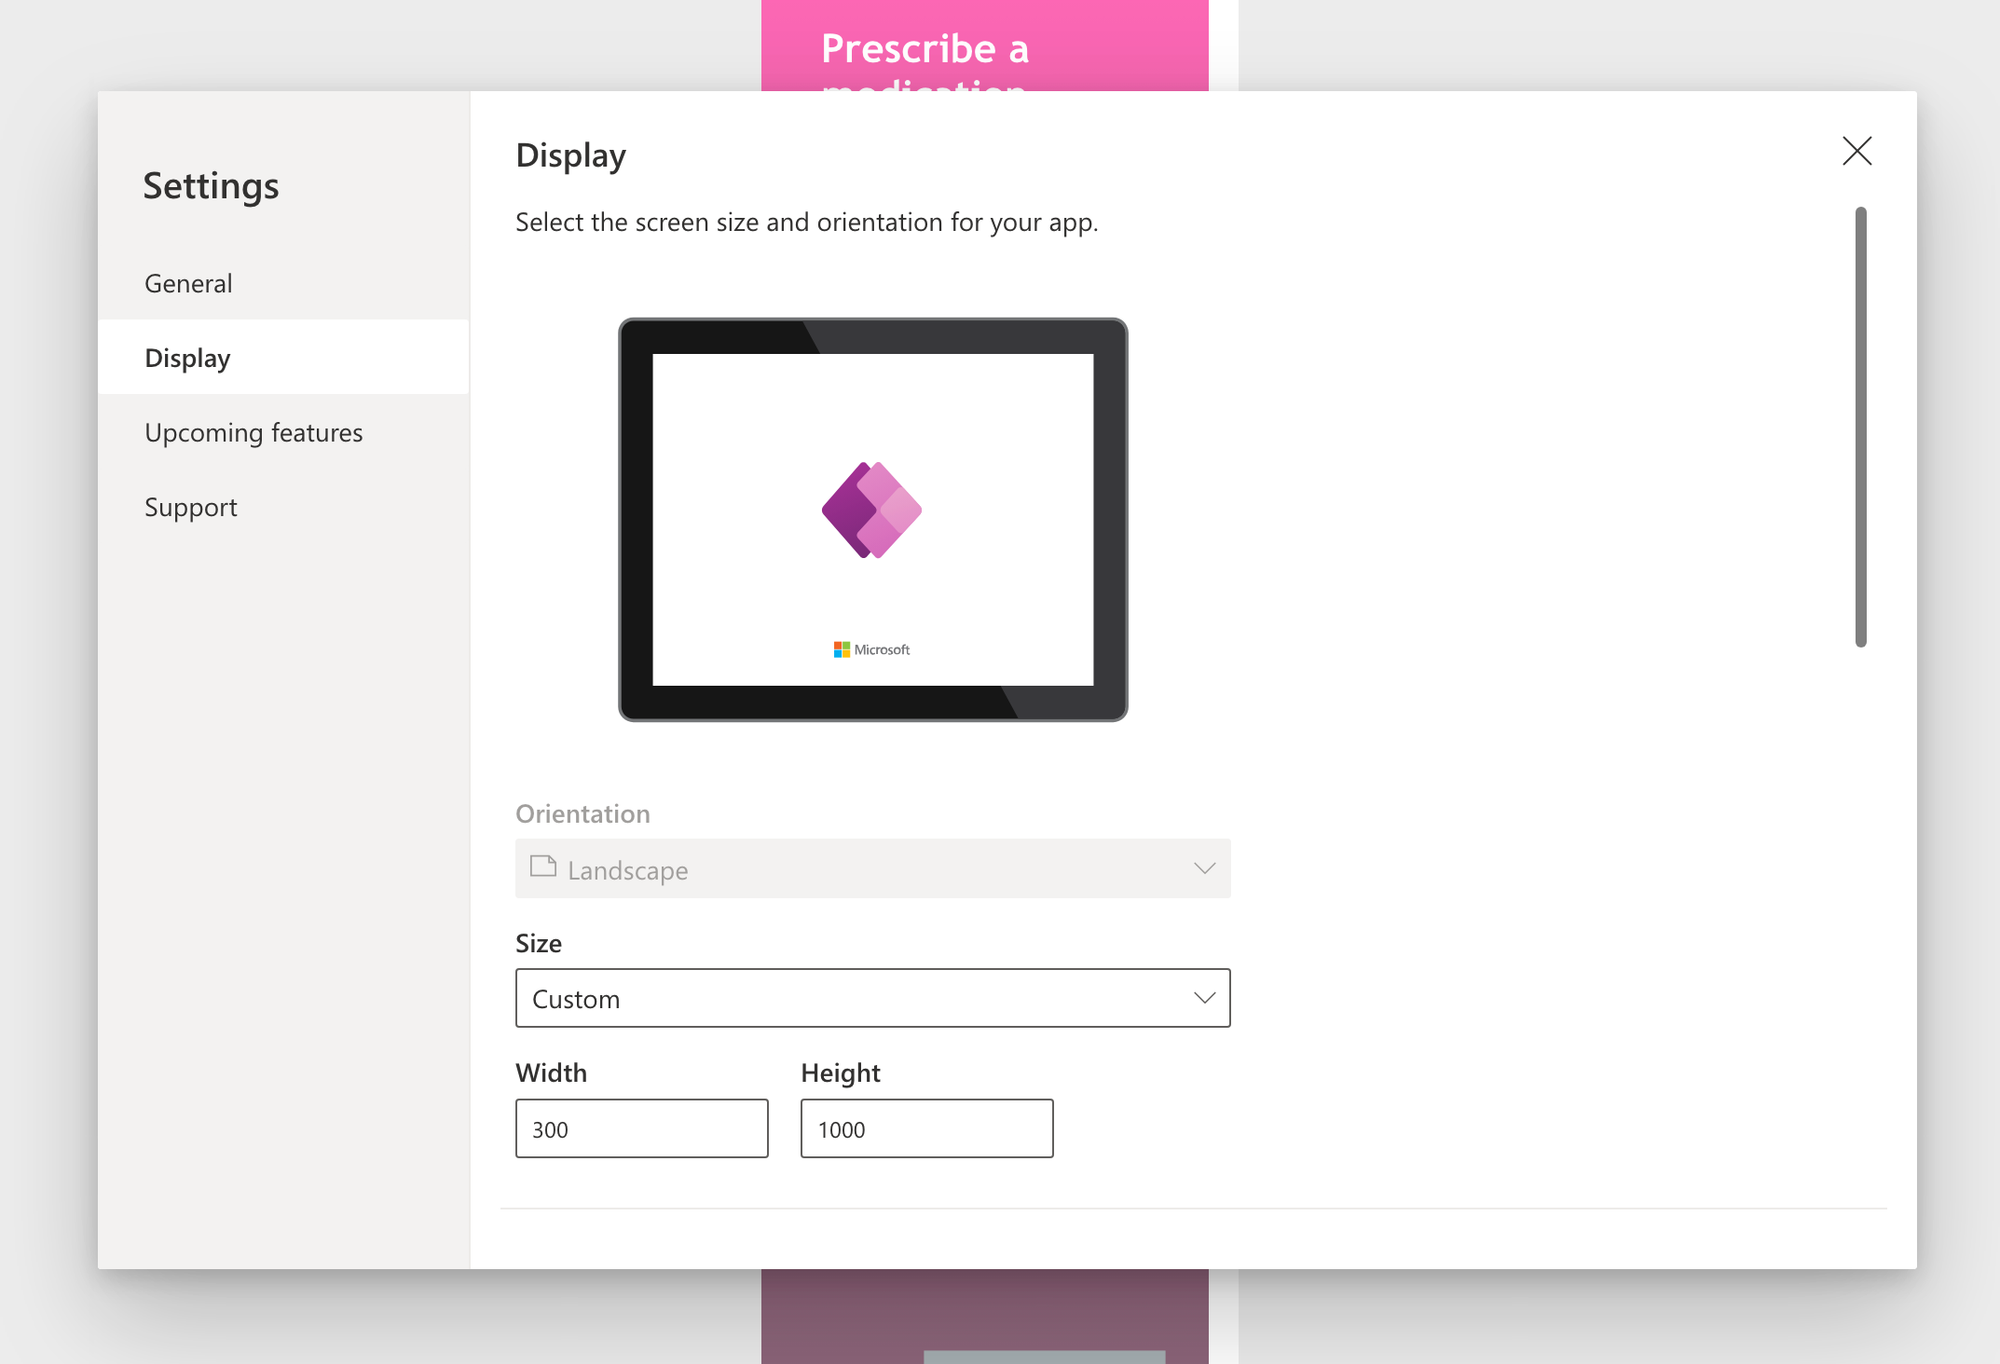
When building your custom page, you may find it easier to set the canvas size to something with a much larger height than width to mimic that of a normal sized sidebar.
Within your custom page if you’re using any record GUIDs to pass a record from your model-driven app to the side pane custom page, you’ll need to handle these in the OnStart of the custom page. Let’s look at the Power Fx formula code to handle the parameter we will pass for now, and we’ll look at how we pass it to our custom page later in some other code.
If(
    Not(IsBlank(Param("recordId"))),
    Set(
        gblContact,
        LookUp(
            Contacts,
            Contact = GUID(
                First(
                    Split(
                        Last(
                            Split(
                                Param("recordId"),
                                "{"
                            )
                        ).Value,
                        "}"
                    )
                ).Value
            )
        )
    )
)
This code will effectively take any parameters usually passed into the canvas app or custom page as a URL query string but in this case we will pass in the value using another method in some JavaScript code.
Publish your custom page and close it, heading back to the solution explorer.
Some JavaScript code
Now we need to write a JavaScript function which will enable us to open a side pane and navigate to our custom page within that space. Here’s the code.
//A function for showing a side pane which is populated with a record view of a contact.
function showSidePane(FirstSelectedItemId) {
    //Create the side pane with the correct icon, title etc.
    Xrm.App.sidePanes.createPane({
        title: "Pane Title - Descriptive Name Here",
        imageSrc: "WebResources/adx_contacts.svg - Replace this with web resource that will be the icon for the side pane.",
        hideHeader: true,
        canClose: true,
        width: 600
    }).then((pane) => {
        //Within the side pane, populate the space with a record view of a contact
        pane.navigate({
            pageType: "custom",
            name: "Custom Page Name Goes Here",
            recordId: FirstSelectedItemId,
        })
    });
}
Replace the relevant strings in the code above where they are marked and then upload this as a web resource in your solution.
Adding a button to the ribbon
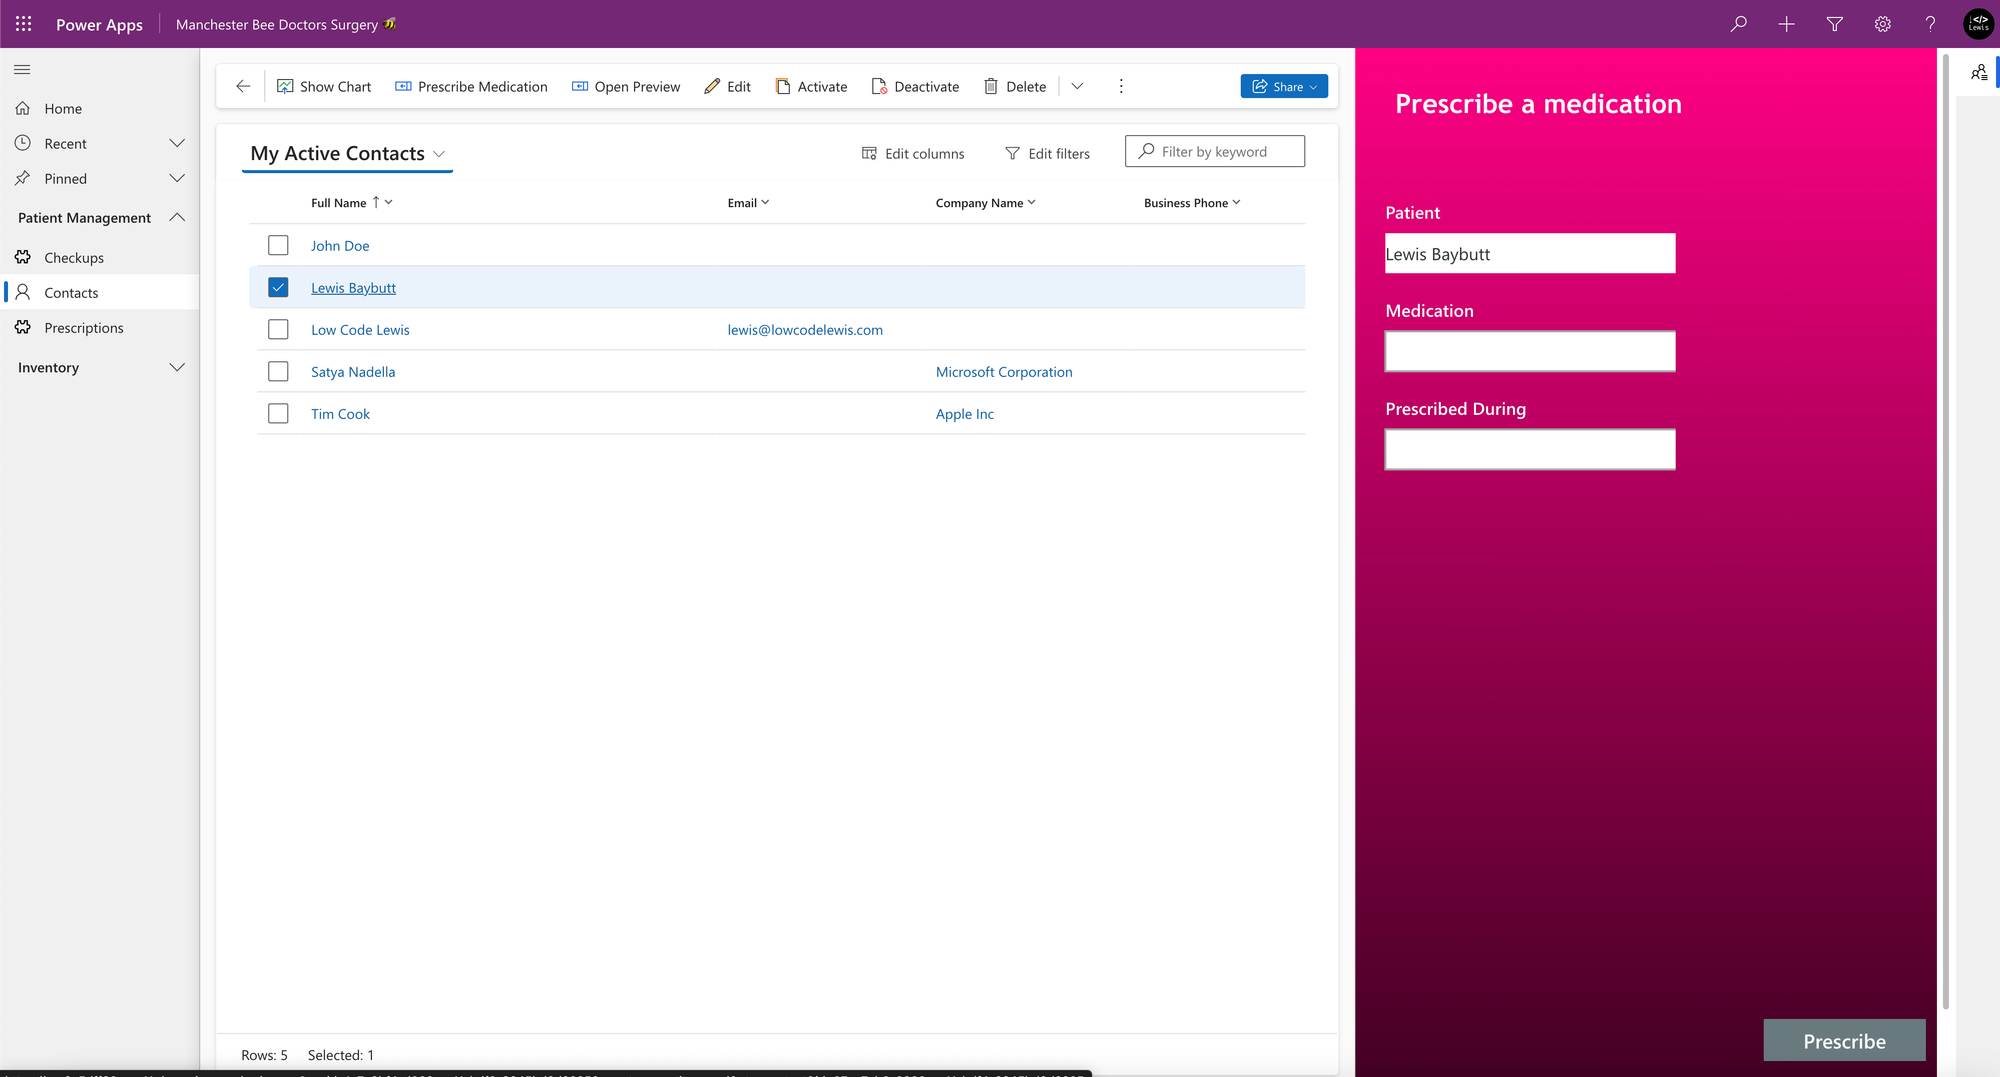
To launch this side pane we’re going to add a button to the ribbon in our model-driven app. In my example, I’m going to apply my custom page side pane to a contacts table view. The JavaScript code above uses a parameter (FirstSelectedItemId) which supports this page in my app (table view).
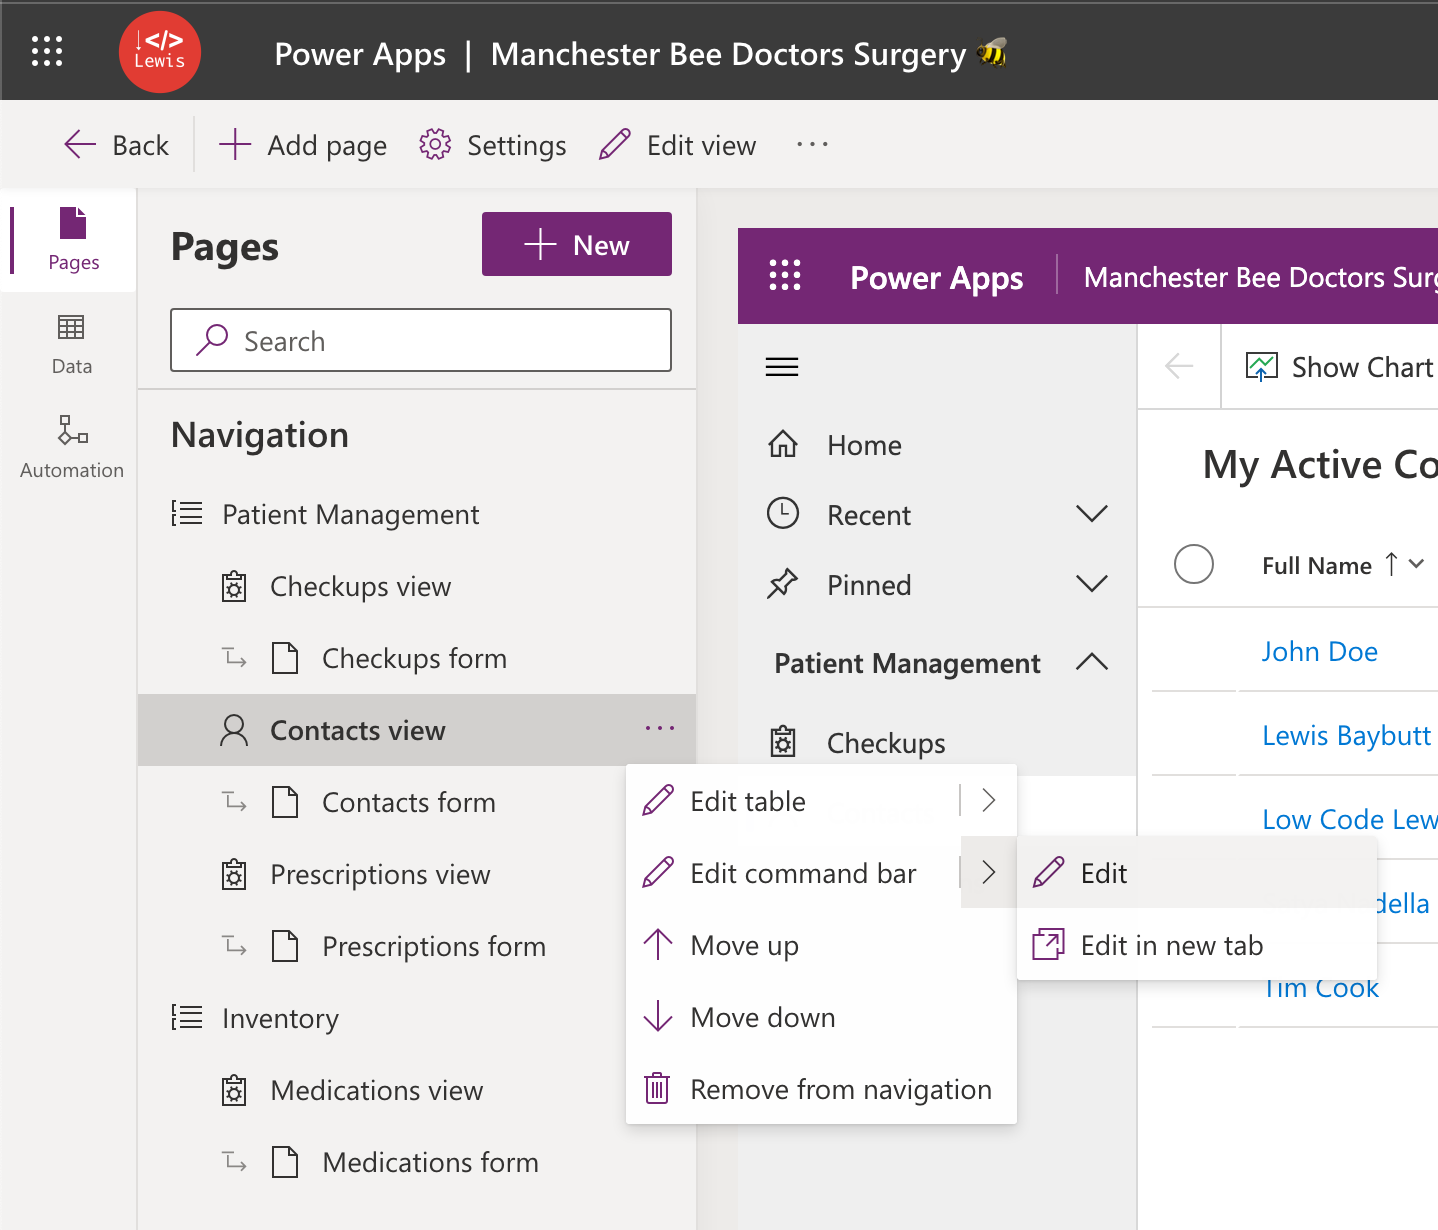
Within the editor for your model-driven app, select to edit the command bar on the table you want to add a side pane for. Then select to edit the main grid side pane.
Now, there’s a few things that we need to do here to configure the code on the ribbon. Add a new button with a descriptive label and icon for the logic. Then set the action as run JavaScript, choose the library you uploaded as a web resource and input the name of the function you wrote in JavaScript which in my case was showSidePane. Then add a parameter and choose the out the box FirstSelectedItemId parameter.

The last step is to set the visible property of the command to…
CountRows(Self.Selected.AllItems) = 1Finally, save and publish the ribbon and then head back to your solution. Save and publish all customisations and then test out the app. Select a record on the table you added your button to and select the command on the ribbon. Check out my side pane there!
Did you enjoy this content? 💖
If you enjoyed this post, check out some of the other content on my blog, and maybe even subscribe below to get my content directly in your inbox as soon as it gets posted!
Subscribe