

In my last blog post, we talked more about why working with delegated permissions and something like a simple HTTP connector action in Power Automate is a little tricky. We covered three methods to how we can achieve working with delegated permissions to get around the limitation with this Power Automate step.
In this post, we’ll take a look at the first method we previously discussed of building a custom connector to provide the ability to connect with user credentials enabling the capability of working with delegated permissions.
If you’re enjoying this content, and you’d like to have my content notifications land directly in your inbox, be sure to subscribe below.
SubscribeA scenario – Getting calendar details for myself and another user
So, lets work with a scenario throughout this guide. In this guide we’re going to achieve a working Power Automate flow which utilises a custom connector to get calendar details for both myself and another user from the Microsoft Graph API whilst authenticating using an app registration that has delegated permissions, and no application permissions.
Setting up the app registration
So, lets look closely at how we set up the app registration for working with delegated permissions, as this has an ever so slight difference to the general approach below which we can use for application permissions. Everything is the same around creating the app, assigning permissions, and creating a client secret to authenticate against the app with, but we need to apply a redirect URL to work with the Microsoft identity service.
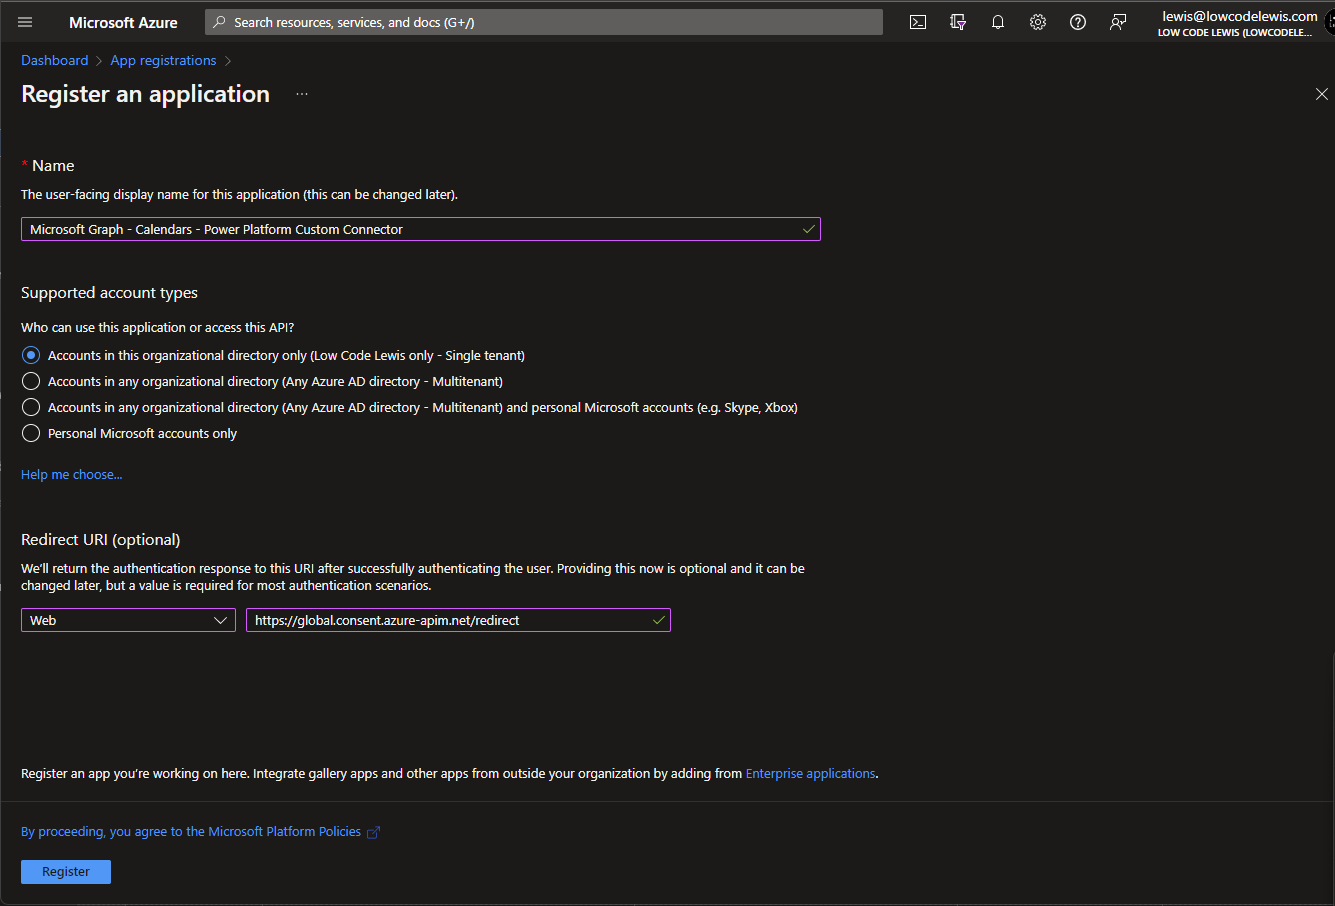
First I’m going to head to portal.azure.com and I’ll make a search for app registrations. Then I’ll select New registration to start building an app registration.
We’ll give our app registration a name of Microsoft Graph – Calendars – Power Platform Custom Connector
Then, the only other thing I’ll change is that I’ll set the Redirect URI to a web type with the following URL.
https://global.consent.azure-apim.net/redirect
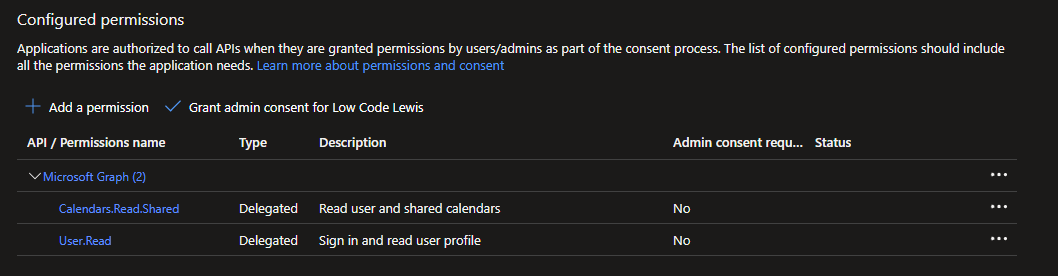
Next I’ll work on adding some permissions to my application (client). Head to the API permissions tab and select add a permission. Then select Microsoft Graph, and follow by selecting delegated permissions.

Next, find the calendars category in the permissions list, and check the box against the following permission.
Calendars.Read.Shared
This permission will allow the app to read events in all of the calendars that the user interacting can access, including any delegate or shared calendars. This is the only permission I need to add for this use case.
Finally select add permissions. We will not need to have admin consent granted for this permission to work with it.
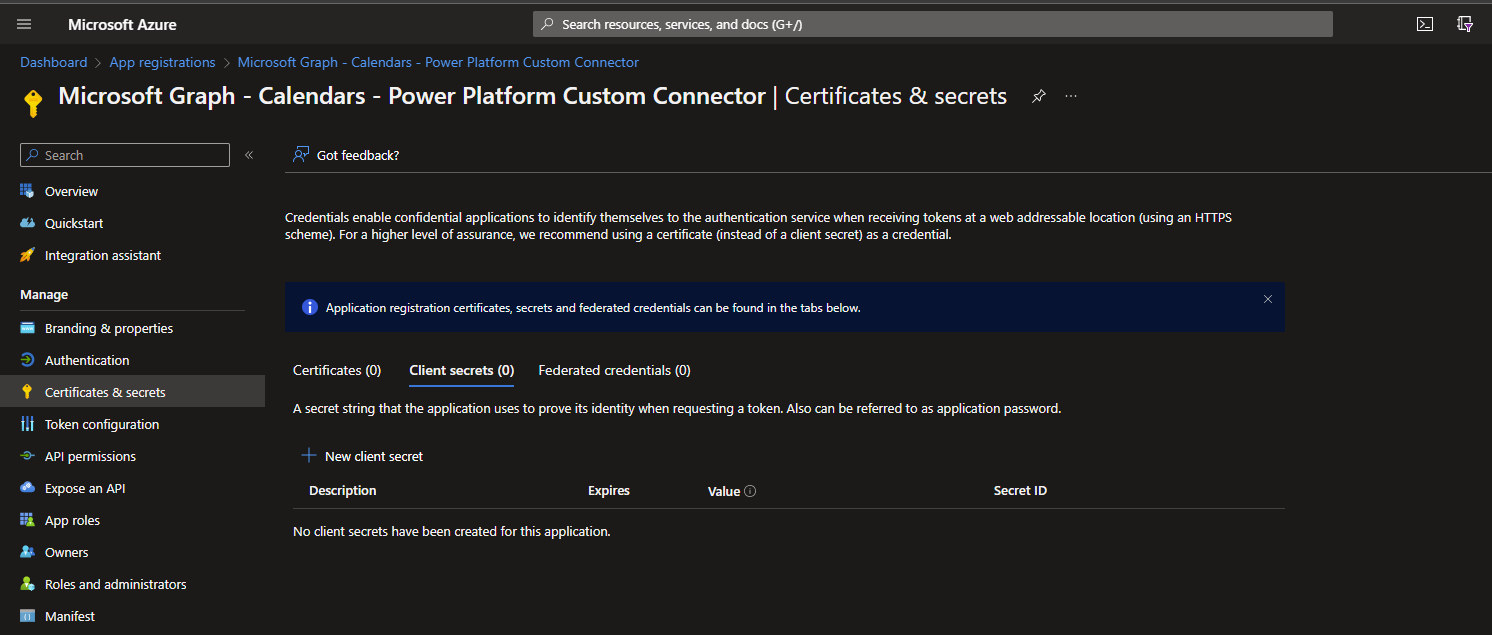
Next we’ll head to the certificates & secrets tab to create a client secret to use when building our custom connector.
Select new client secret
Now give your secret a description and set an expiry time period on it.
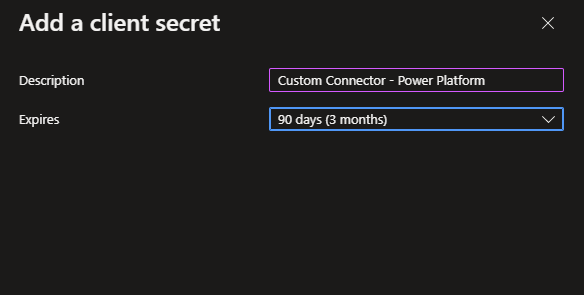
Select add and then copy the secret value and store it in a notepad window or somewhere similar temporarily.
Building the custom connector
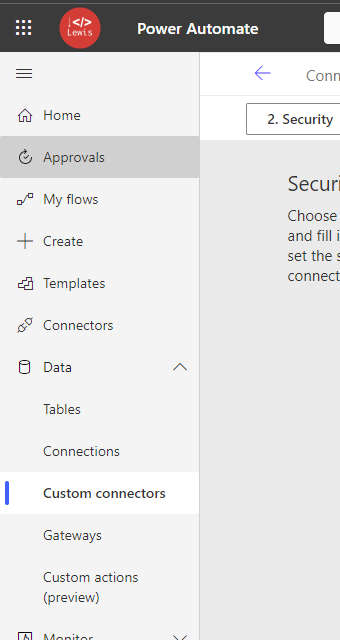
Now we’ll work on building the custom connector in the Power Platform. I’m going to head to make.powerautomate.com and head to custom connectors in the left hand navigation bar.
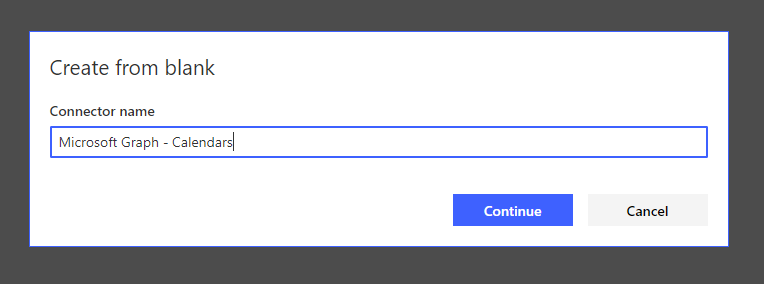
Next I’ll select new custom connector, then create from blank. Give the custom connector a name to continue.
Now we can provide general information about our connector, such as creating branding and a description. Then we need to provide the scheme and host.
We’ll leave the scheme as HTTPS and set the host as graph.microsoft.com
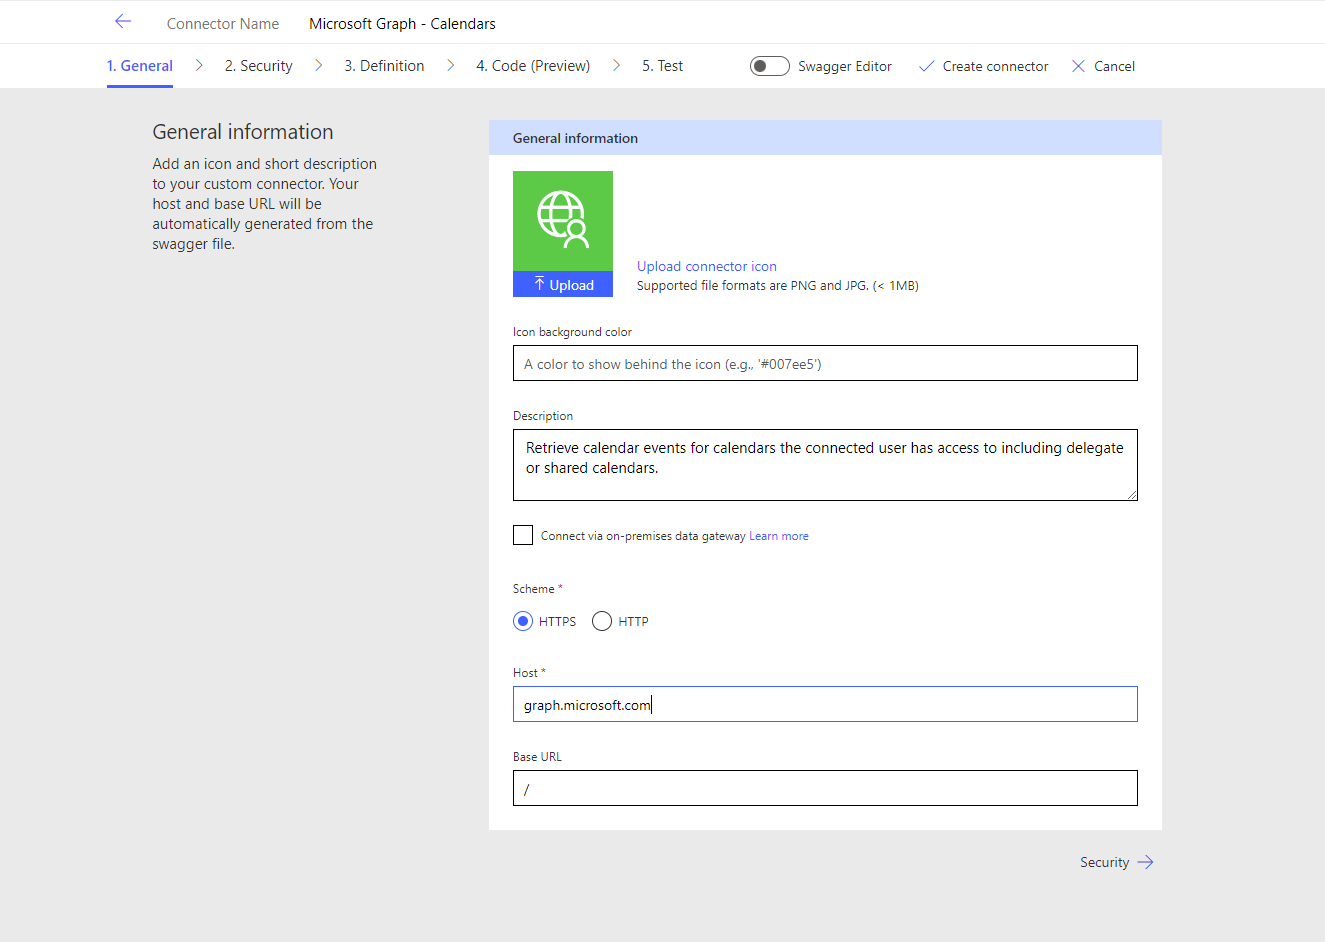
Once you’ve done that, select the security tab or next arrow to continue configuring the custom connector.
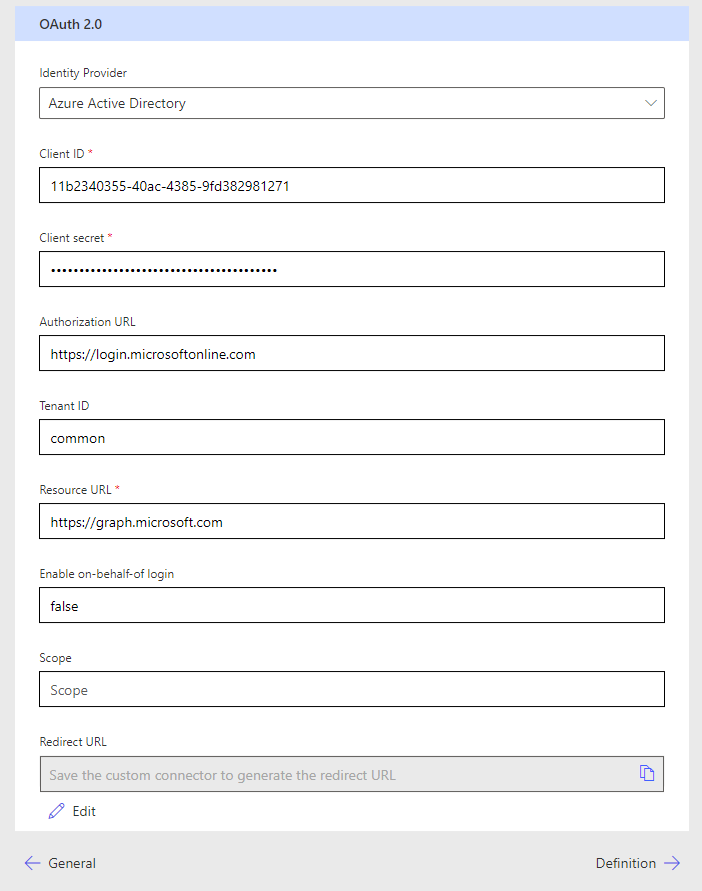
Now we’ll configure the security and authentication element of our custom connector. Start by selecting OAuth 2.0 as the authentication type. Then set the identity provider as Azure Active Directory.
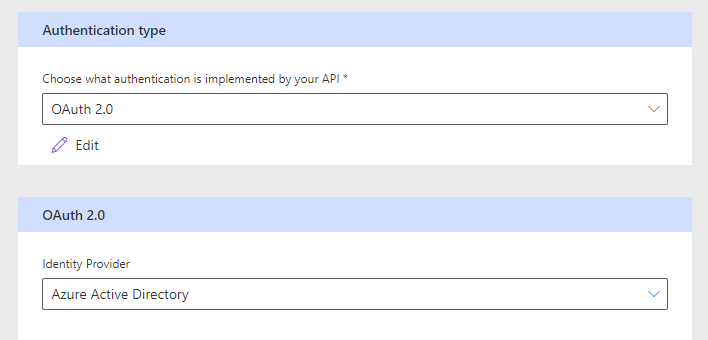
Next we’ll need to copy our client ID from the app registration we created and paste it into the Client ID field on the custom connector. Following this paste in the client secret you temporarily stored in a notepad window. Then finally set the resource URL as https://graph.microsoft.com and leave everything else as it is.
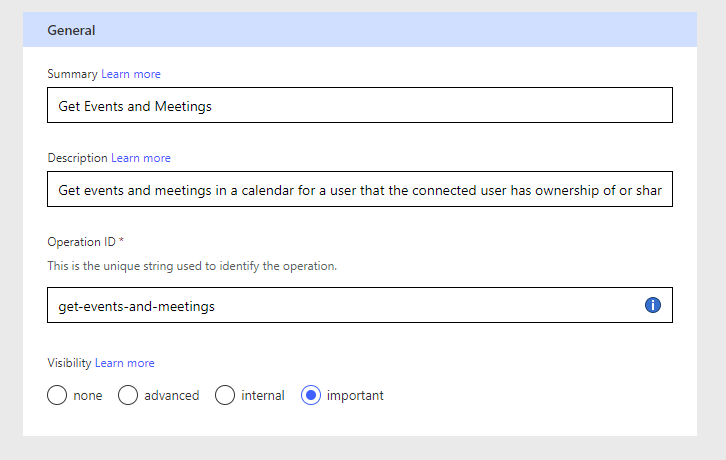
Next, select the next arrow to work on the definition of the custom connector which is where we will work on creating actions. Start by selecting new action to begin creating an action within the connector. Then give it a name in the summary field, you can provide a description, and then provide unique string that can be used to identify the operation we are creating.
I’m going to use the following inputs.
Summary: Get Events and Meetings
Description: Get events and meetings in a calendar for a user that the connected user has ownership of or shared access to.
Operation ID: get-events-and-meetings
Now we’ll work on adding input parameters to the current action. Under request select import from sample. Then select GET as the method for the request.
Then in the URL, we will use the request URL we would use to call Microsoft Graph. For any parameters that a user should be able to fill in as an input to the action, put these in curly brackets. {}
I will use the following as the URL here.
https://graph.microsoft.com/v1.0/users/{userid}/calendar/events
Now in the headers provide the following string. Here we can separate keys and values with a space, and different headers with a new line.
Content-type application/json
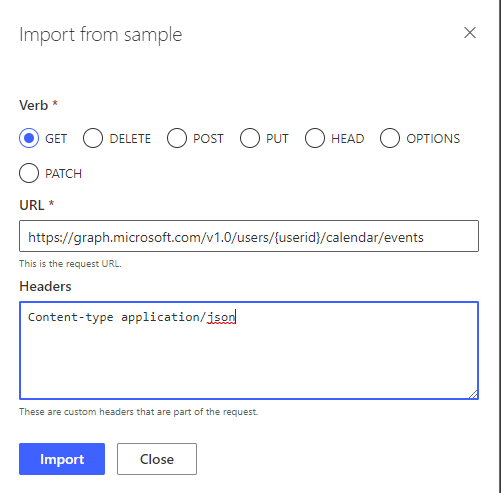
Finally select import to create the action. Then select create connector. You can set a default value for the headers parameter if you like. Now head to the test part of your connector to test it out by creating a connection and then providing a user id to get calendar events for.
When you create the connection, you’ll be asked to provide permissions for the app you’re trying to authenticate against. Here the app is asking for permission to use the delegate permissions against you as a user to read calendars you can access. Select accept here.
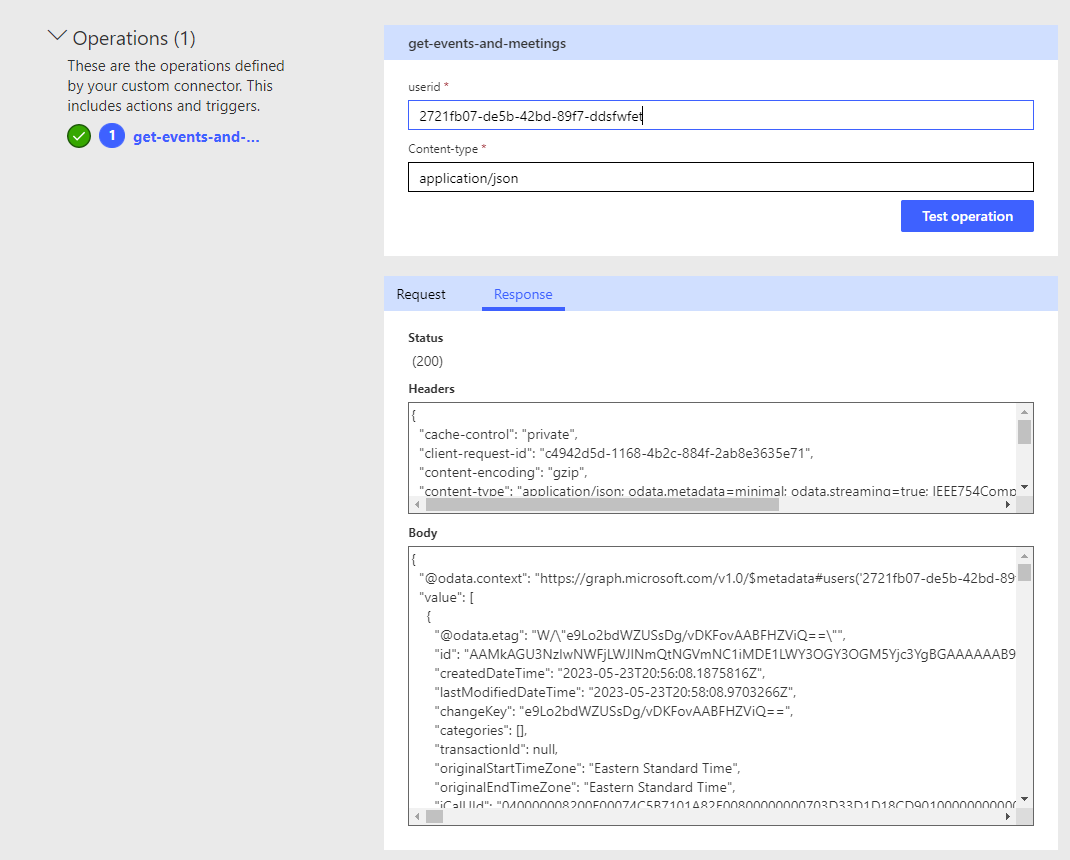
Now provide a user id and select test operation.
Here we can now see that our custom connector is working to retrieve events from Microsoft Graph for a calendar I have access to. If I tried to supply a user id whose calendar I don’t have access to, I would get an error. Here we can see our delegated permissions working where we don’t have a need to use application permissions.
Upcoming content
In future posts we will look at how we can utilise this custom connector to work with both Power Apps and Power Automate. We’ll look at this once we’ve finished covering the three methods of working with delegated permissions when interacting with Microsoft Graph covered in the following blog post.