

In this blog post we’ll take a look at using Azure Pipelines within Microsoft’s Azure DevOps to automate the deployment of Power Pages websites from one Dataverse environment to another. Bear in mind that we won’t look too closely at using version or source control in this post, and we’ll primarily be working with a single repository and a single main branch. This post primarily looks at automating deploying from one environment to another, without advanced source control in the middle, with the slight exception of using a single branch and single repository to store our code.
Prerequisites
Okay some prerequisites. The first one is that you need to have a visual studio license or other applicable license to let you use Azure DevOps.
Next we need to make sure we have a certain extension installed in our DevOps organisation from the marketplace. In this blog post, we’ll be using the method that takes advantage of the build tools by Arpit Dynamics. These are provided in the community by Arpit Shrivastava (MVP) so credit goes to Arpit for these build tools! #CommunityRocks
You can install the build tools in your DevOps organisation here – Power Pages (Portals) Build Tools (2.0.0) – Visual Studio Marketplace
Make sure you also setup this extension and permissions in your organisation by registering an app, creating an application user in Dataverse and assigning permissions. You can find more information on doing this in the link above or in this previous blog post I did on doing these activities.
Building the pipeline
Okay so now we’ve got the config bit out of the way, let’s look at building a pipeline!
Start by creating a new pipeline in your Azure DevOps project and use the classic editor to create a pipeline using the UI as opposed to using YAML.

I’m just using the git repository in my project so I’ll select Azure Repos Git and leave the repository as my main project repository and my branch as main branch. Then I’ll select continue.
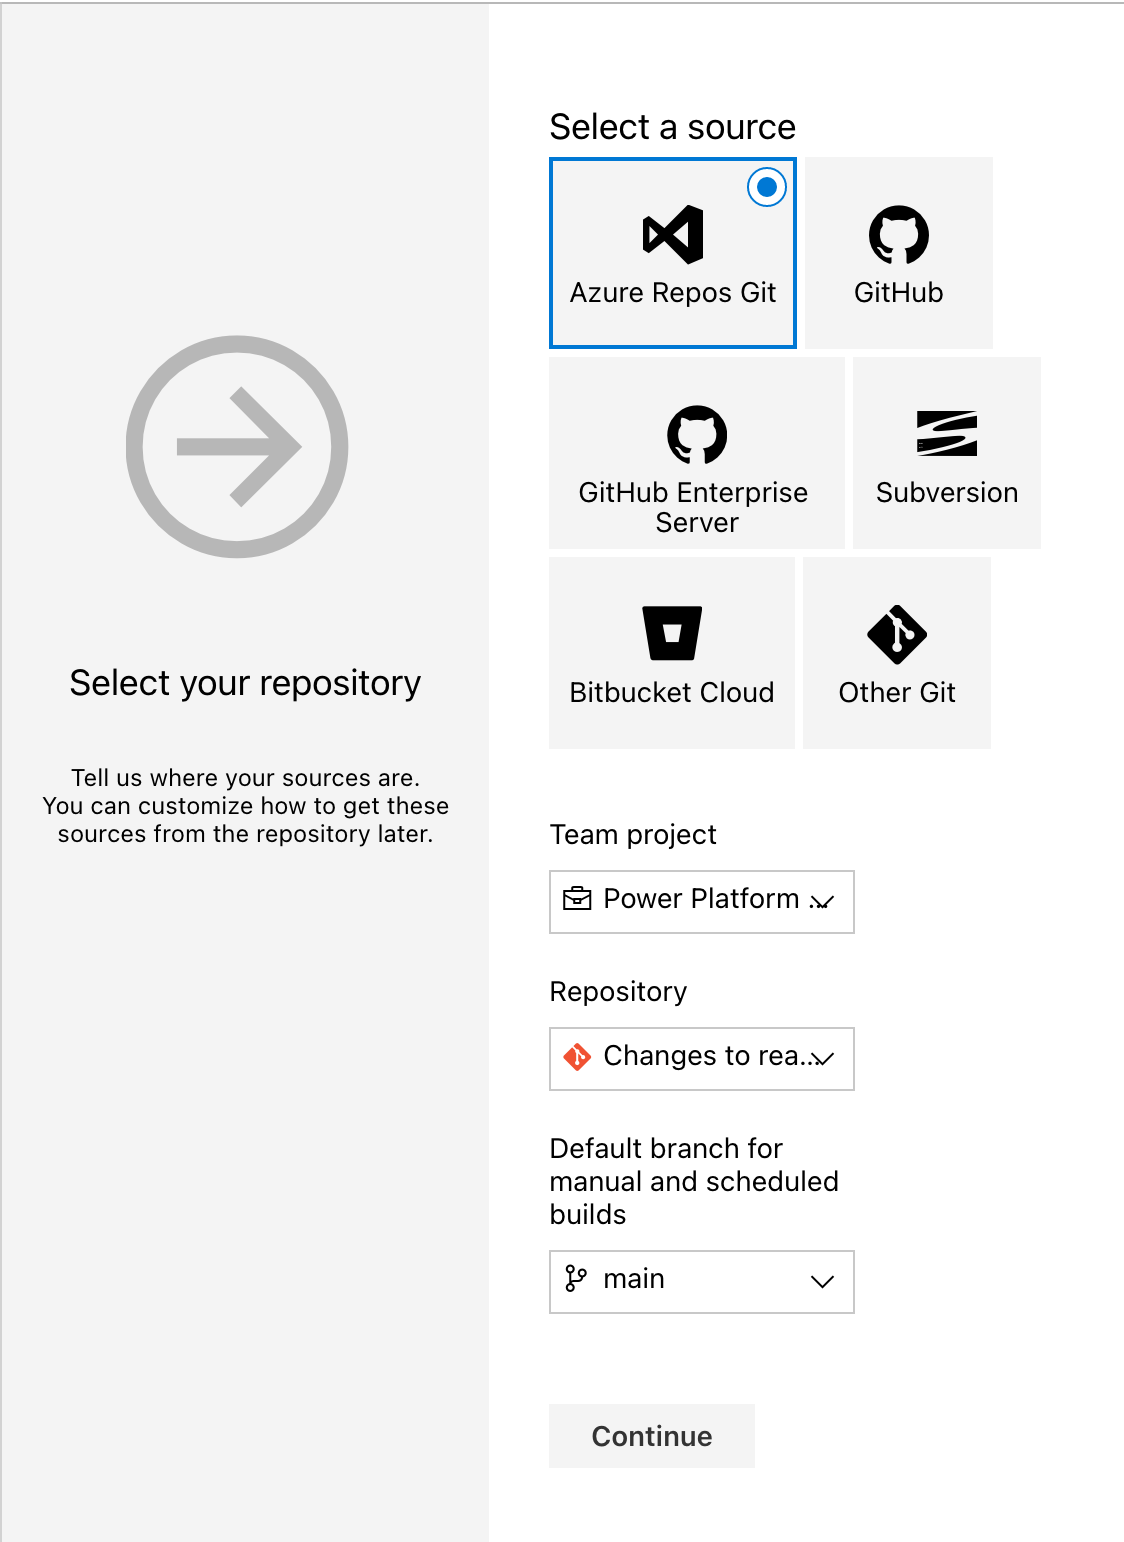
Now rather than selecting a template to work from, start with an empty job and we’ll start building our tasks into our agent job.

Okay so the first thing we need to do is install the portal tools to be able to work with Power Pages. Simply add the portal tool installer step and thats all we need to do!
Next we will export our portal configuration using the export portal configuration step.
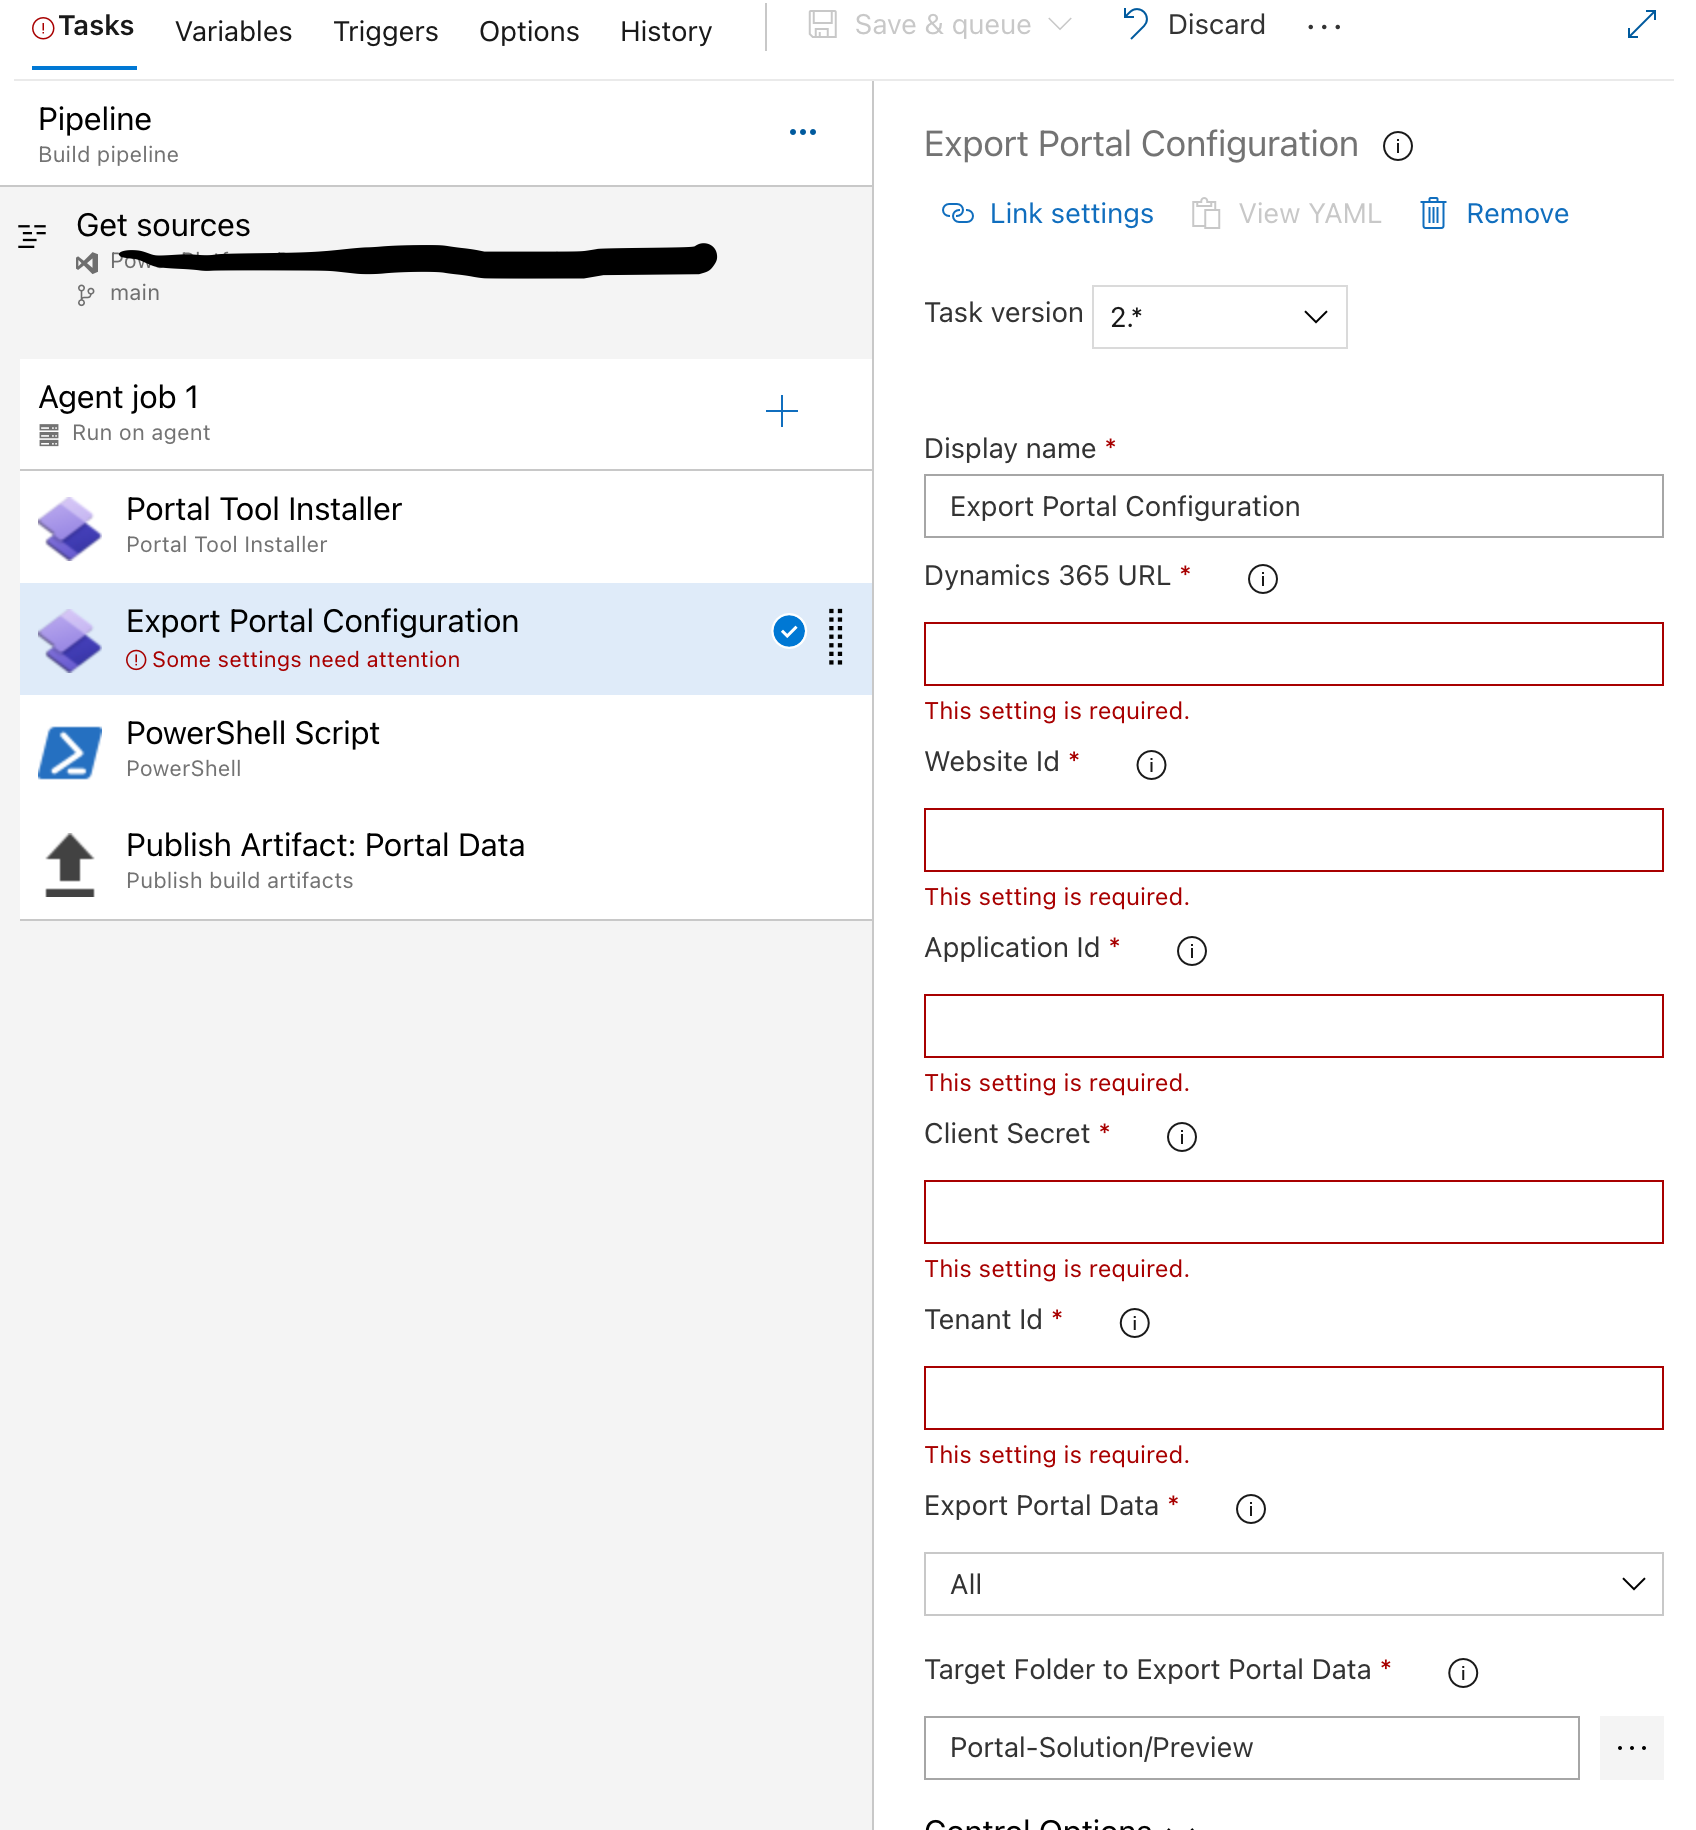
Here you need to add your Dynamics 365 url which you can find in the Power Platform admin center, or at the start of a model driven app url up until .com
Then you need to add your website Id which is the GUID of your website record in Dataverse which you can find in the portal management app by opening the website record and copying the GUID from the URL.
Then you’ll need to populate the app Id, client secret and tenant Id from AAD and your registered app.
Then finally provide a target folder to export the data to.
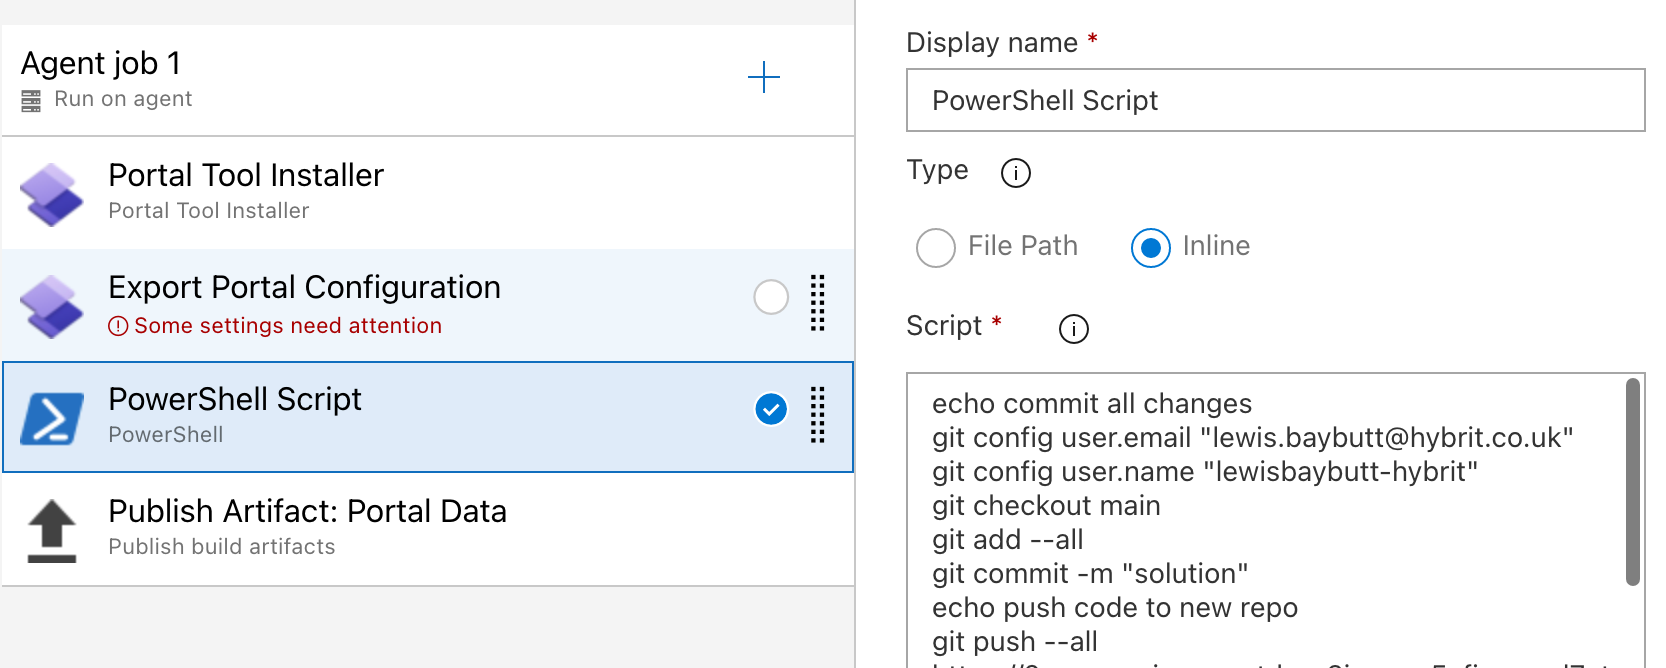
Now we can work on the script which will push our export into our repository.
You can use the following code:
echo commit all changes
git config user.email "your email"
git config user.name "your username"
git checkout main
git add --all
git commit -m "solution"
echo push code to new repo
git push --all https://PAT_FROM_YOUR_REPO@dev.azure.com/REPOSITORYURL
You’ll need to get your PAT and your URL for your repository from your repo by selecting clone.
The lines starting with echo are comments in the script above.
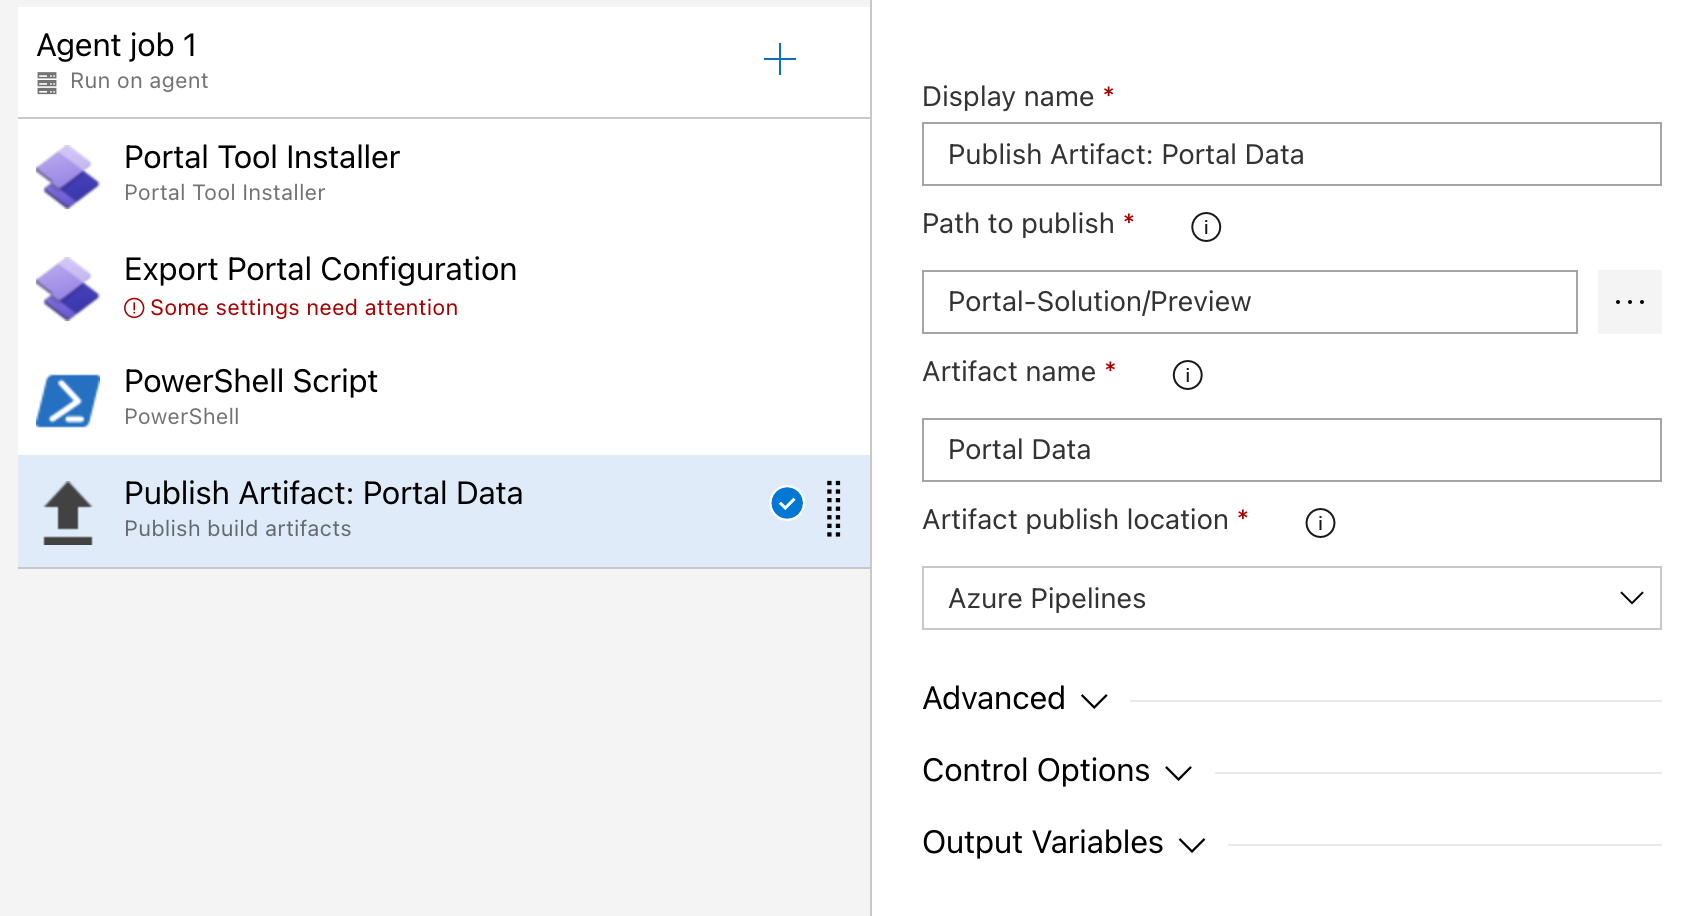
Finally we will run this step to publish our artifact.
Deployment
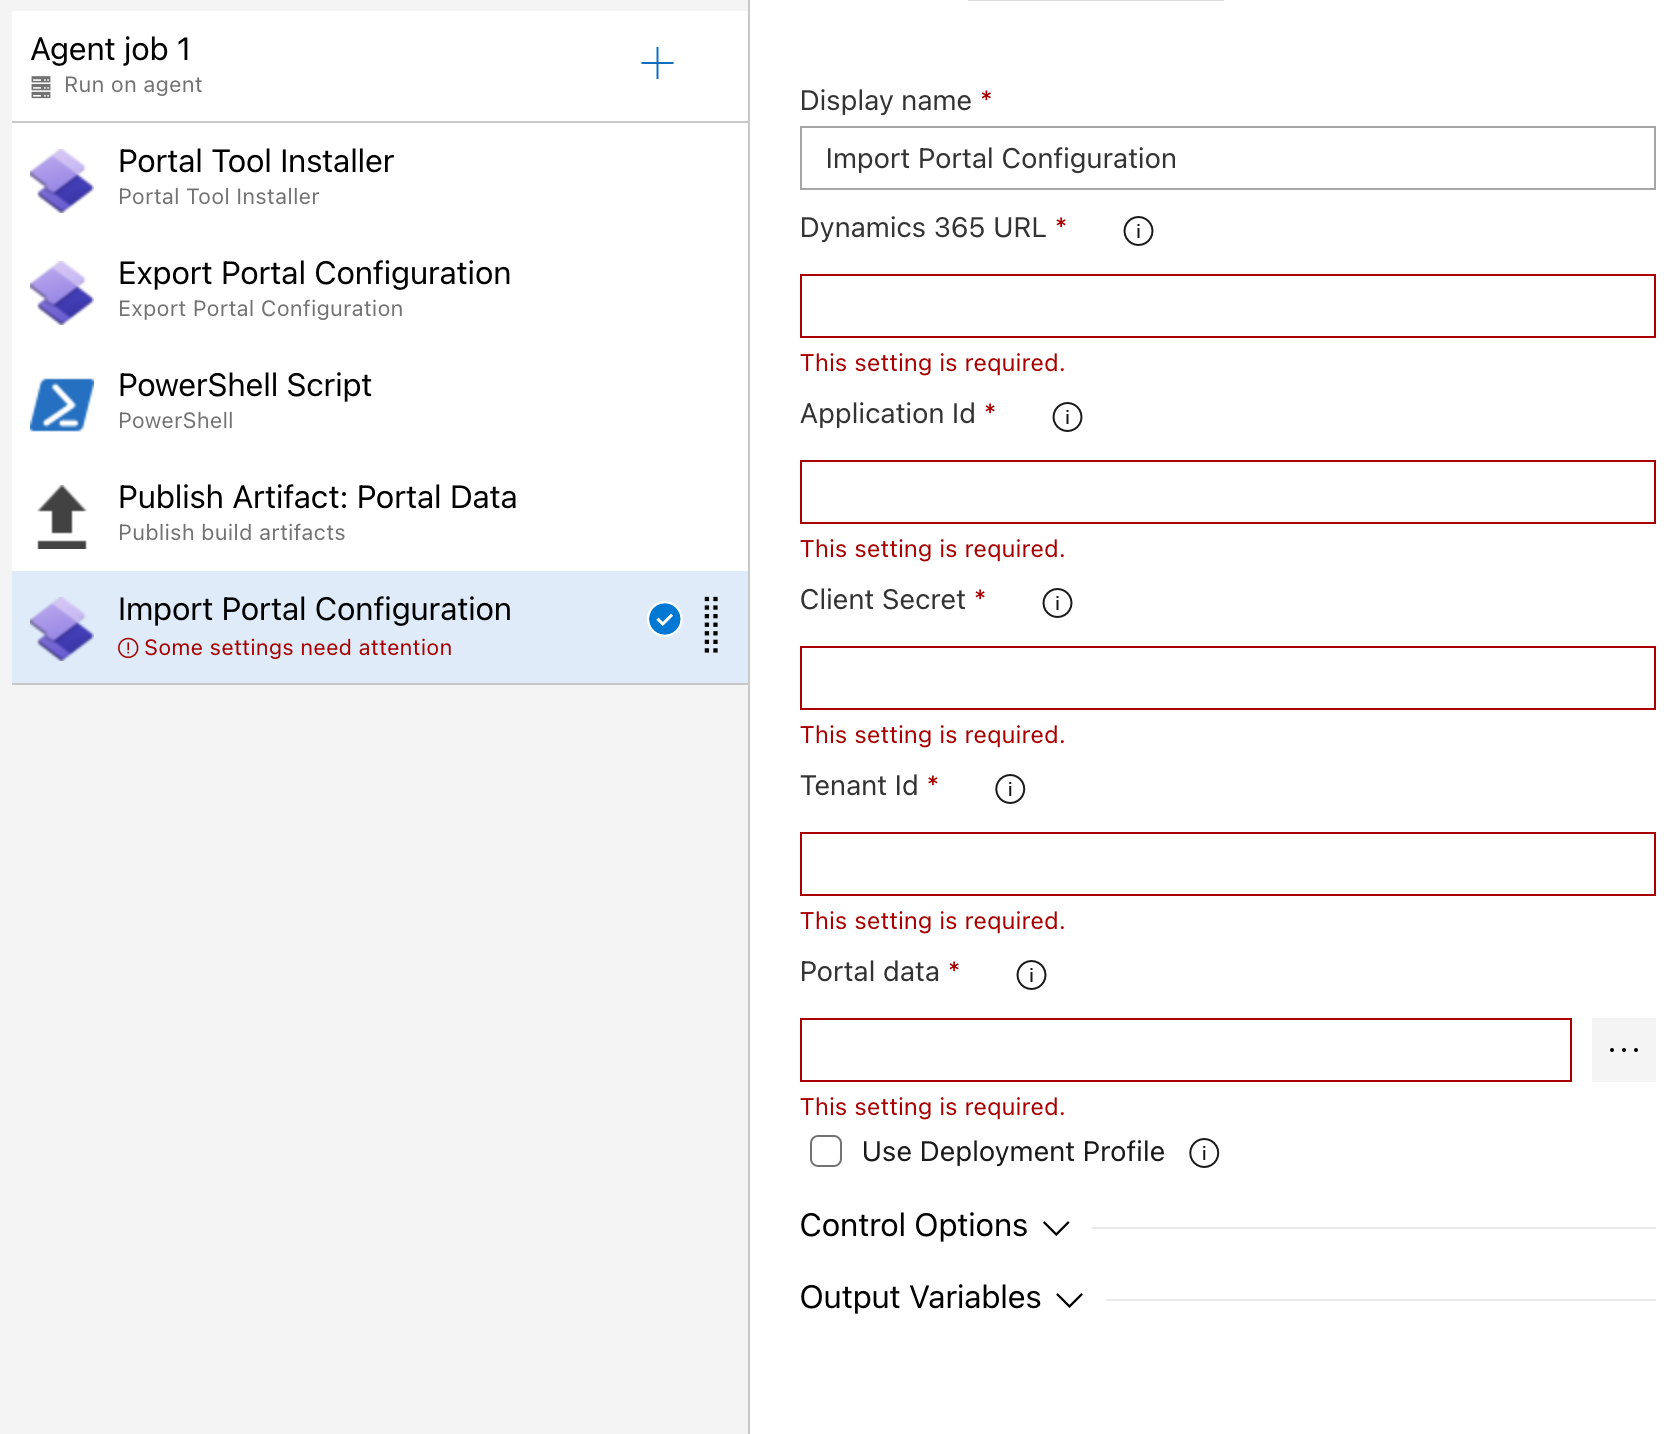
The next part we want to do is actually import our portal configuration to our target environment. To do this we will use the import portal configuration step. Now we need to fill in all the information for the Dynamics 365 environment we want to target including the URL of that environment and the app registration details which give us access to it.
Finally select the location the portal data is coming from and we can test our pipeline!
Overview
Hopefully this post helped you to get started with building pipelines to support your Power Pages ALM processes! If you need more help on anything in this post, let me know in the comments below.