

In this blog post we’ll take a look at how you can pre populate a lookup field on a basic form in Power Pages using some JavaScript. We’ll assume that we’ve already got values for the following pieces of data that we’ll need about the lookup record…
- Value for the primary name field on the lookup tables record that we want to populate
- GUID for the record
- Logical table name for the lookup table
Opening the JavaScript file to create the function
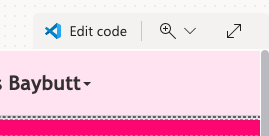
In Power Pages, first we need to go to the page where we’ll apply some JavaScript, then we can open Visual Studio Code to apply our JavaScript by clicking ‘Edit code’
Where now?
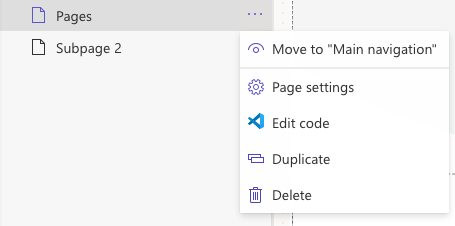
So how do we now get to the write file to pop our JavaScript into? Lets select the one in our workspace which has a JS at the start of it signalling to us that the file is written in JavaScript

The function
Now we can start to write our function… Lets use the following syntax and then we’ll focus on replacing some elements.
$(document).ready(function AutoPopulateLookup(){
    $("#lcl_product_name").attr("value",ProductName);
    $("#lcl_product").attr("value", ProductId);
    $("#lcl_product_entityname").attr("value","lcl_product");
});
In the above example I’m populating a lookup to my product table with a record retrieved through some data held in variables ProductName and ProductId, where ProductName holds the primary name value for the product and ProductId holds the GUID for the record.
We need to also replace the following values though…
- lcl_product_name
- lcl_product
- lcl_product_entityname
To find the relevant values we need to use here we need to inspect our field in the preview mode of our site to get a few things.
Once you’re in preview mode, right click anywhere on the page and select ‘Inspect’.
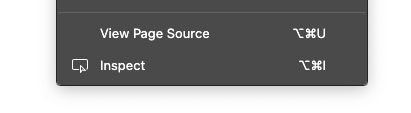
Now we need to select the following tool to hover over an element and select it which will then select it in our elements pane.

Now select in the field input for your lookup field. The control will be selected in the elements pane and you’ll see three parts of our control. Now we need to use the id of each of these to replace our values above in matching order between the list and what we see in the elements.

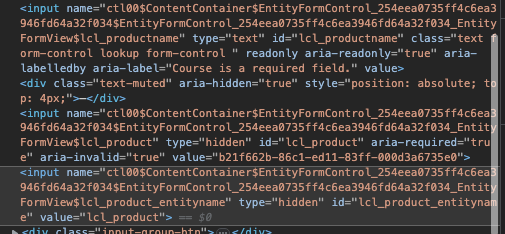
Here is the selected input group where I’m coping the id from each element of the group. Replace my references with the ones you have in each id element on your selected control.
Now ensure you’ve replaced the variables I used for the values corresponding to each attribute, and save your file by using CTRL+S or CMD+S on MacOS.
Sync Configuration and Test
Very simply now sync the configuration and ensure things are working… they should be! 🙂
